How to View and Manage All Form Entries in WordPress with Paymattic
Paymattic has an easy-to-use entry management feature that lets you easily view and manage all the form entries from a single page. This article will guide you through using all the features of the Paymattic Entries Section.
View & Manage Form Entries
First, go to Paymattic Dashboard from the WordPress Left Sidebar, click the Entries section, and you can view the list of all submitted form entries on this page.
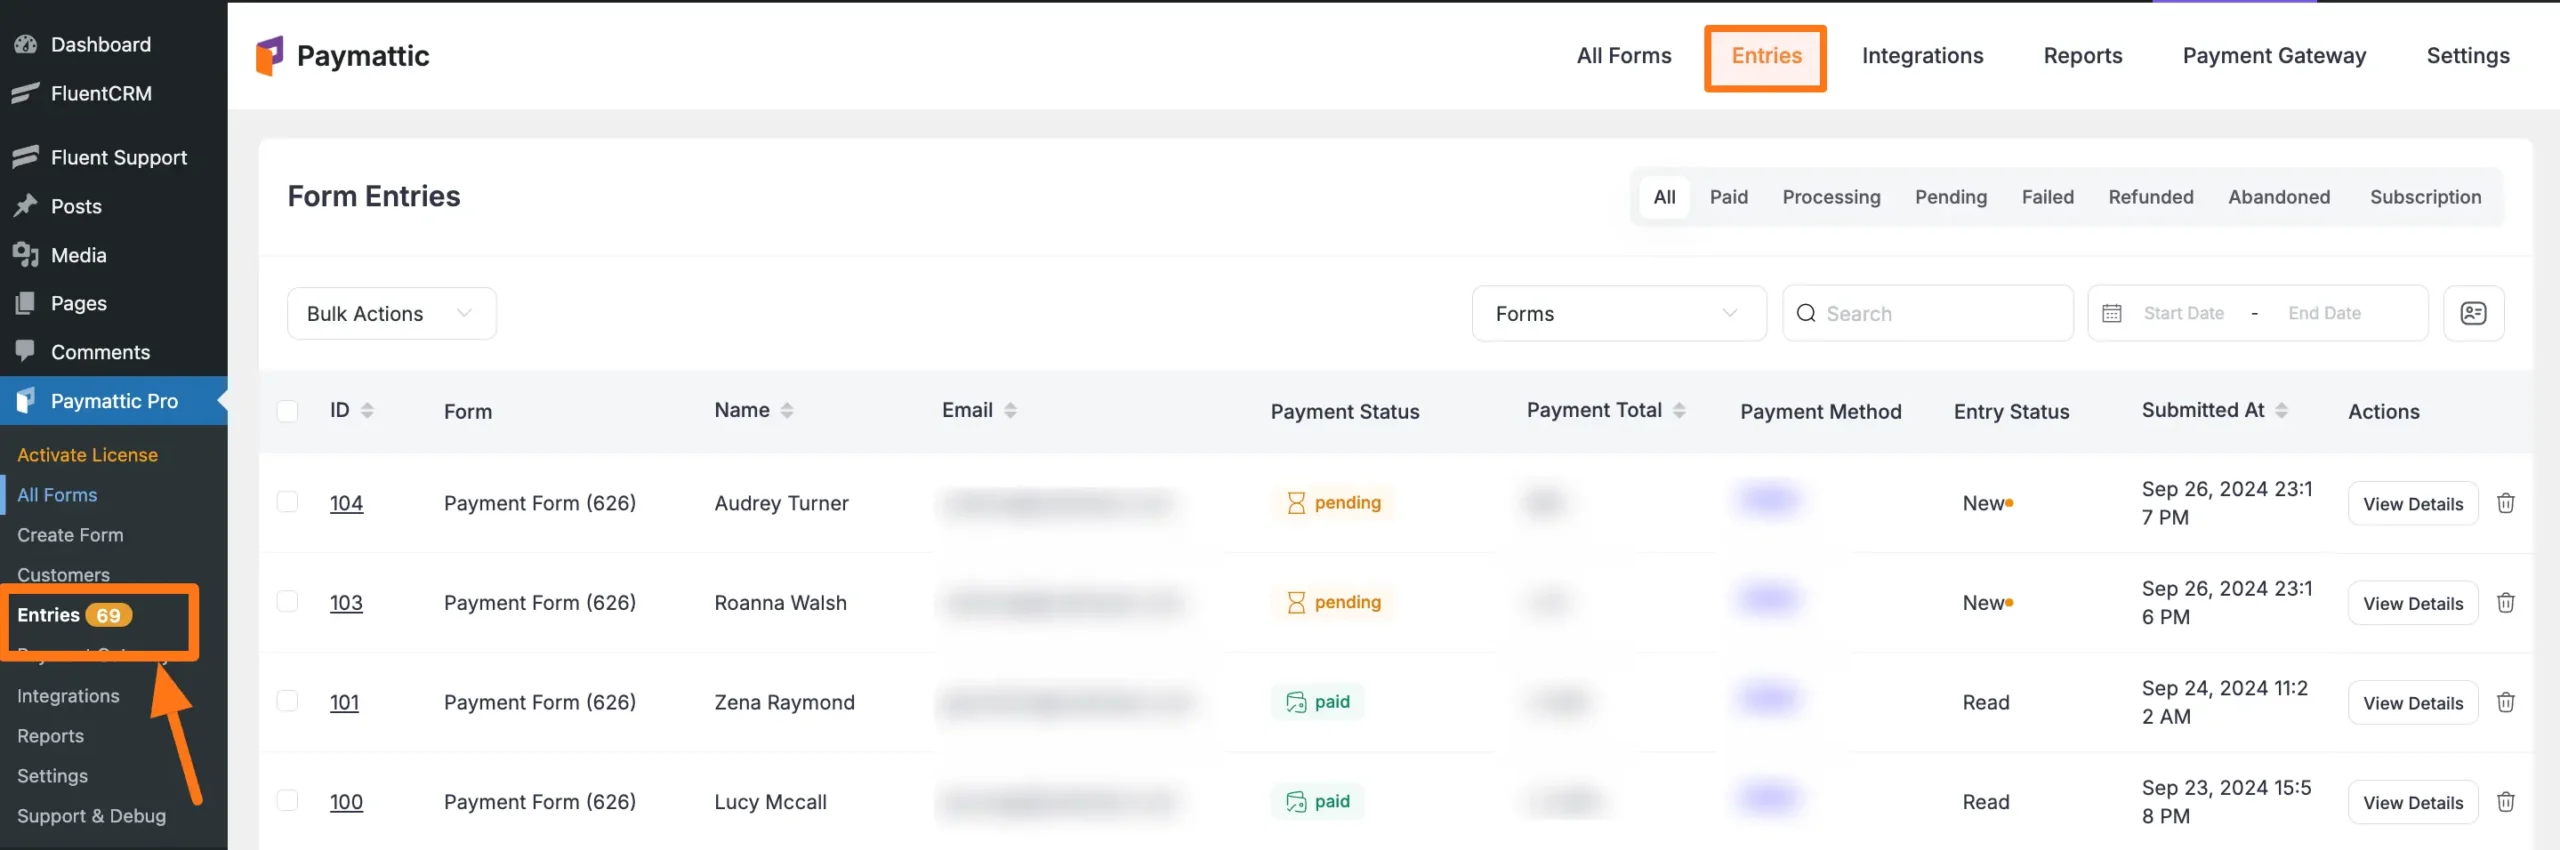
All the features for viewing all form entries of entire Paymattic activities are organized into nine major options: These are:
A. Payment Status Filter
B. Subscription Filter
C. Forms Filter
D. Search Bar
E. Date Filter
F. Entry Status Filter
G. View Details
H. Delete

All the available options mentioned above to view form entries are explained below:
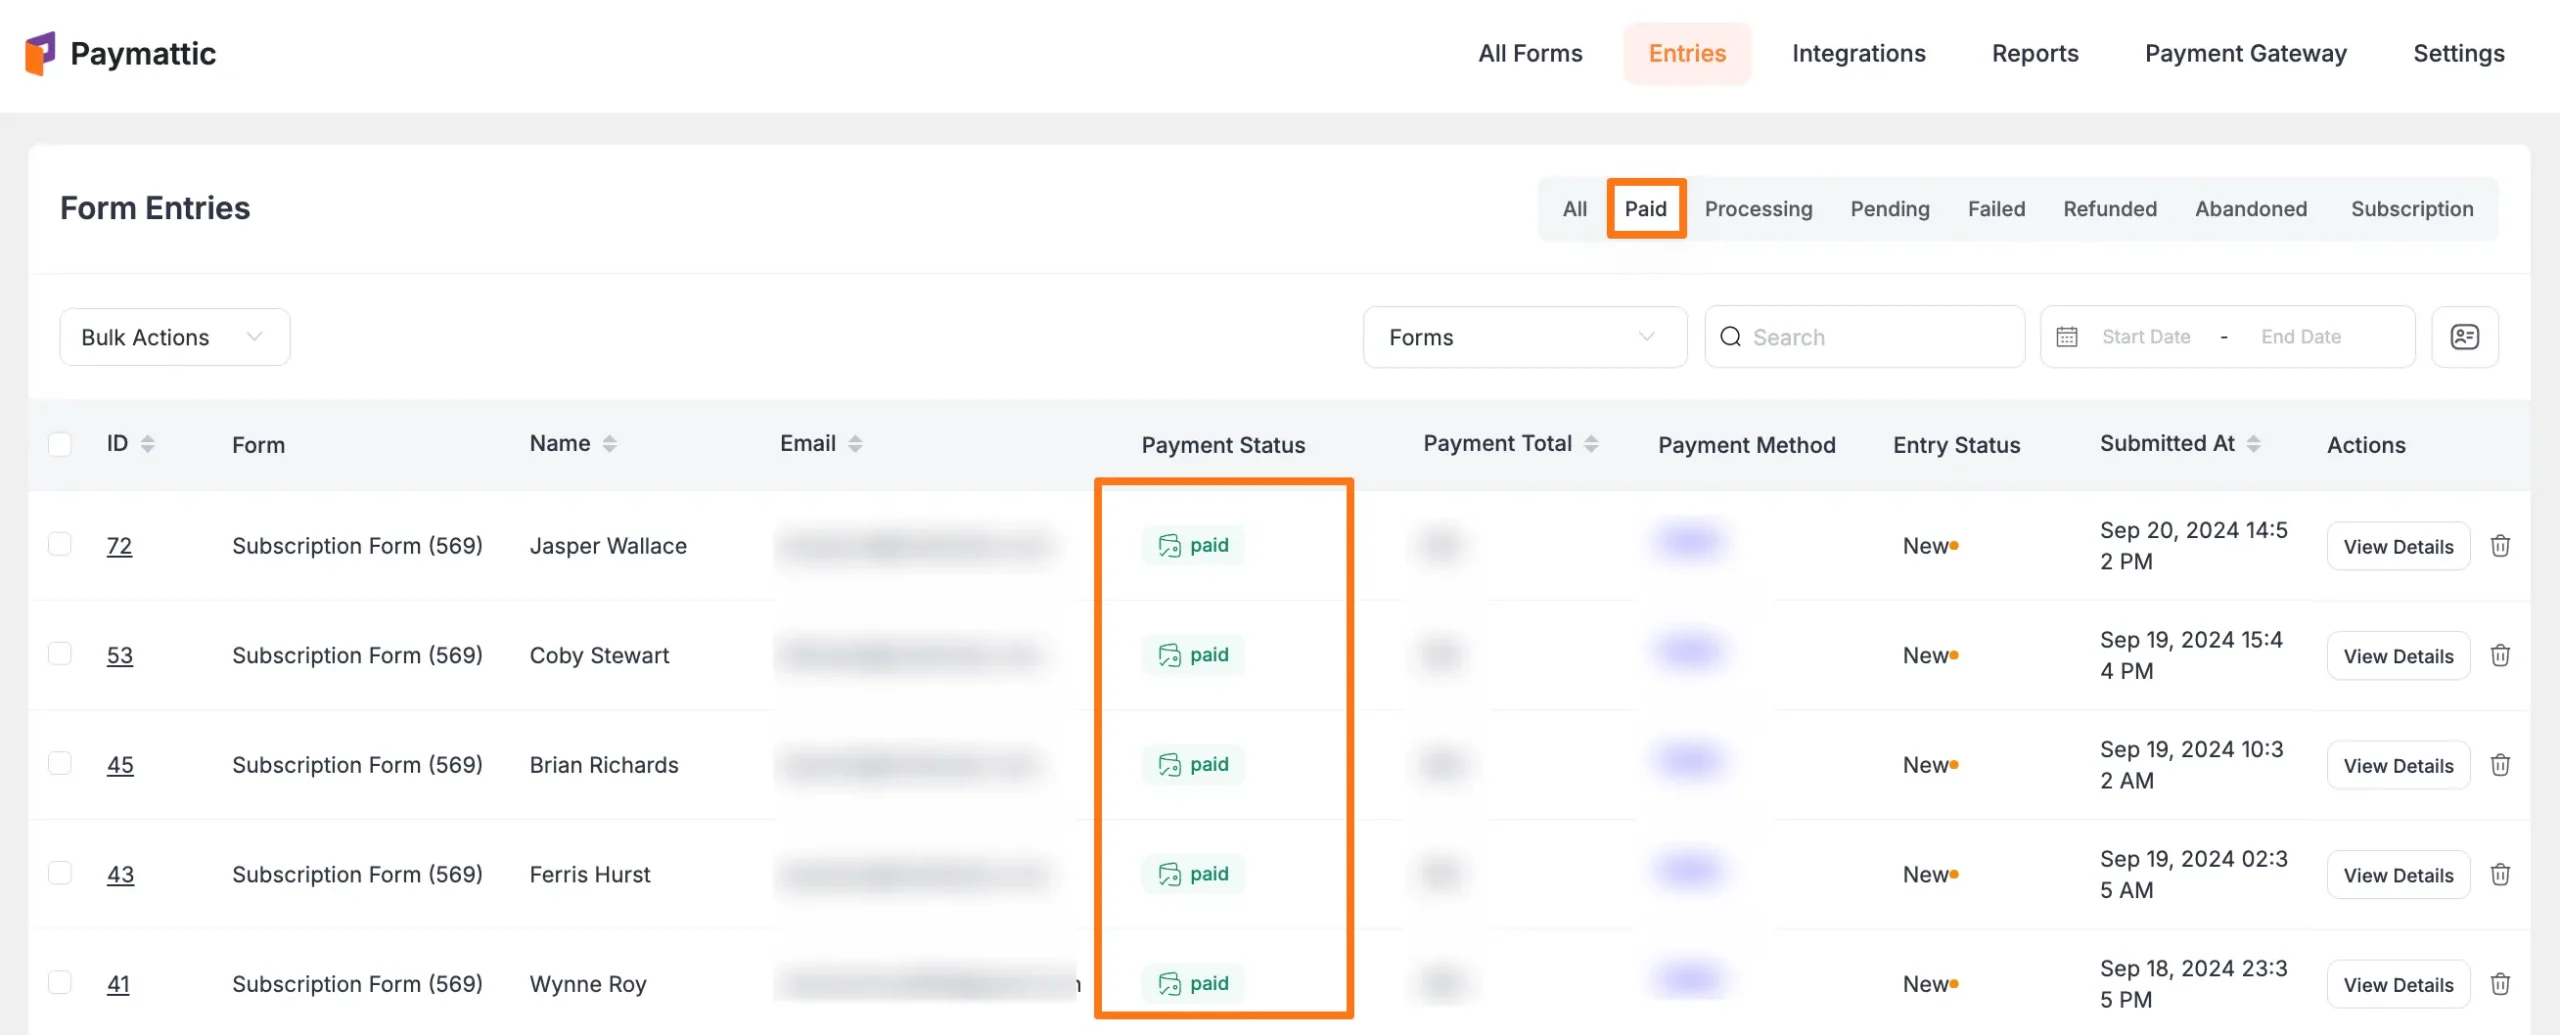
A. Payment Status Filter
Using this option, you can filter the form entries based on the payment status. Here, you can see the following payment statuses:
- Paid
- Processing
- Pending
- Failed
- Refunded
- Abandoned
Example: I chose the Paid tab as the payment status filter and here you can see all the form entries appear based on paid submissions. In the same way, you can filter your form entries based on any payment status according to your needs.
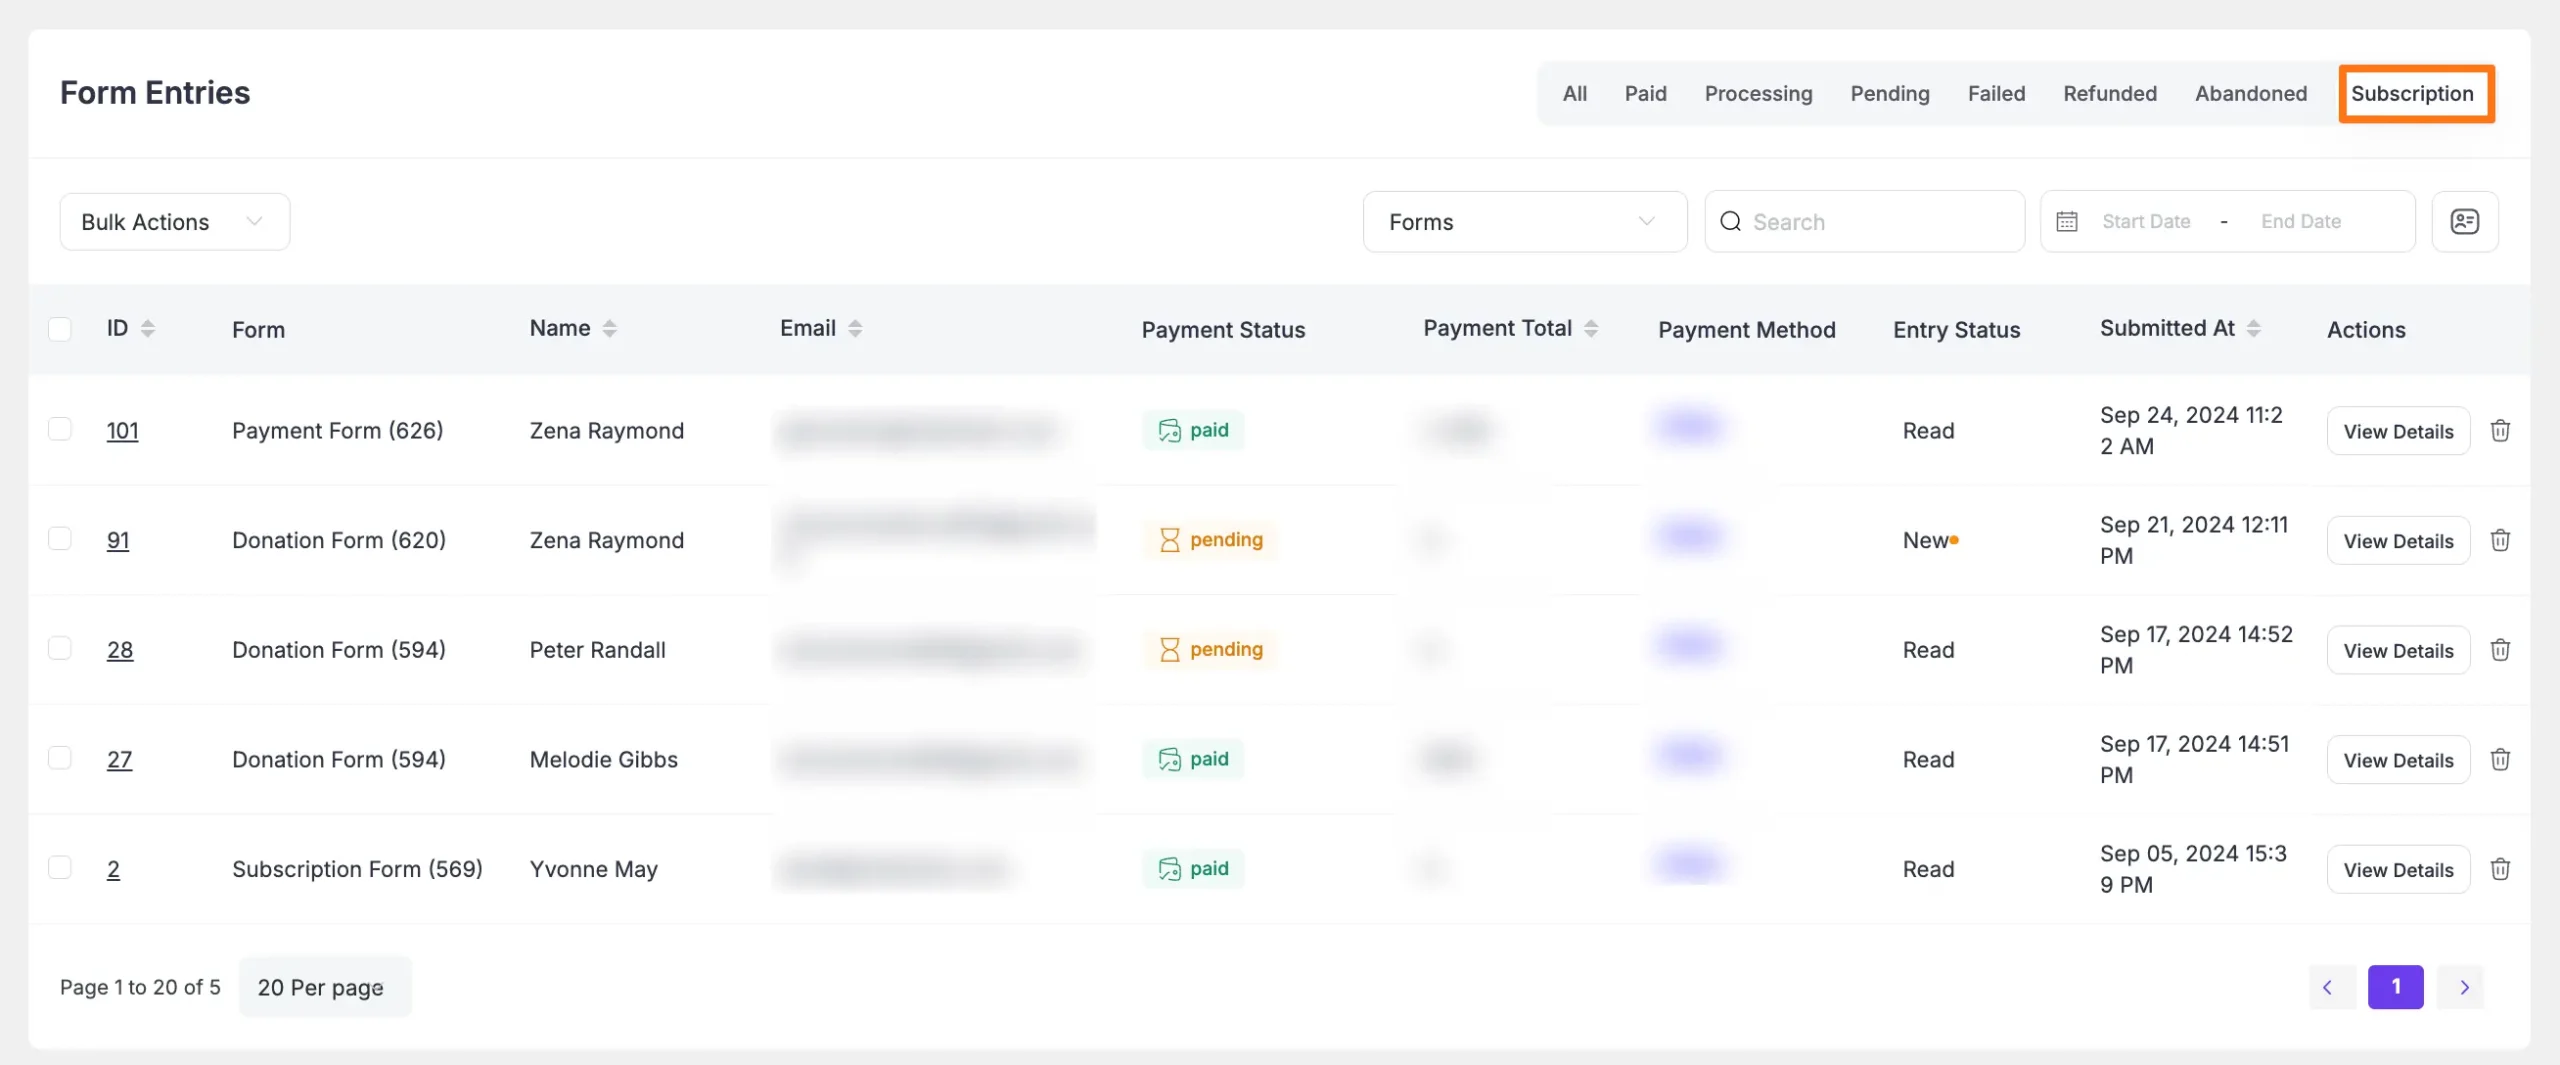
B. Subscription
By selecting this option, you can view only those form entries that have a successful subscription.
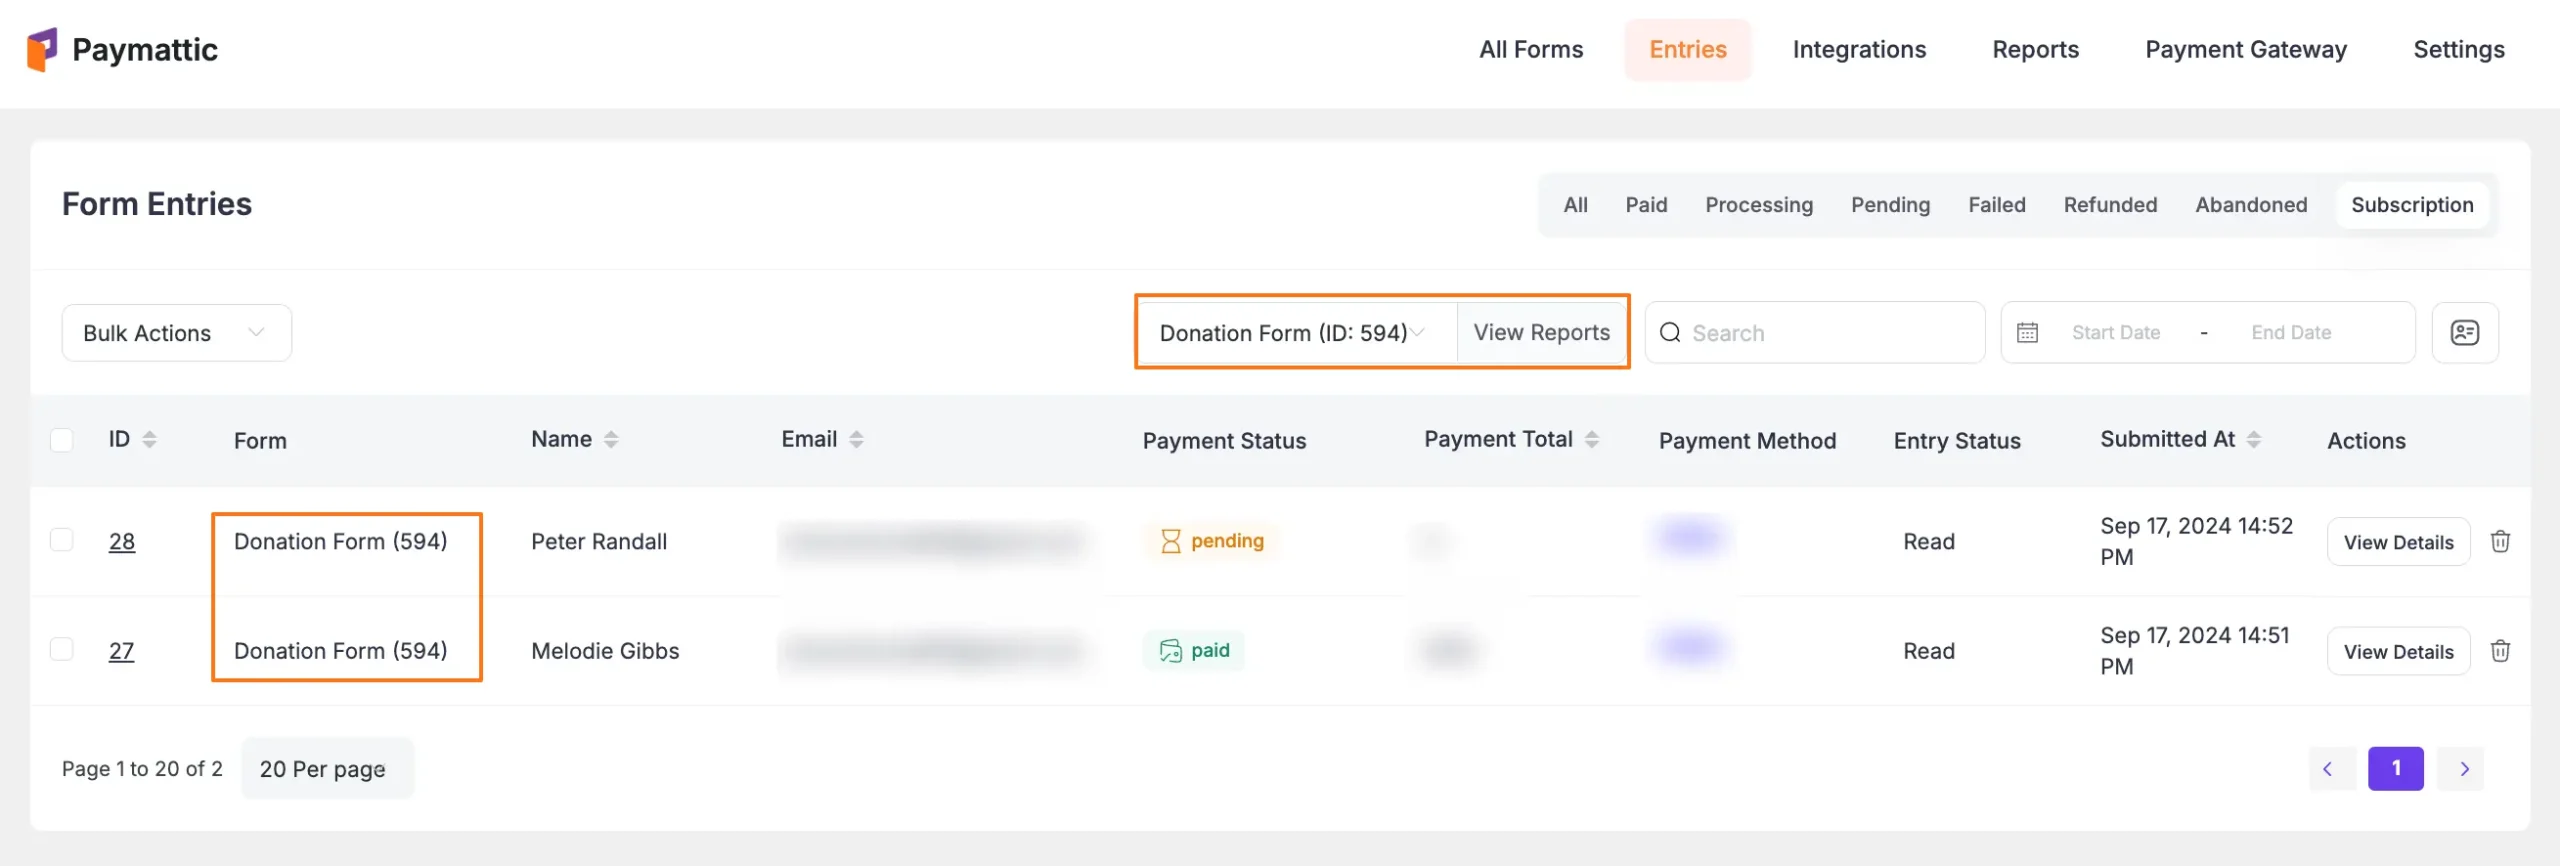
C. Forms Filter
Use this option, if you want to view your form entries based on a specific form.
Click the filter option and a dropdown list will appear with all the available forms on your site. Now, select your preferred form to view all entries for that form.
Example: I chose the Donation form, and the two entries I have on this form are now visible.
Quick Access
You can also access form-specific entries directly:
- Find the form in your forms list
- Click the Three-Dot Icon
- Select Entries
![]()
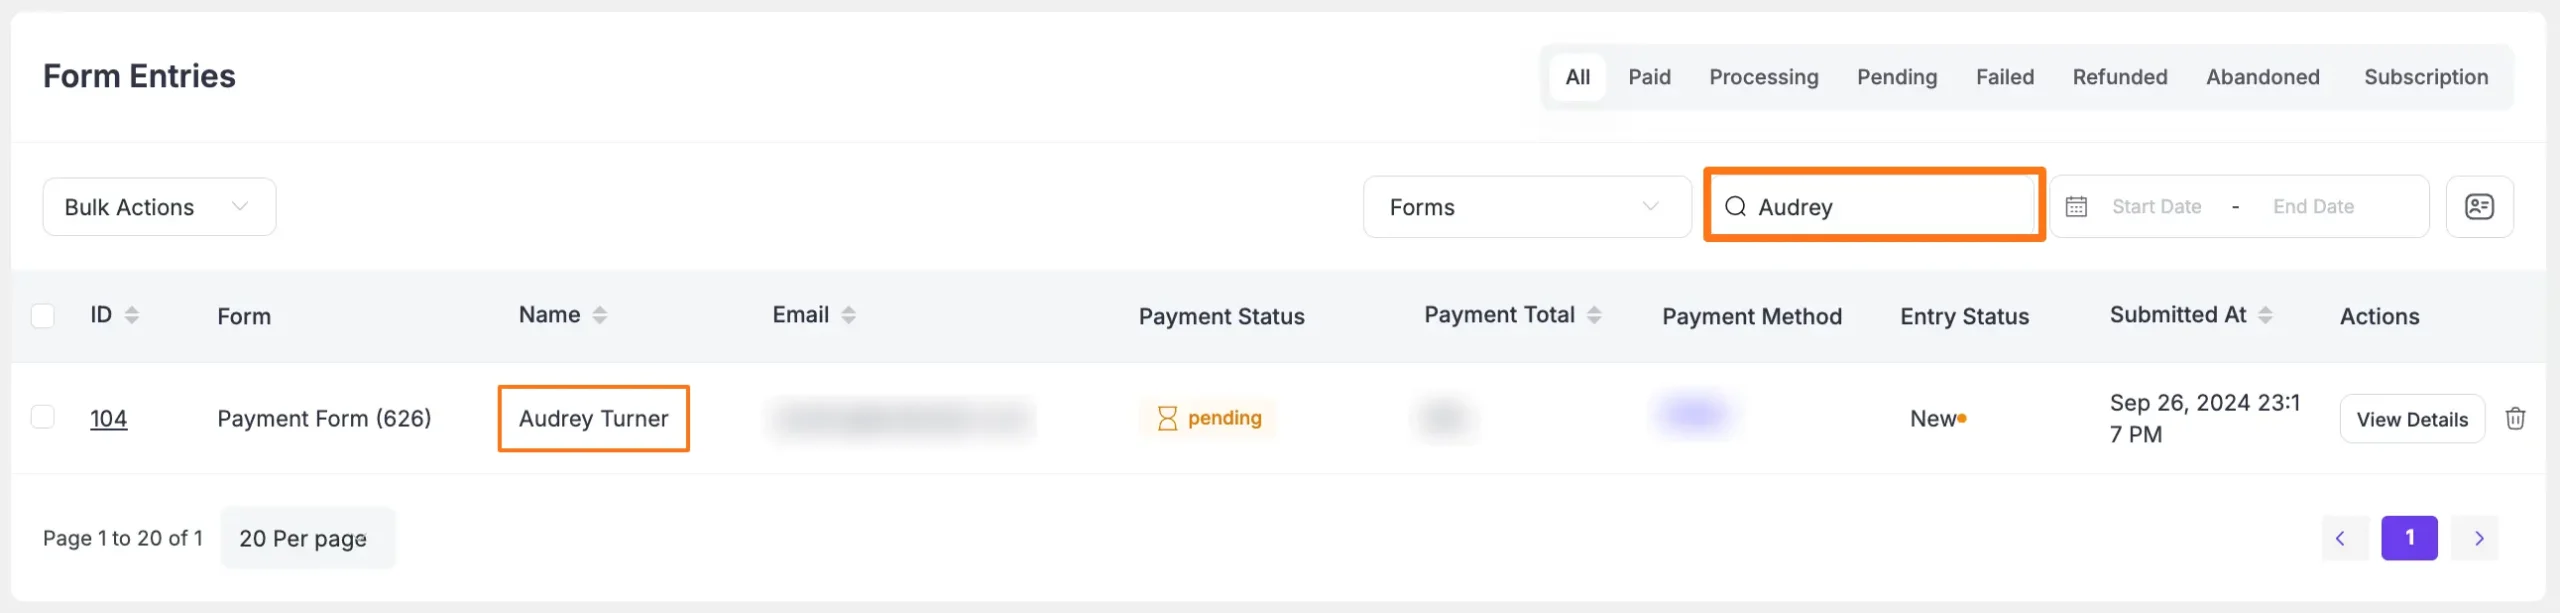
D. Search Bar
Using this option, you can search for specific entries with keywords (e.g., user name, user email, payment method, etc).
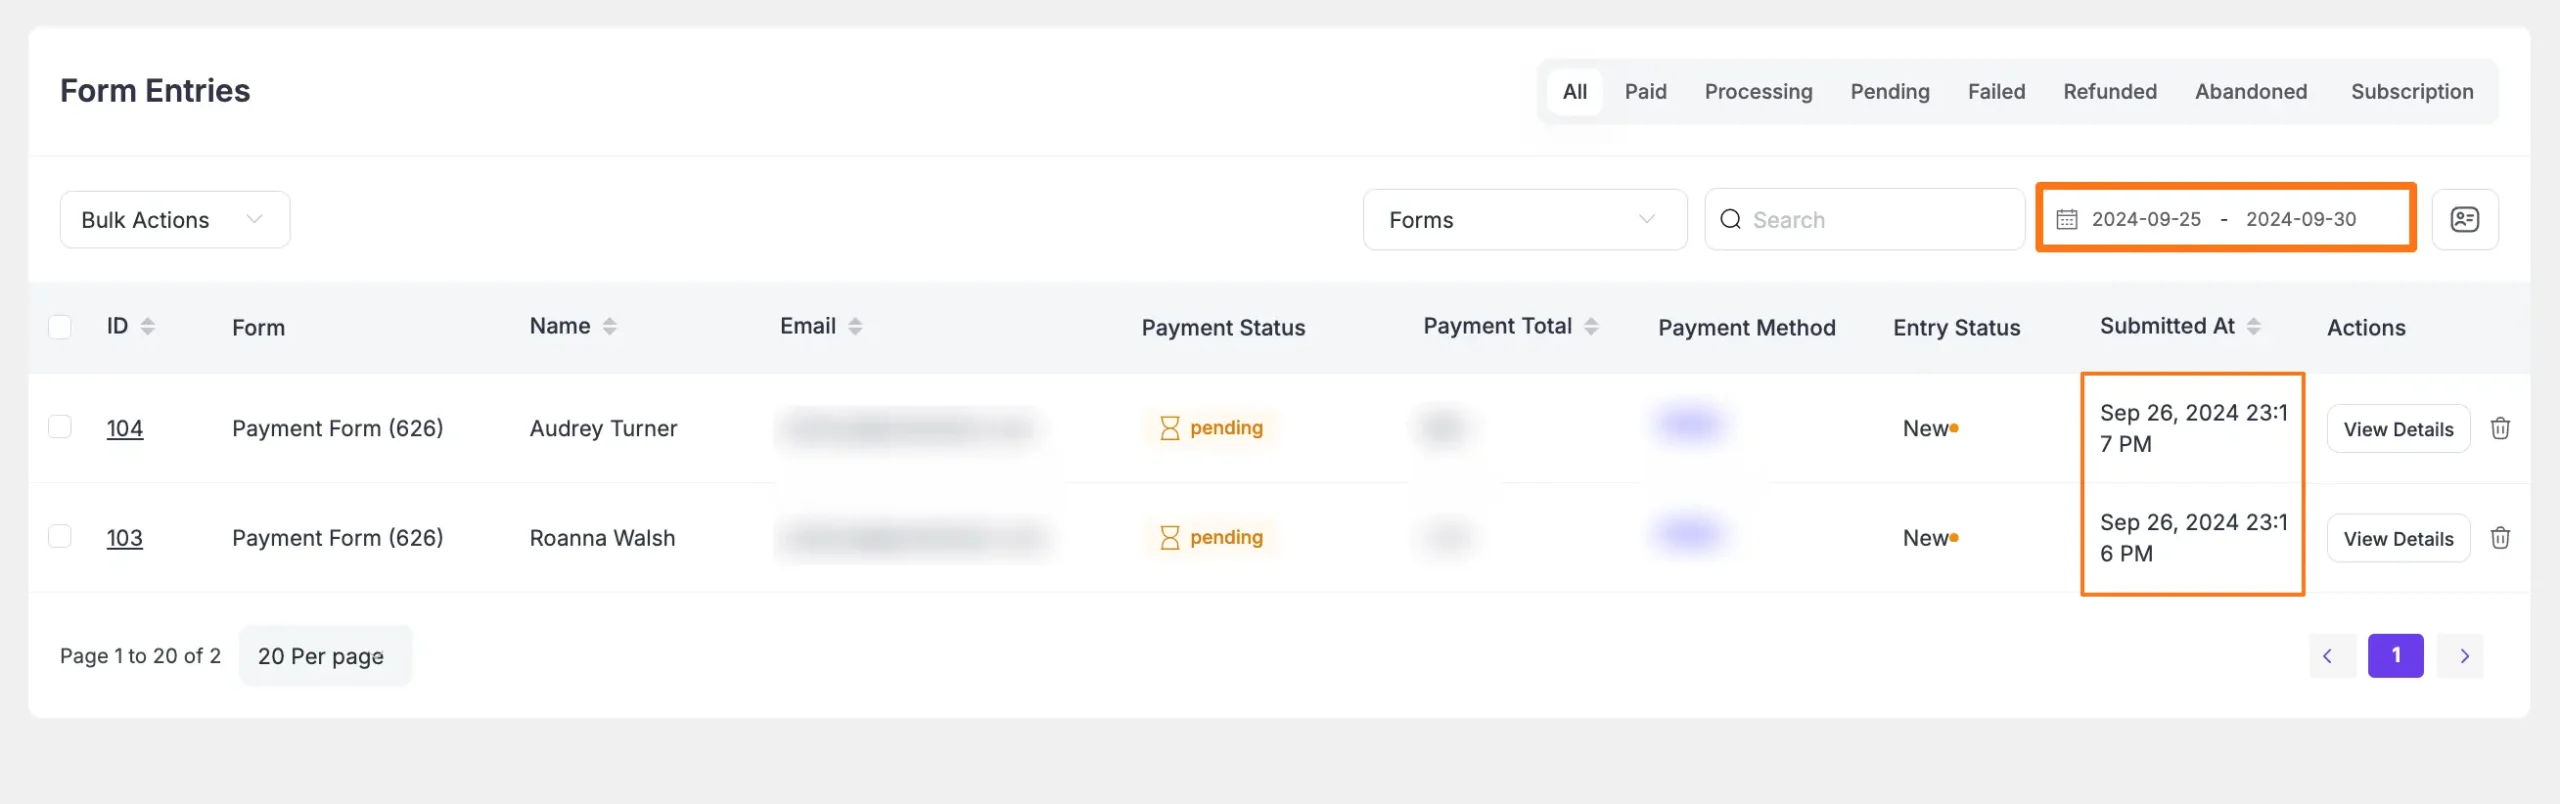
E. Date Filter
Use this date filter to view form entries based on a specific time range.
Example: I selected the date range “September 25th to 30th, 2024,” and you can see the two entries within this time frame appeared.
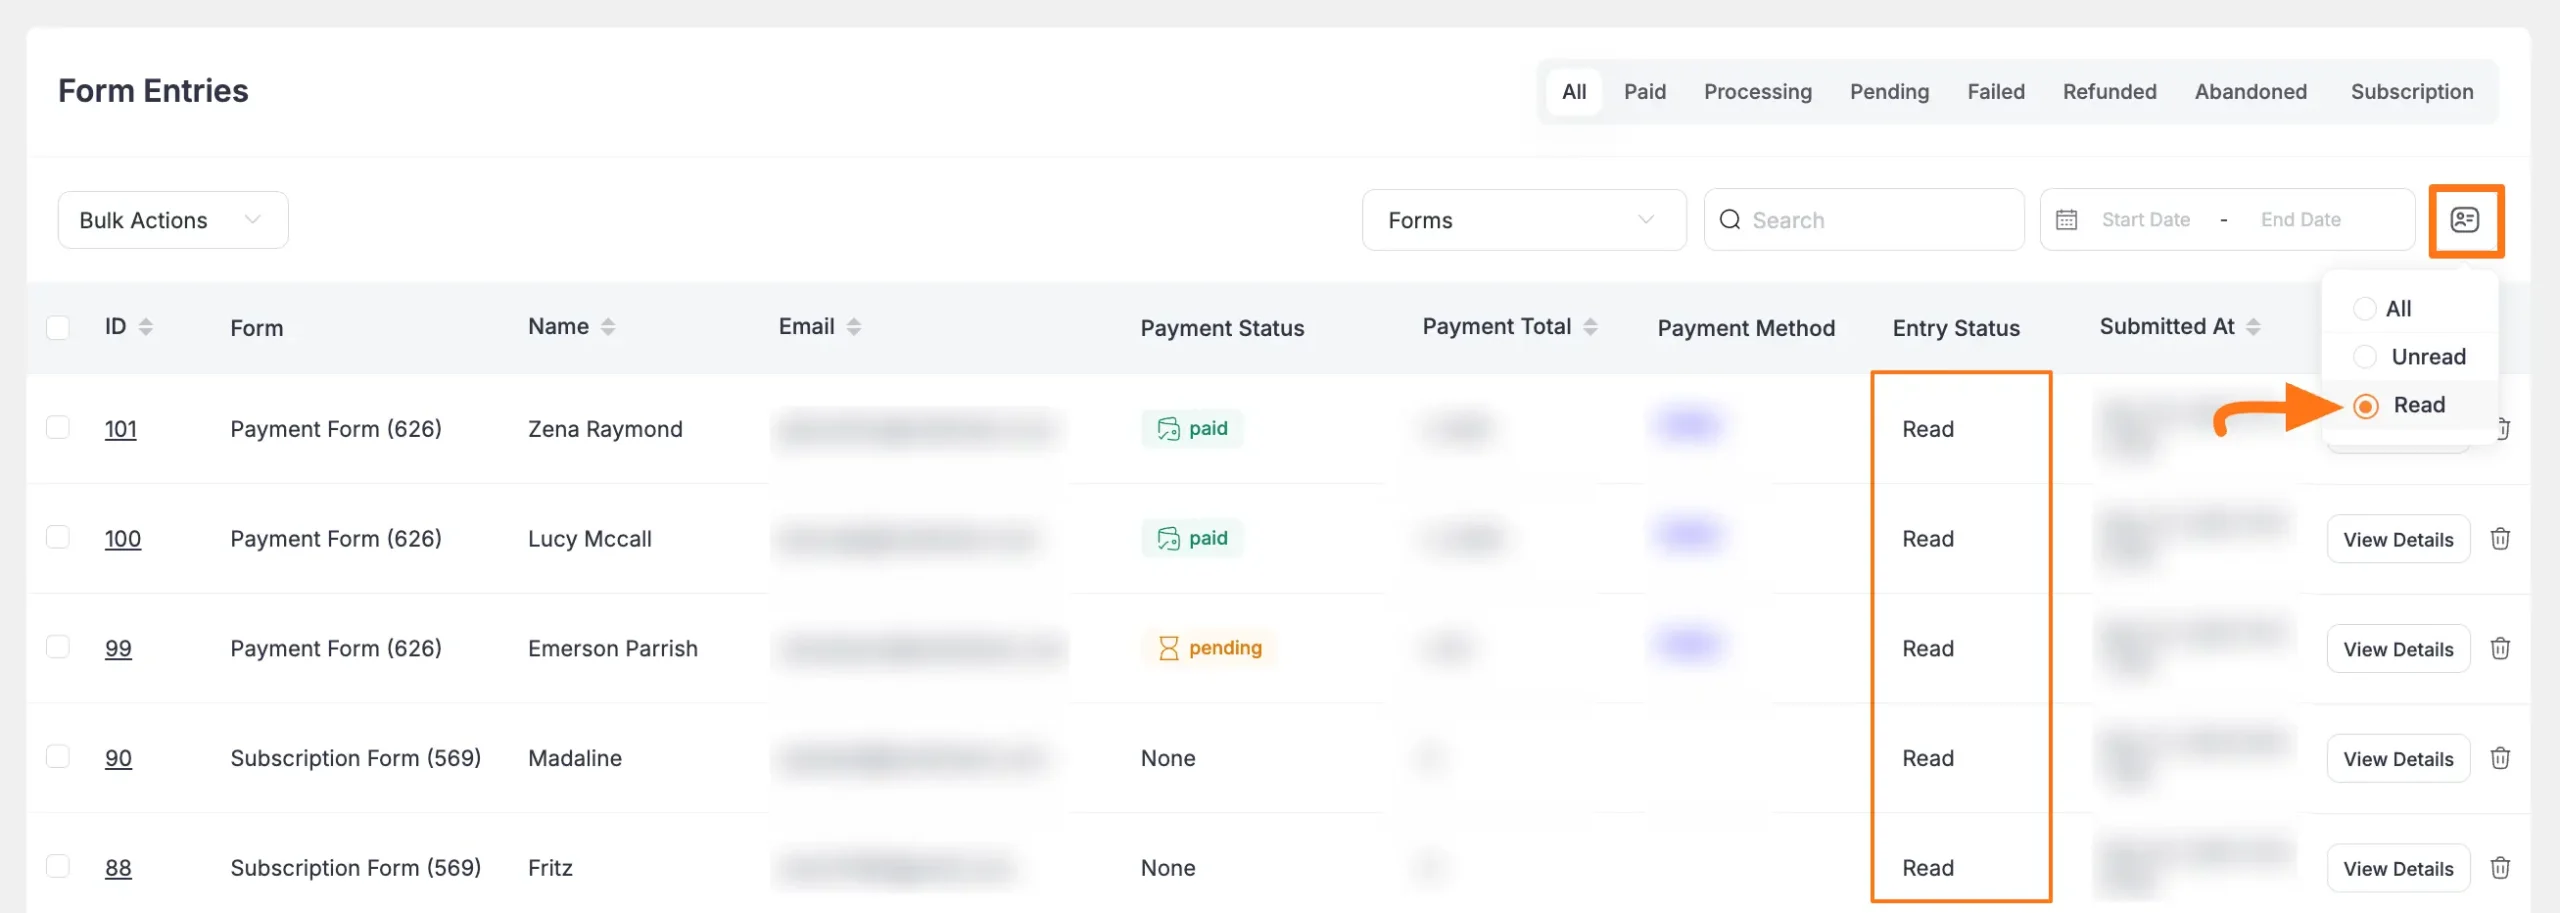
F. Entry Status Filter
Use this option, if you want to view your form entries based on the Entry Status.
Click the filter option and a dropdown list will appear with available entry status (All/Read/Unread). Now, select your preferred form to view all entries for that form.
Example: I chose the Read form, and all the entries I have on this Status are now visible.
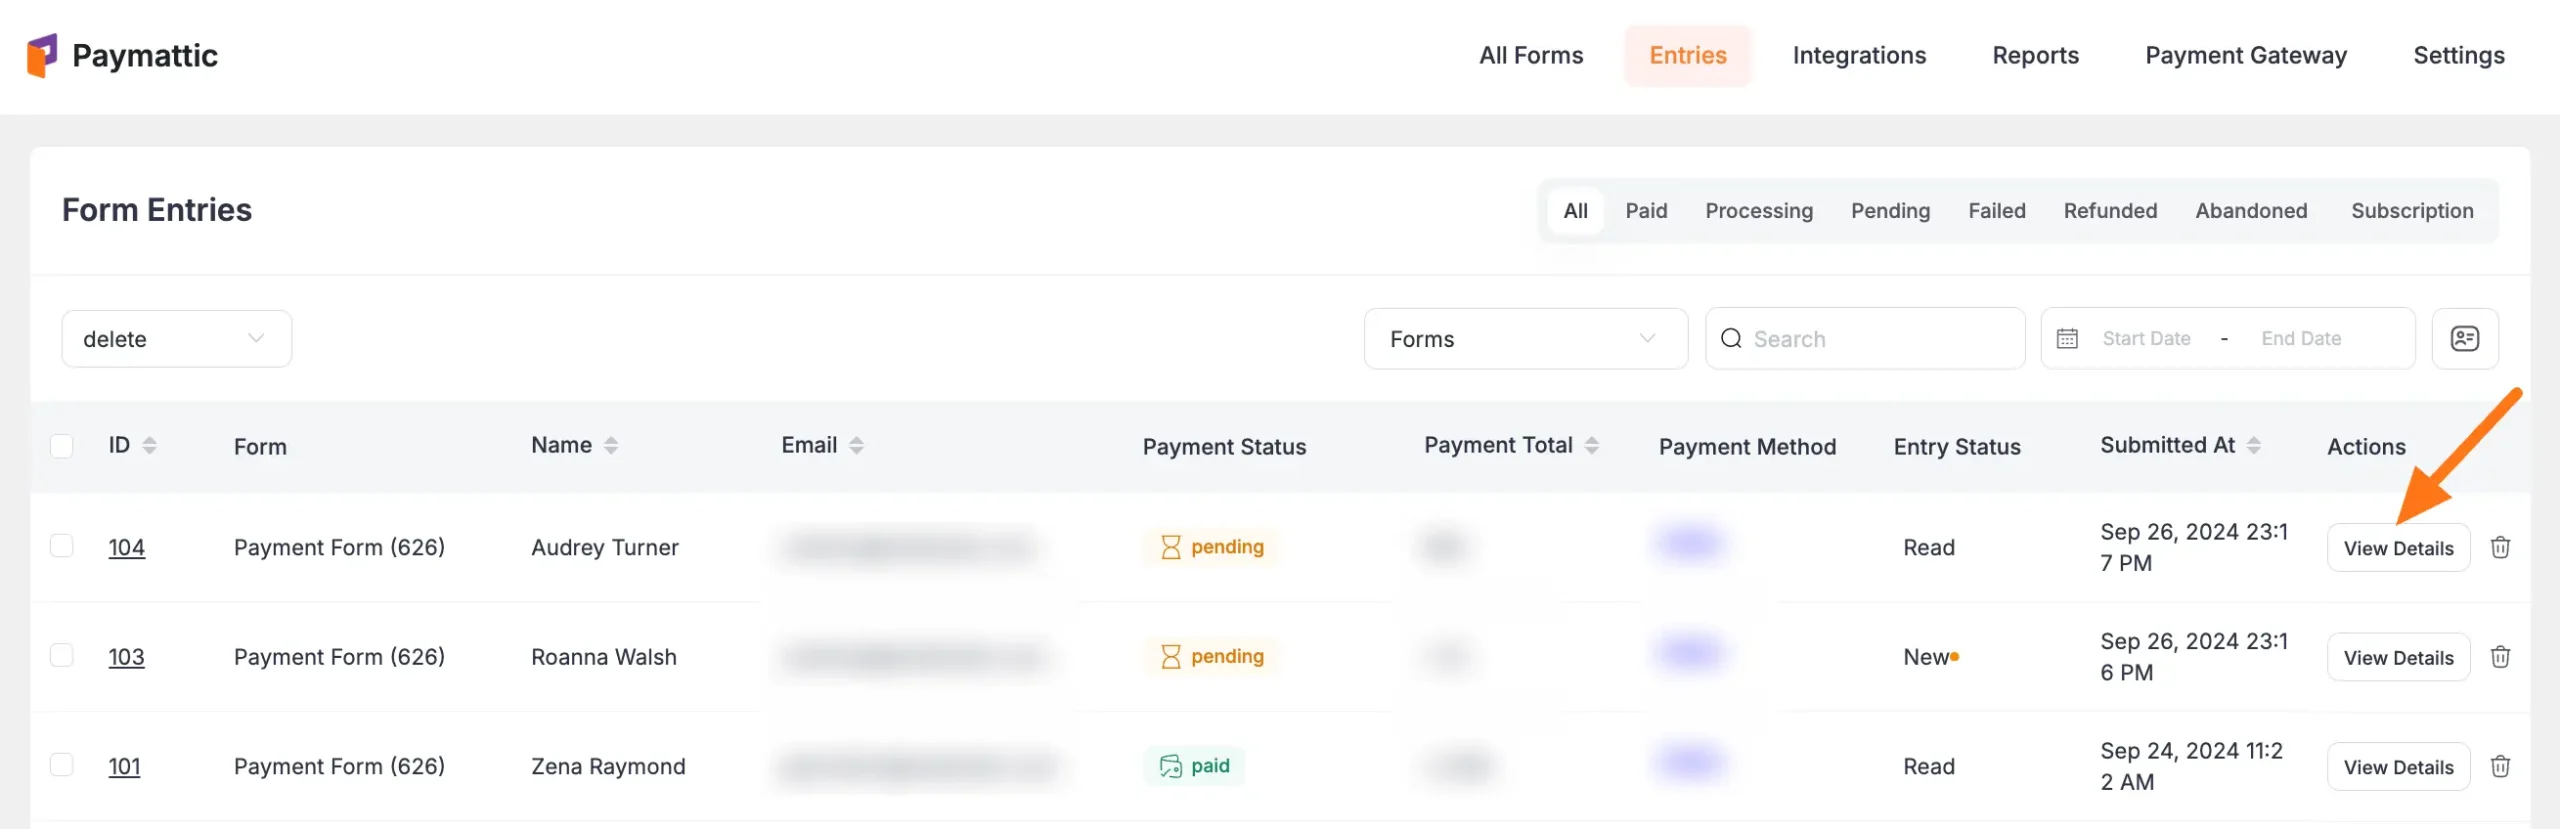
G. View Details
If you wish to see a specific form entry in detail, click the View Details button for your desired form entry located in the right corner under the Actions column.
For more information about viewing individual entries, see our guide on managing single submissions.
H. Delete
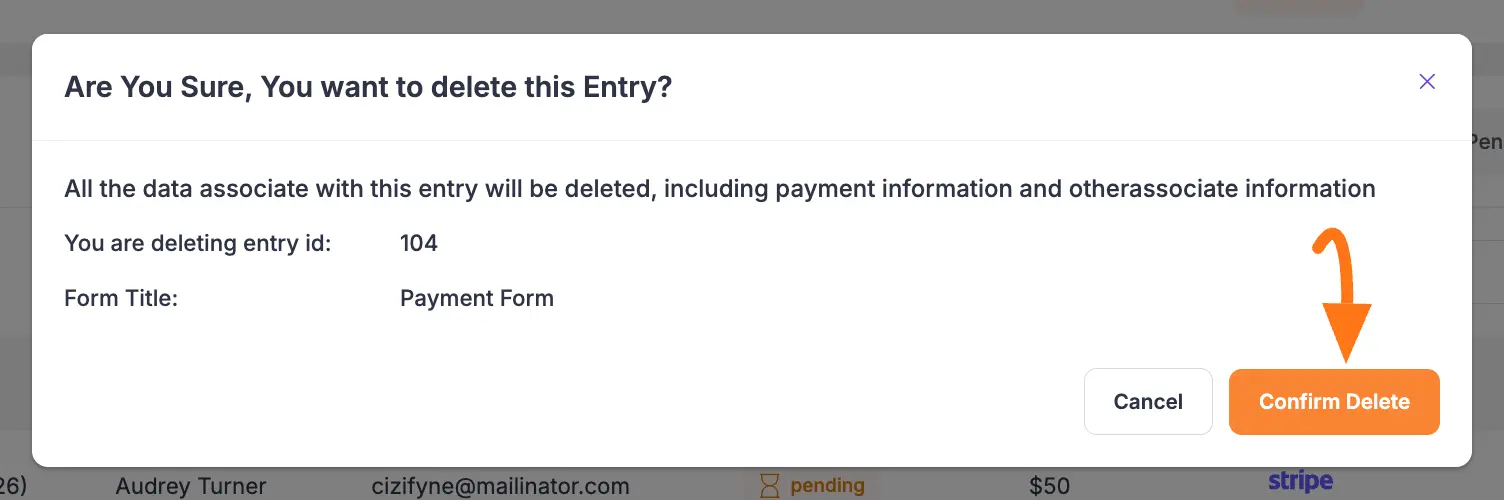
If you want to delete any submission data, click the Trash Icon in the right corner of your desired entry that you wish to delete.
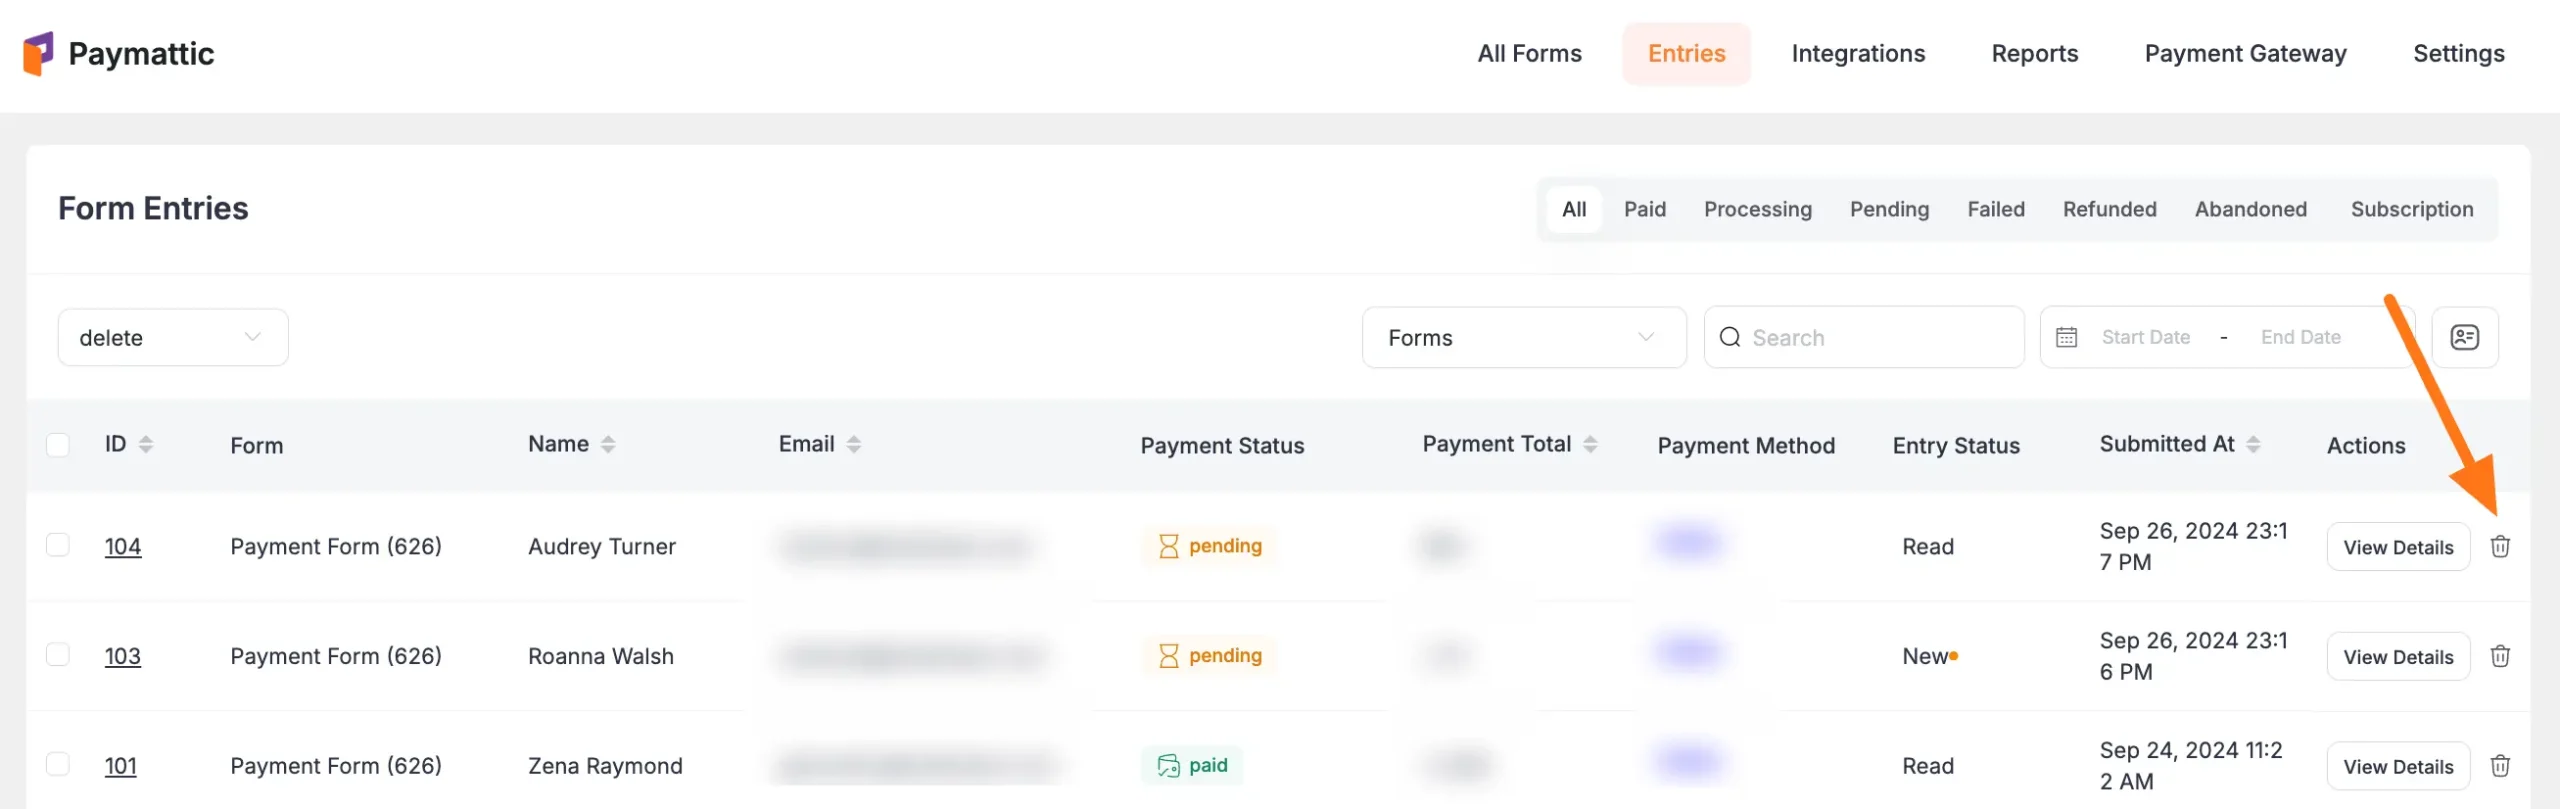
Then, a pop-up will appear asking for your confirmation. Click the Confirm button and your form will be deleted.
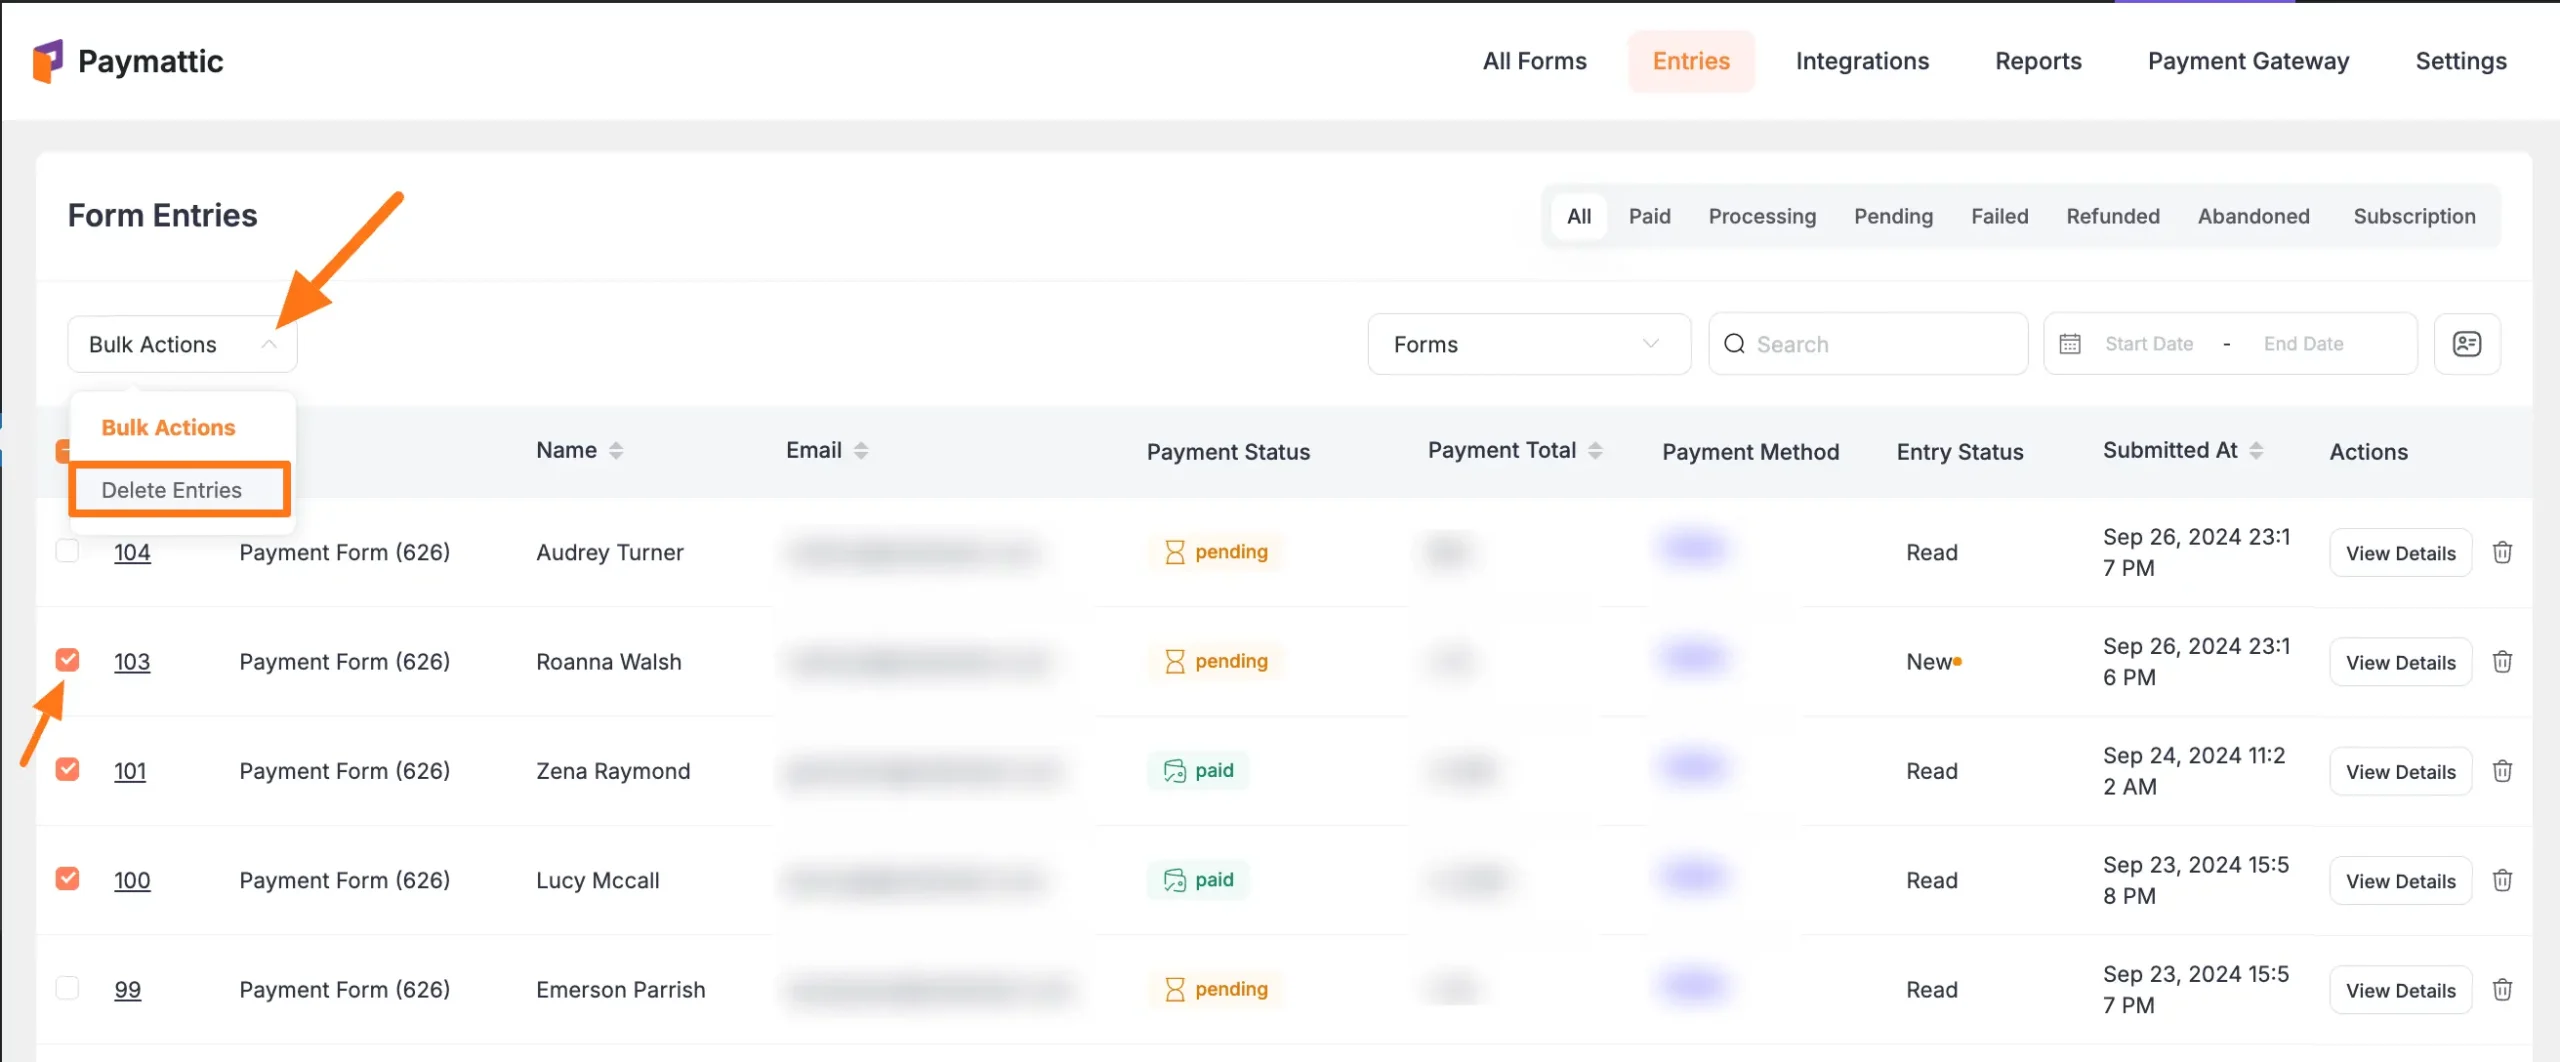
Bulk Delete Entries
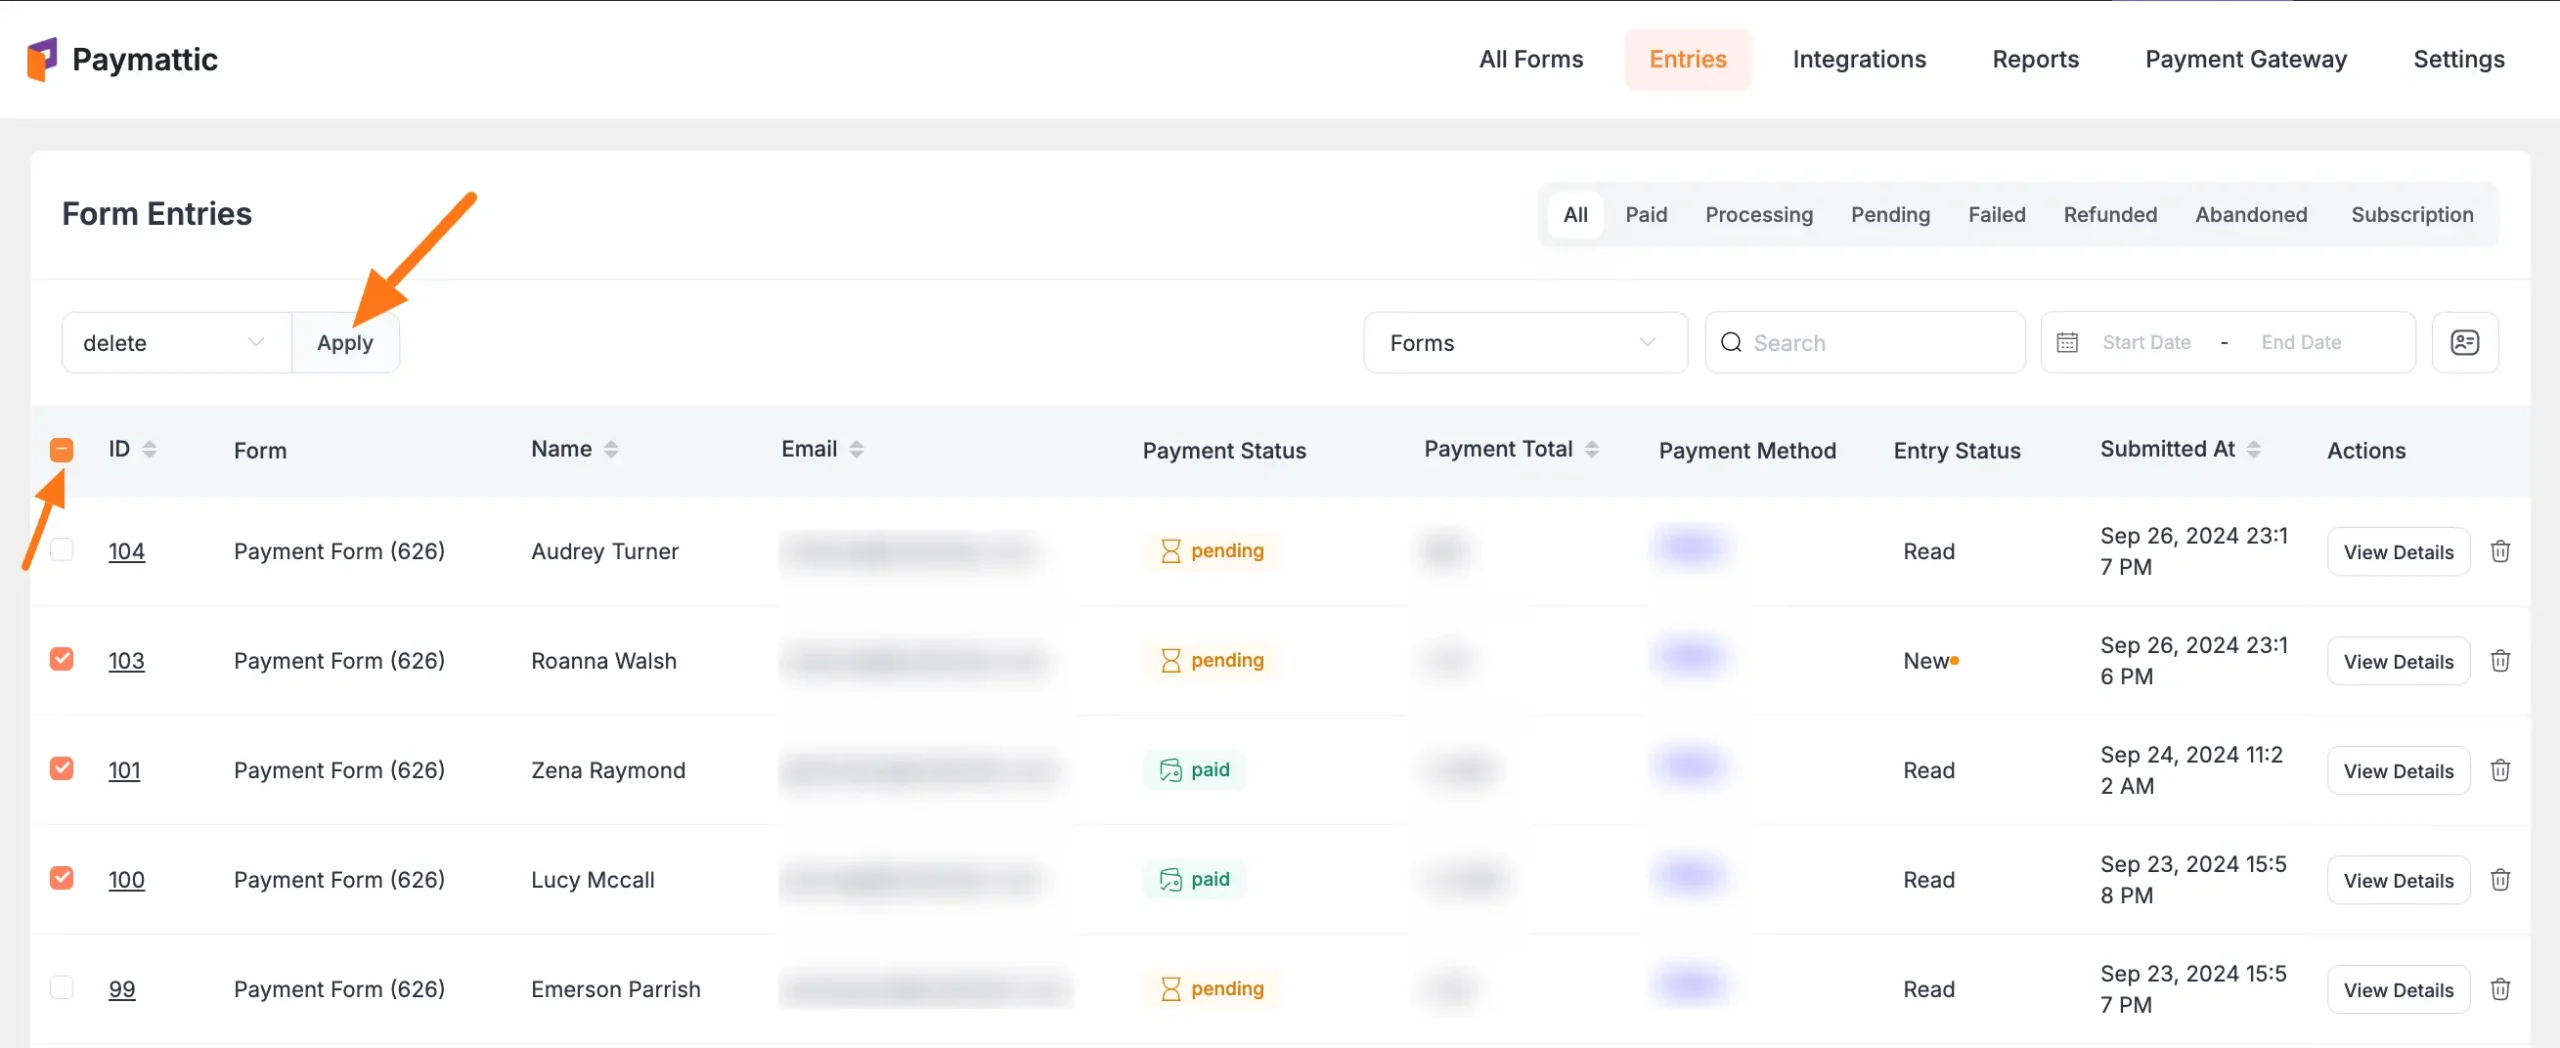
To delete forms in bulk, check the Form IDs and expand the Bulk Action dropdown to click the Delete Entries button.
Delete All Entries
To delete all entries at once:
- Check the box in the header row (left of "ID")
- Follow the same bulk delete process
Need Help?
If you have any questions, concerns, or suggestions, please contact our support team.