How to Integrate Razorpay with Paymattic in WordPress
Razorpay allows you to smoothly handle online payments in India, supporting various payment methods including credit cards, debit cards, net banking, UPI, and popular wallets like JioMoney, Mobikwik, Airtel Money, FreeCharge, Ola Money, and PayZapp.
This article will guide you through configuring Razorpay on your WordPress Site with the Paymattic plugin.
Prerequisites
To get access to the Razorpay payment gateway, you need the Paymattic Pro Plugin.
Configuring Razorpay Payment Method
Follow these steps to configure the Razorpay payment gateway through Paymattic:
Step 1: Access Razorpay Settings
- Go to Payment Gateway from the Paymattic Navbar
- Click the Razorpay tab from the left sidebar
- The Razorpay Settings page will open
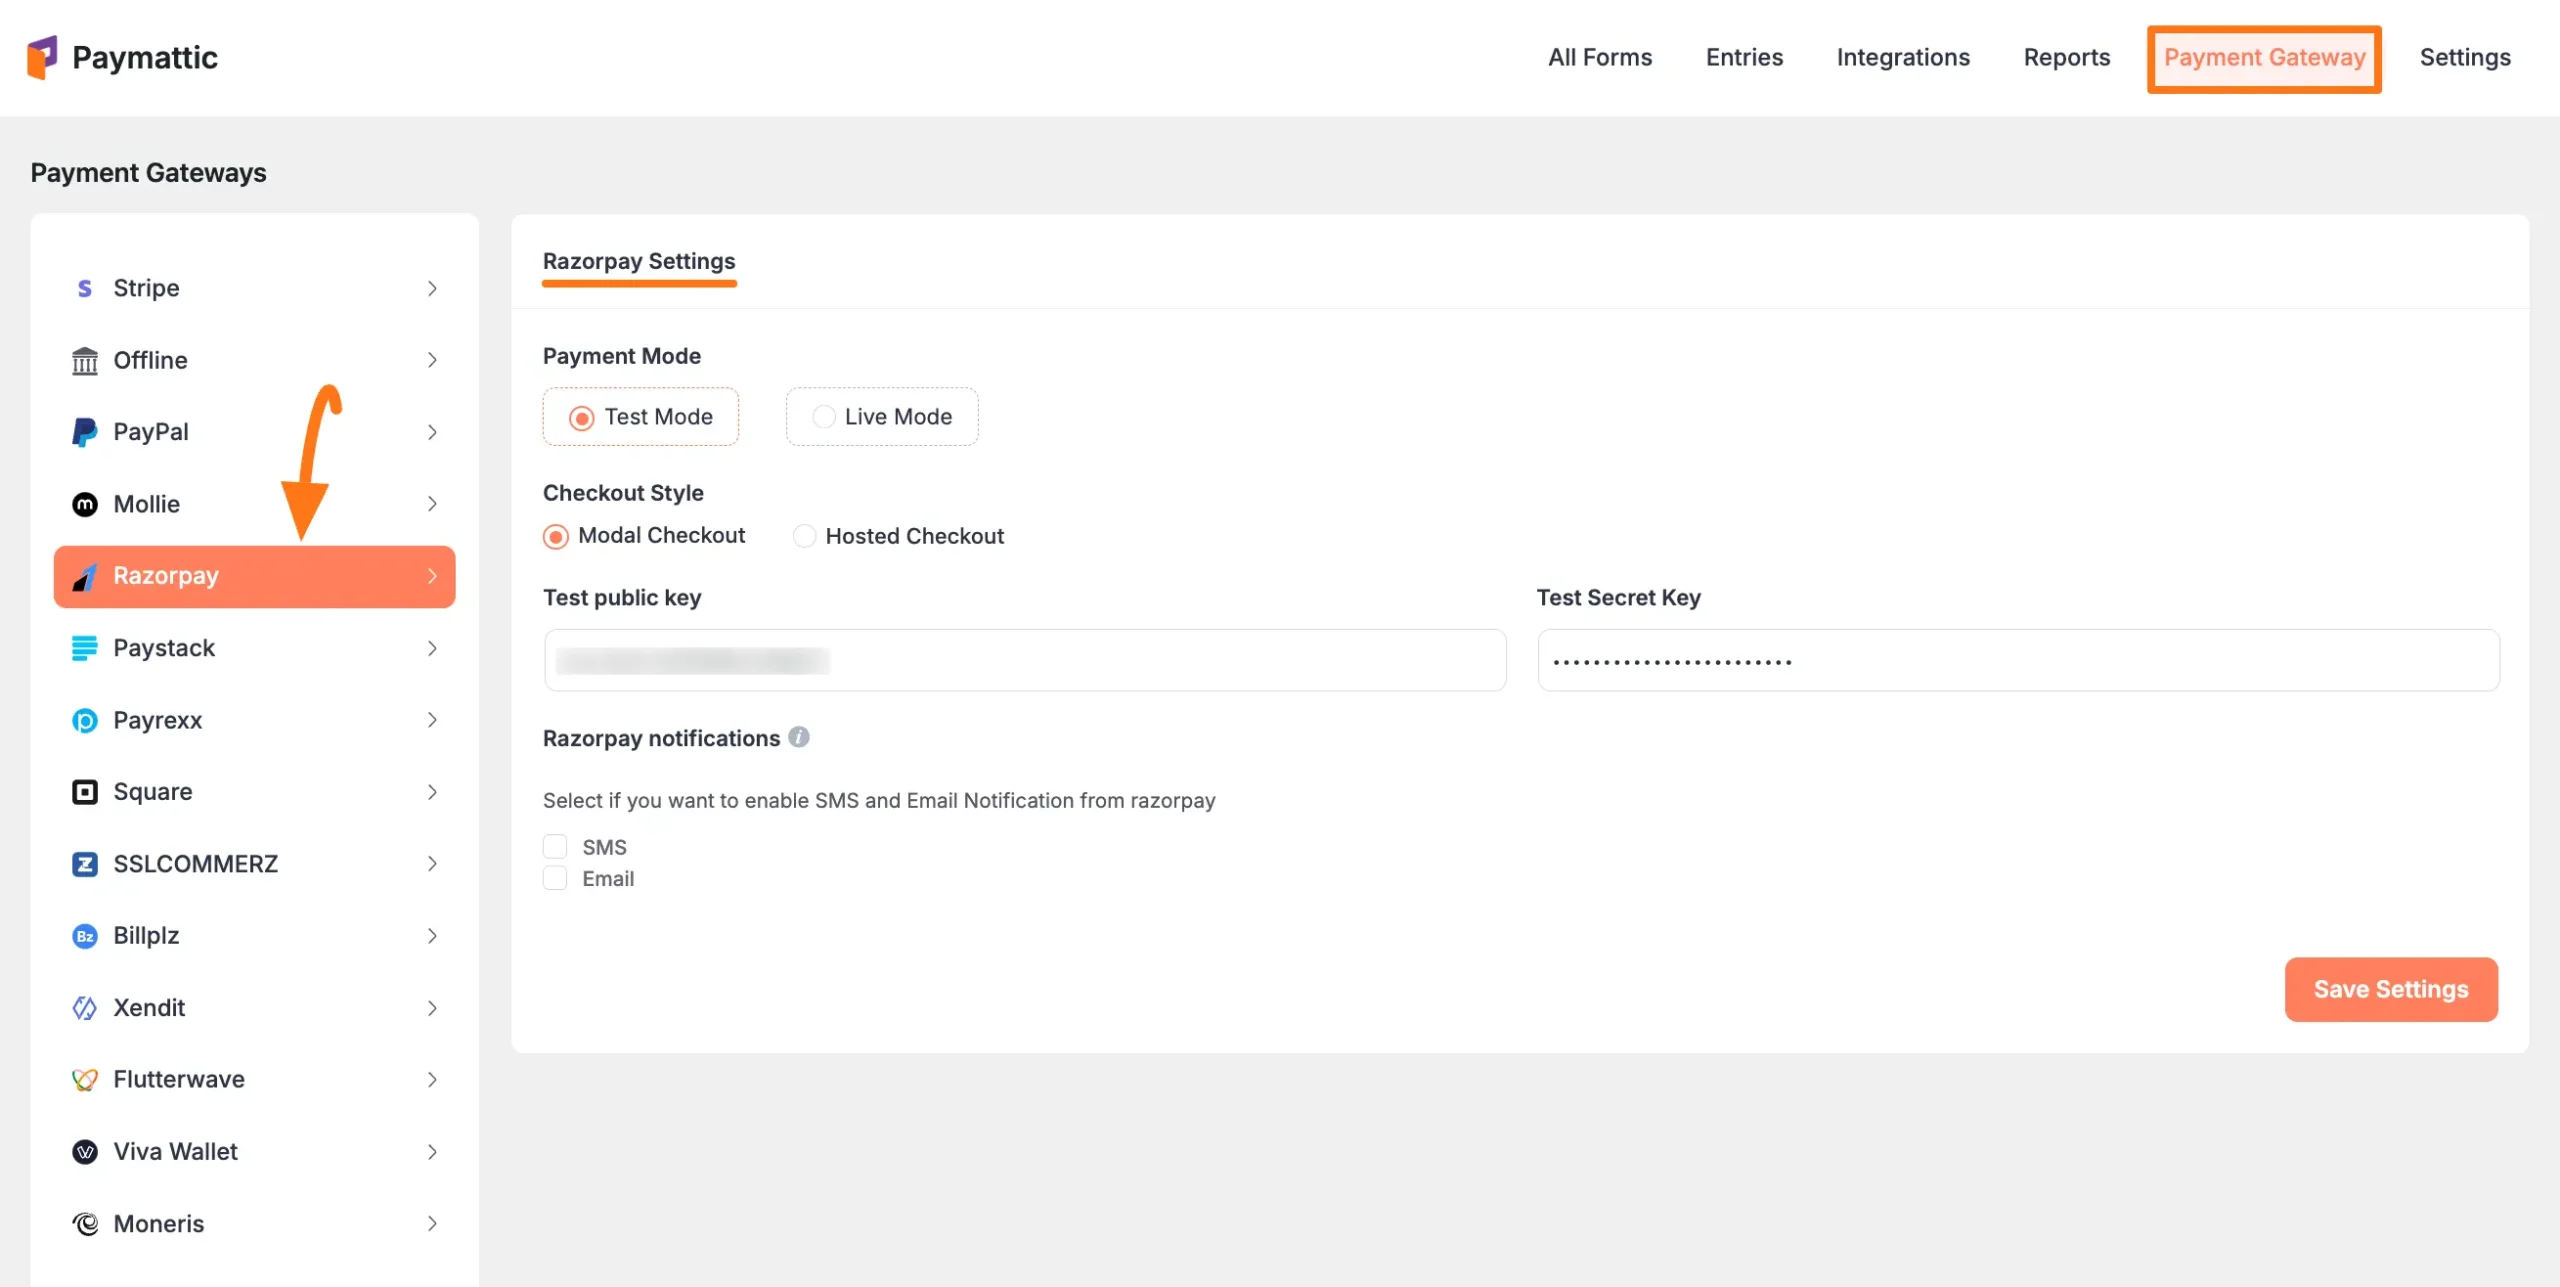
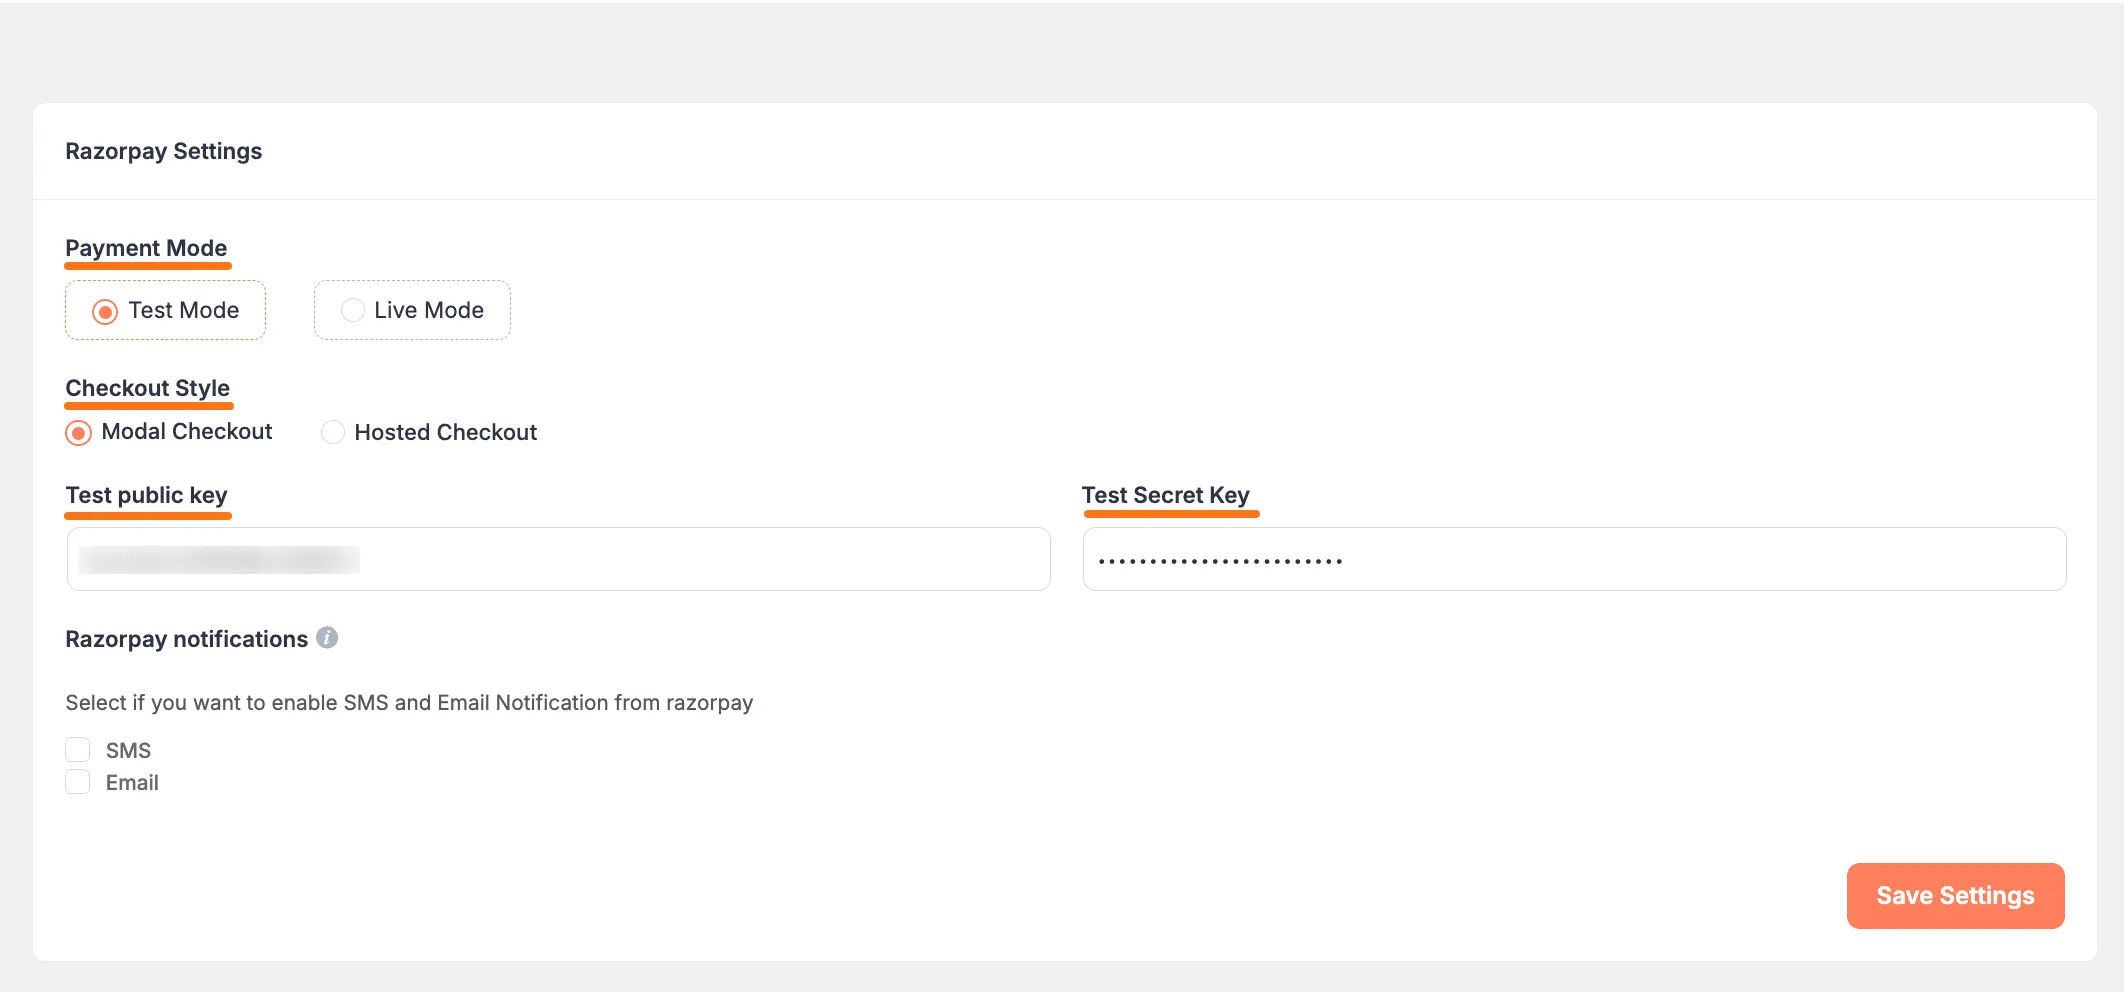
Step 2: Configure Basic Settings
Select Payment Mode: Choose between Test (for test payments) and Live (for real payments). Both options follow the same configuration process. For this example, we'll use Test Mode.
Choose Checkout Style: Select your preferred checkout experience.
- Modal Checkout: This allows users to complete payments in a pop-up directly on your site.
- Hosted Checkout: This will redirect users to the Razorpay website to complete the transaction.
Next, you need to obtain the Key ID (public key) and Key Secret (secret key) from your Razorpay account.
Step 3: Get Razorpay Credentials
First, log in to your Razorpay Account.
- If you do not have an account, you will need to sign up first.
Once you log in to the Razorpay Dashboard, go to the Accounts & Settings section from the left sidebar.
Click the API keys tab to find your credentials.

INFO
To get the Key ID and Key Secret, you need to generate new keys.
- Click the Regenerate Test Key button to generate new keys
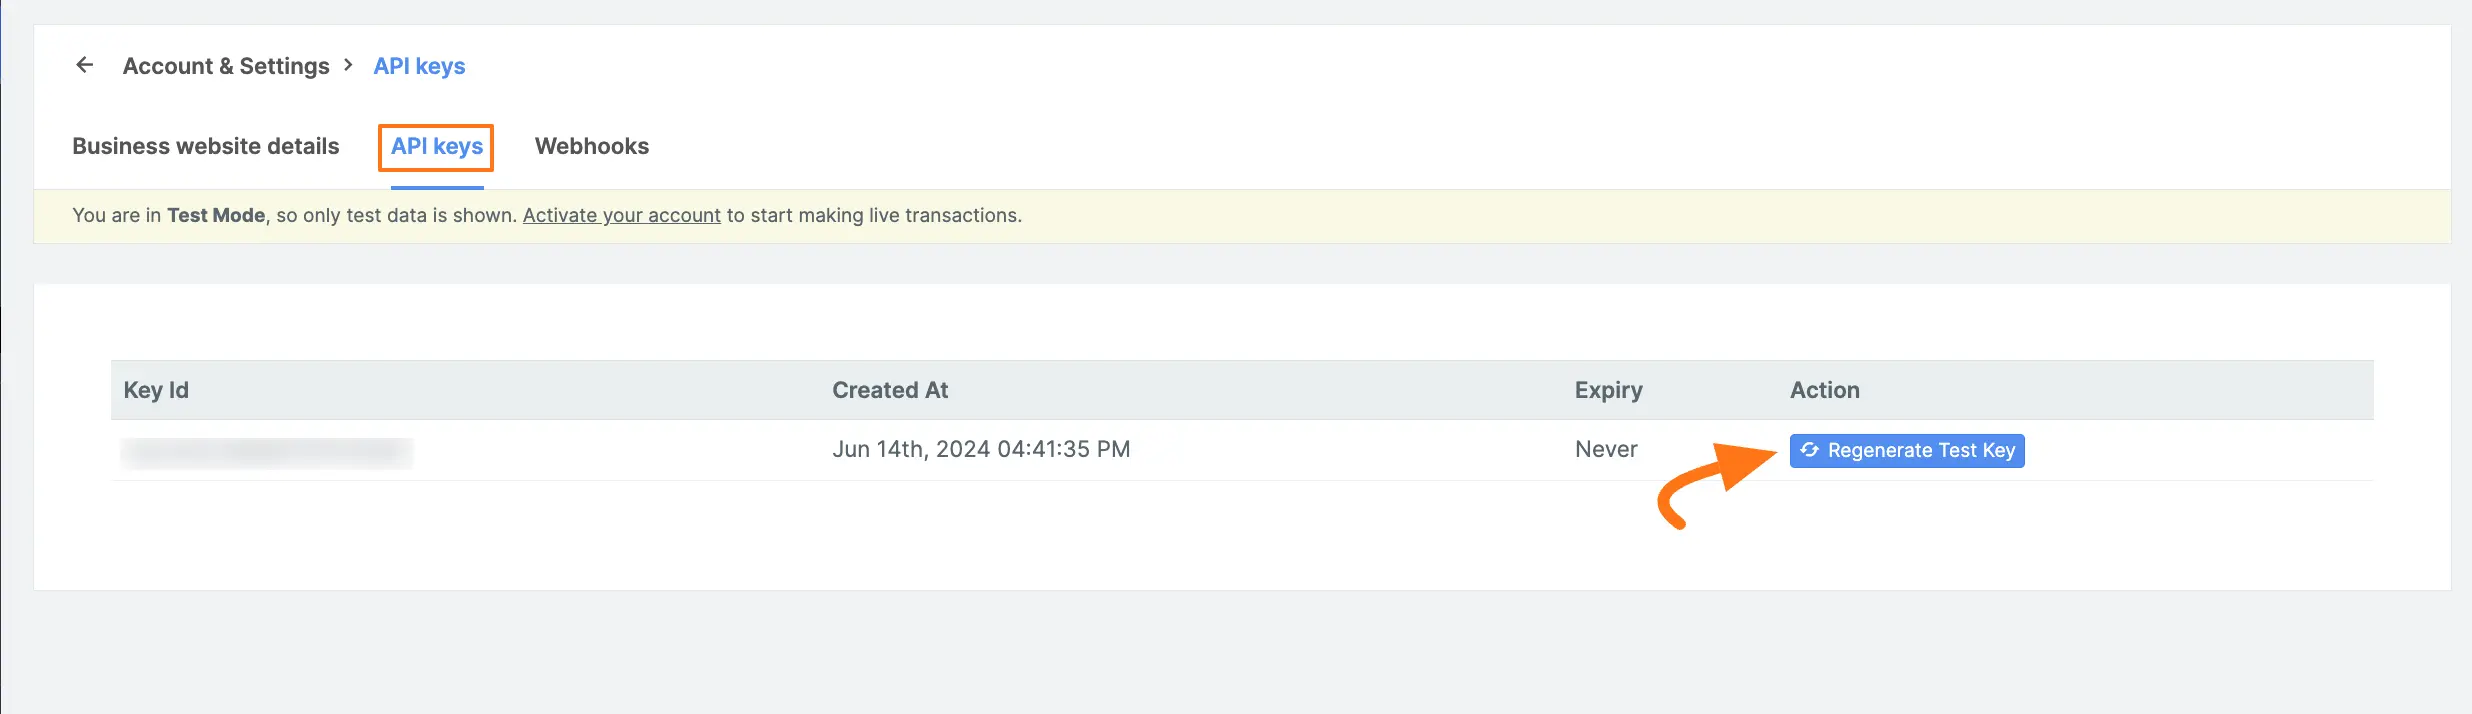
- Copy your credentials:
- Key ID
- Key Secret

Step 4: Configure in Paymattic
Go back to your WordPress dashboard and navigate to Paymattic → Payment Gateway, then click the Razorpay tab.
Paste the Key ID you copied from your Razorpay dashboard into the Key ID field.
Next, paste the Key Secret into the Key Secret field.
Finally, press the Save Settings button.
Your Razorpay account will now be integrated with Paymattic for your WordPress Site.
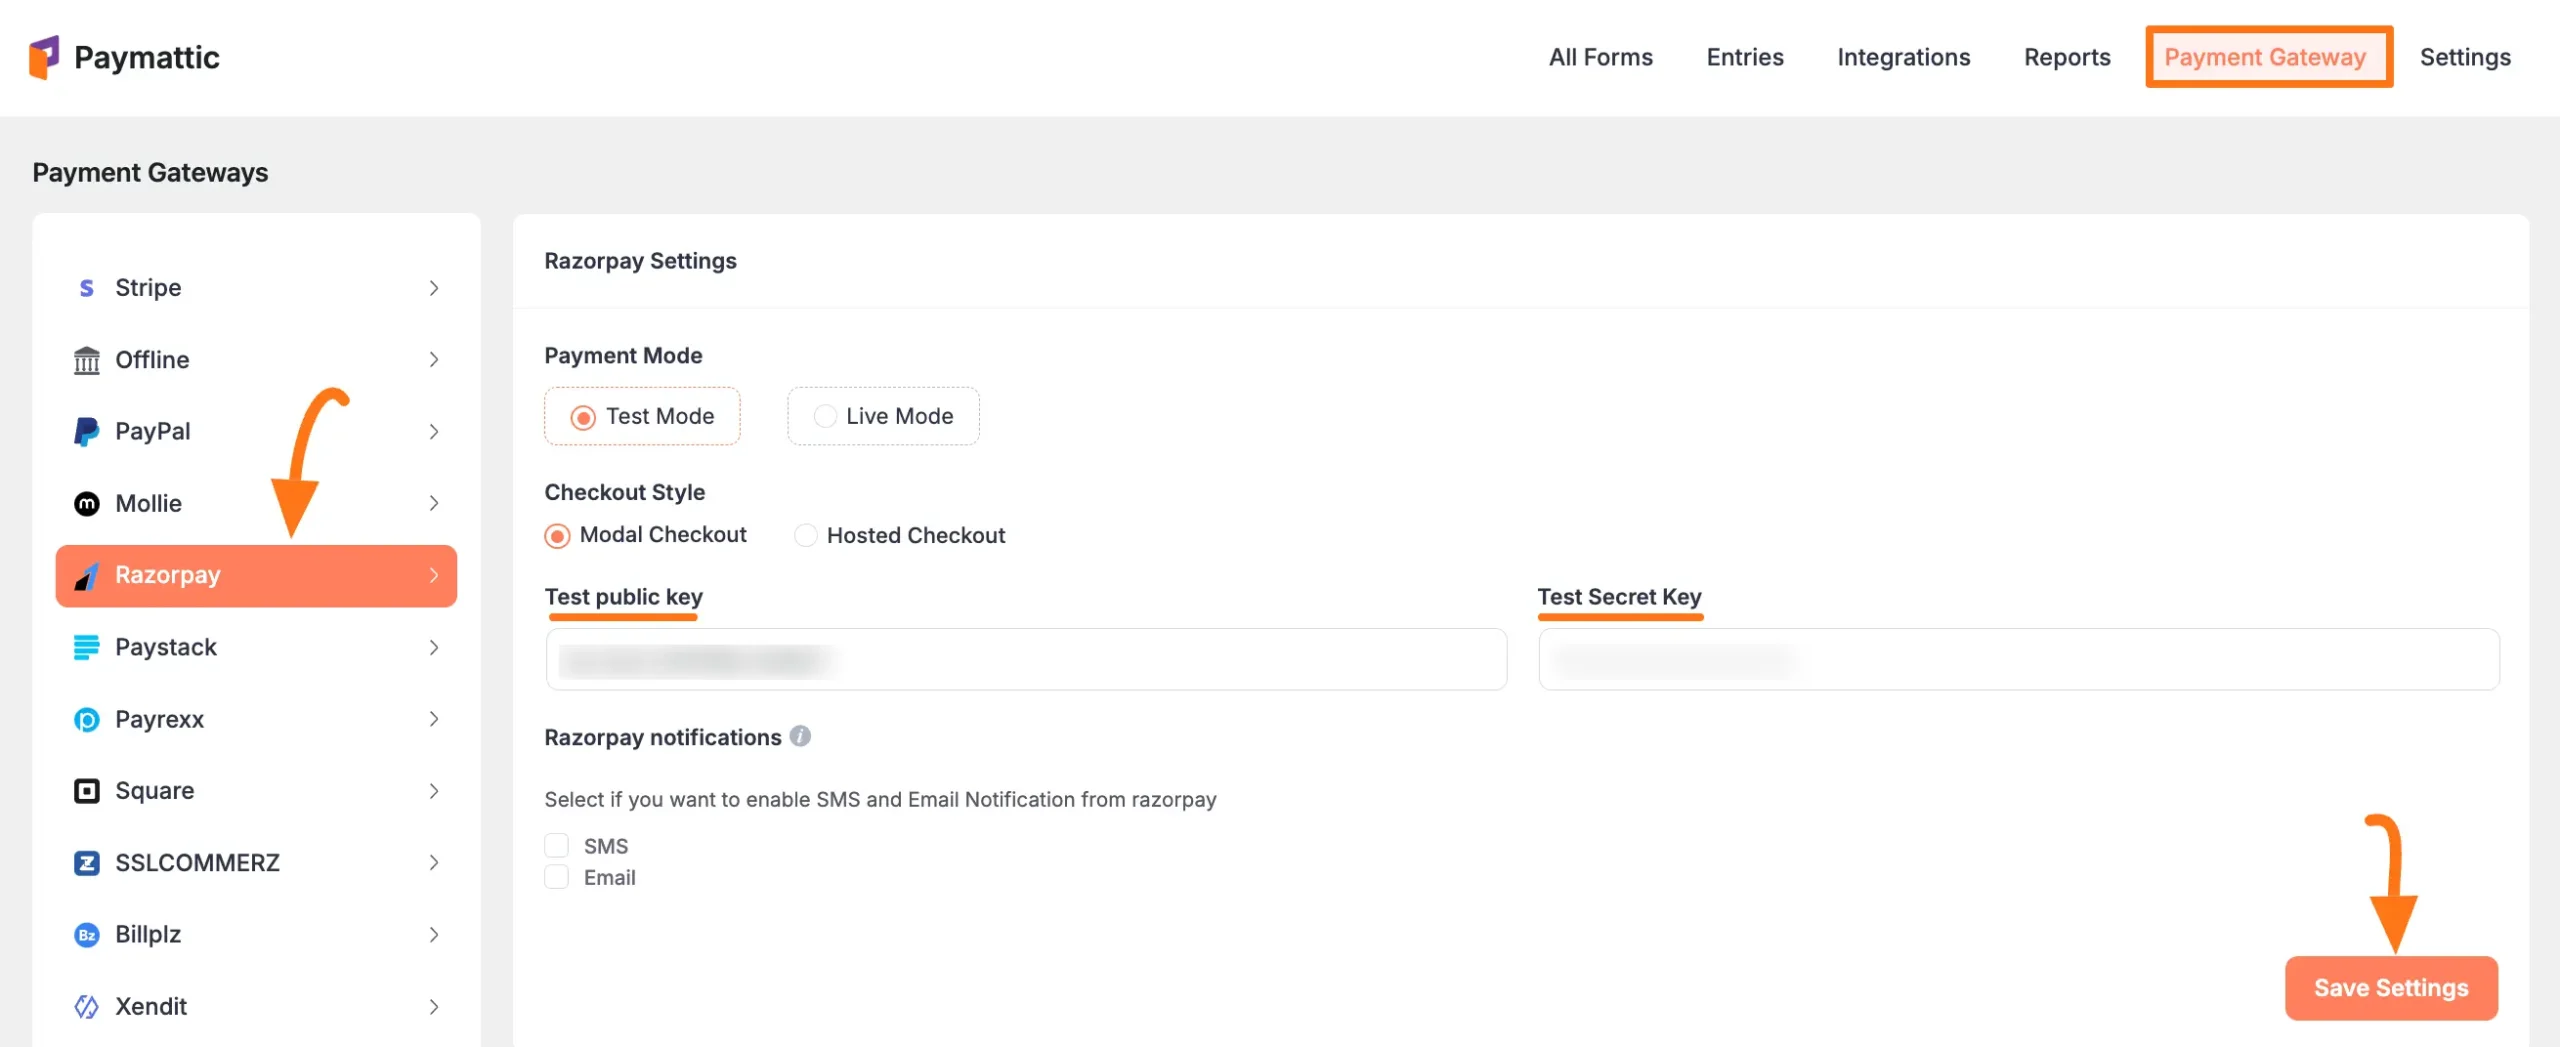
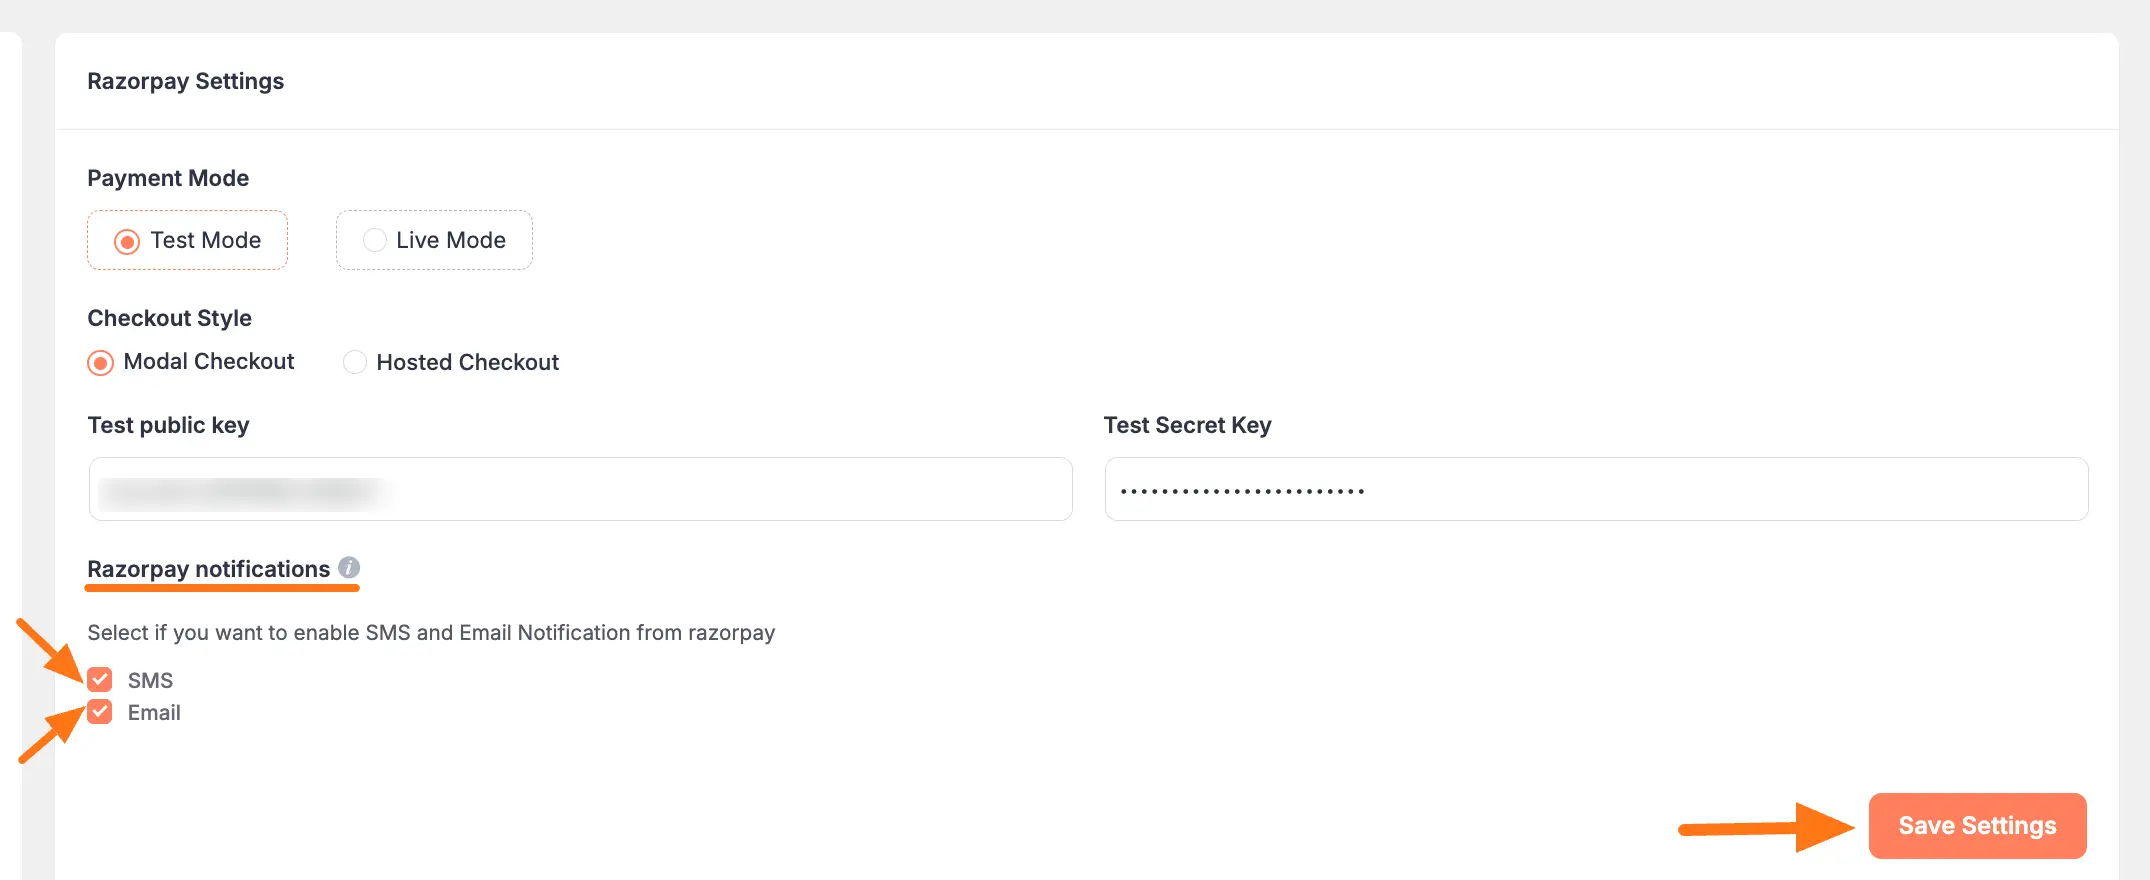
Configuring Notifications
You can configure SMS and Email notifications from Razorpay to your WordPress site to stay updated on transactions.
Notification Options
- Choose your notification methods:
- SMS - receive SMS notifications
- Email - receive email notifications
- You can select either or both options
Important
Always click Save Settings after making changes to your Razorpay settings.
Using Razorpay in Forms
Once you've completed the setup, you can add Razorpay to your forms:
For existing forms: Add it to any Payment Form
For new forms:
Learn more about adding payment methods
Note
The Razorpay payment method will not function unless you complete the configuration process properly.
Need Help?
If you have any questions, concerns, or suggestions, please contact our support team. We're here to help!