How to Integrate Square with Paymattic in WordPress
Square is a globally recognized payment gateway that you can integrate with Paymattic. This article will guide you through configuring Square in your WordPress Site with the Paymattic plugin.
Prerequisites
To get access to the Square payment gateway, you need the Paymattic Pro Plugin.
Configuring Square Payment Method
Follow these steps to configure the Square payment gateway through Paymattic:
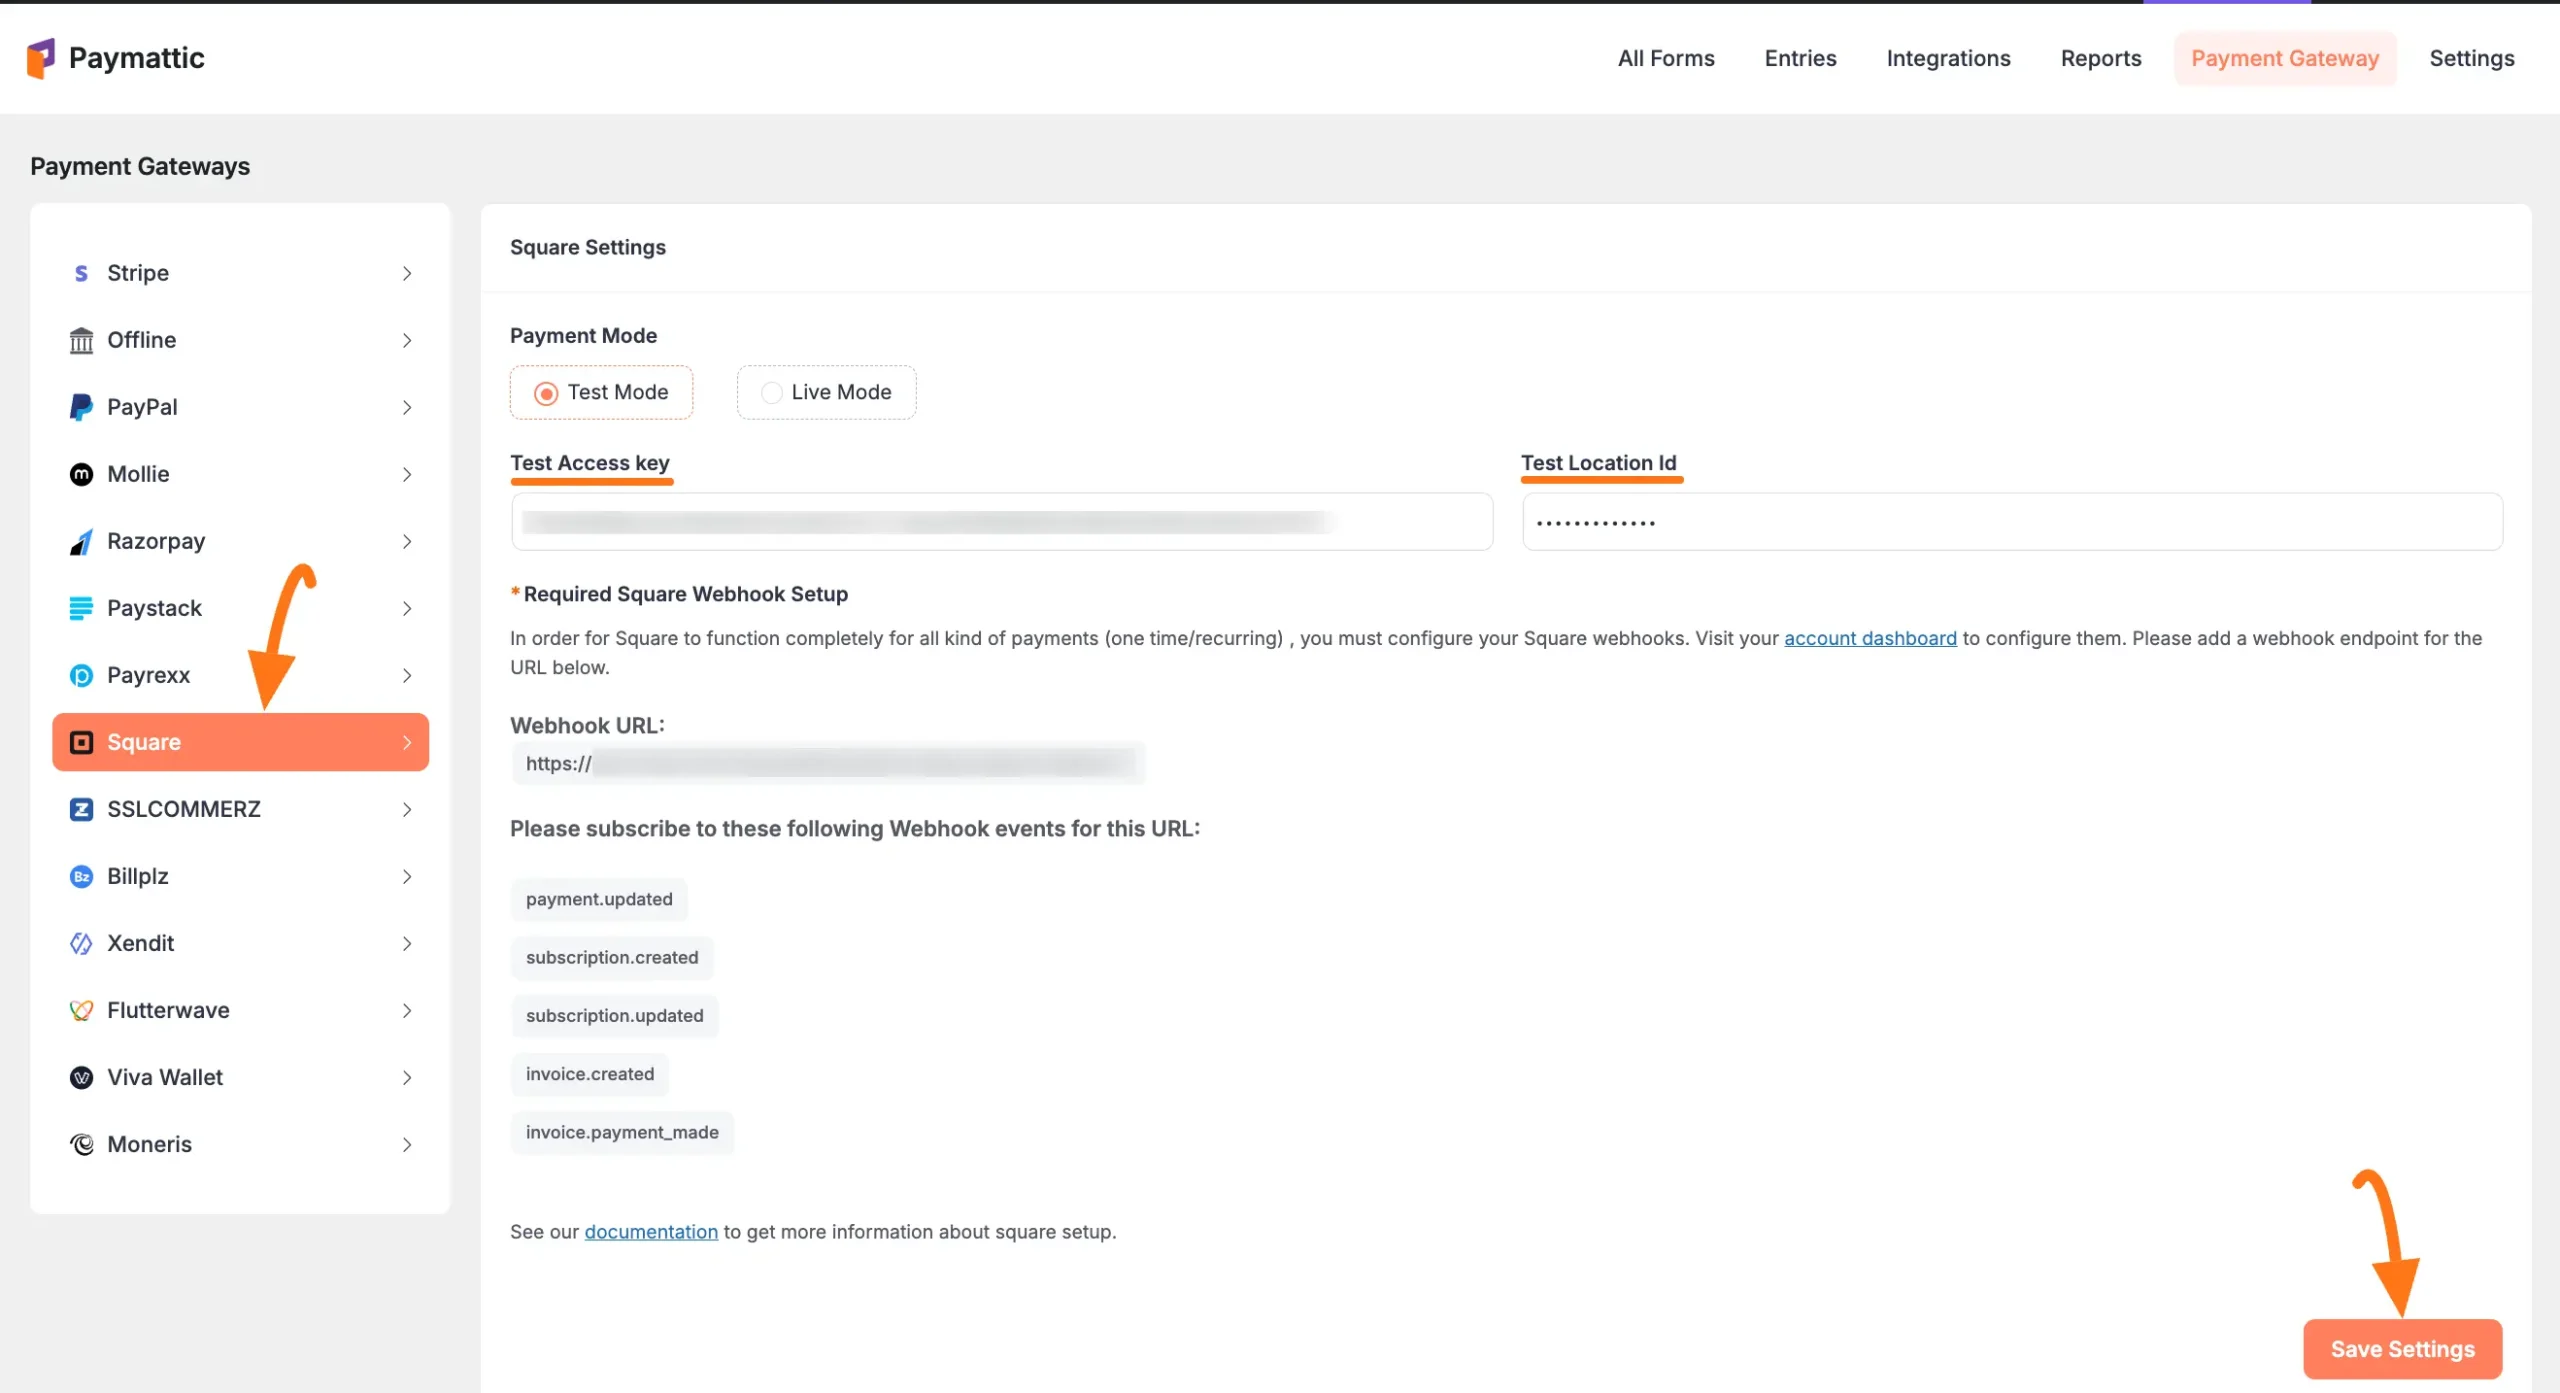
Step 1: Access Square Settings
- Go to Payment Gateway from the Paymattic Navbar
- Click the Square tab from the left sidebar
- The Square Settings page will open
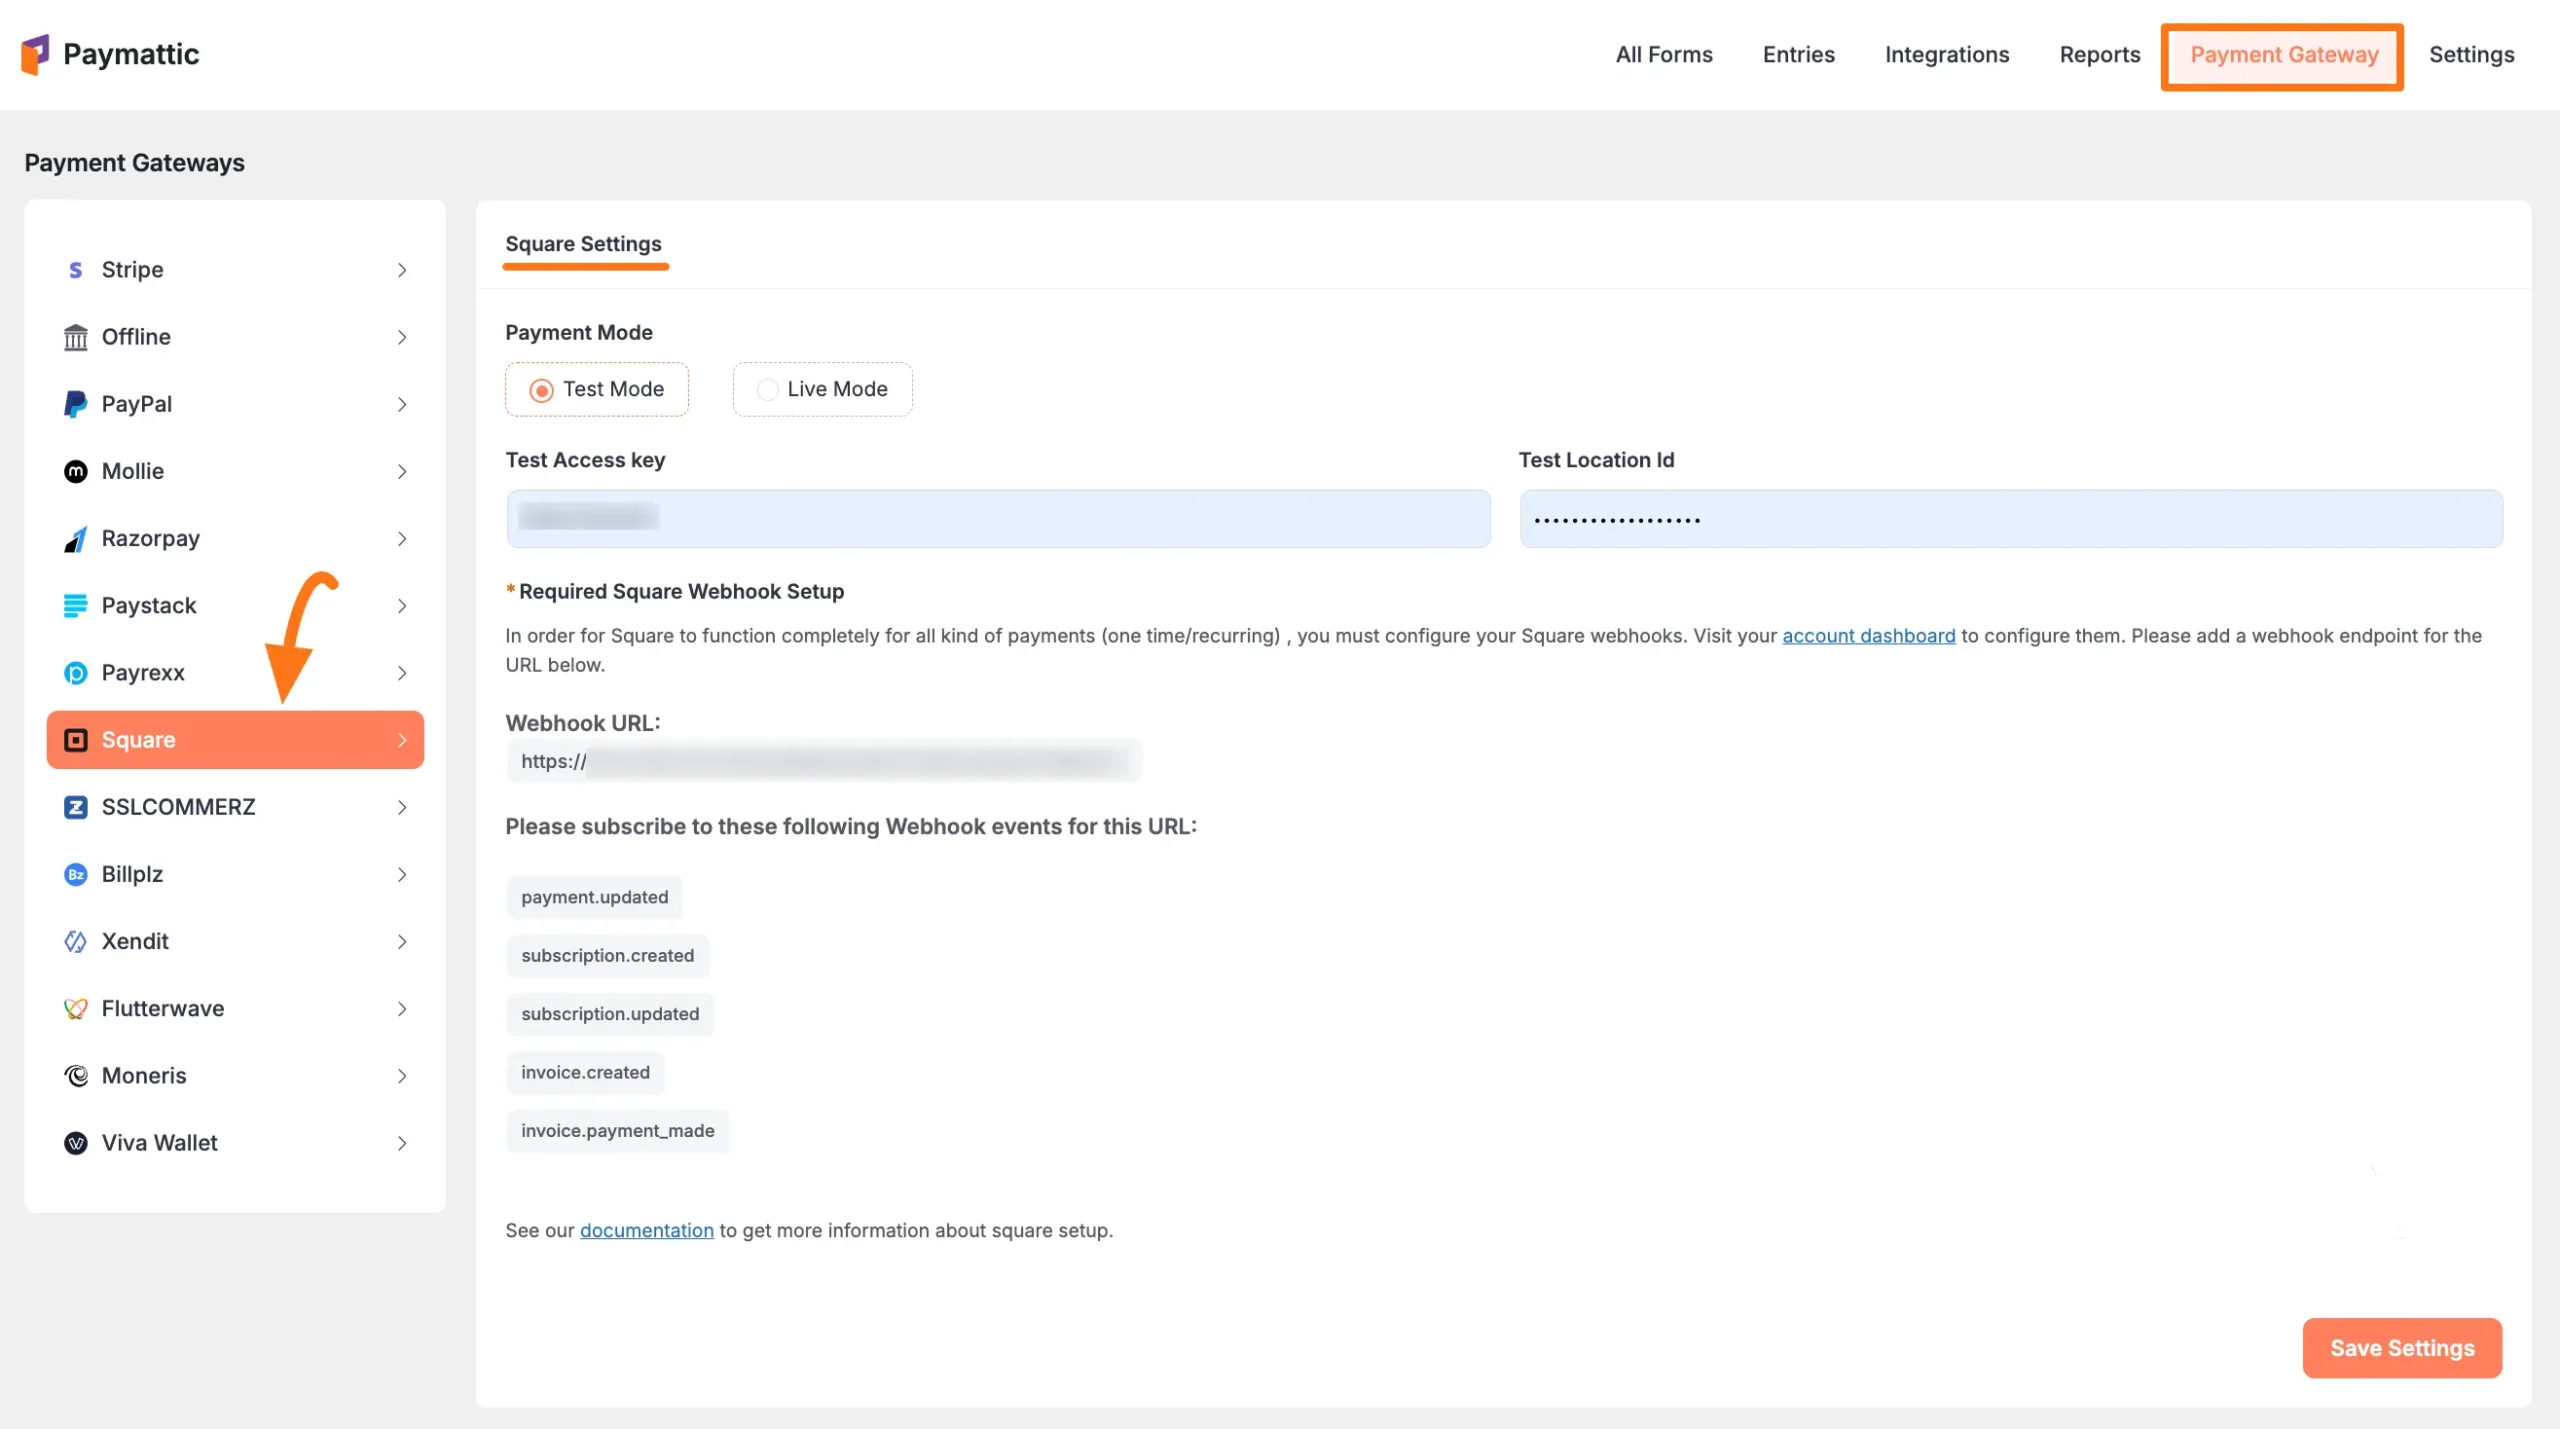
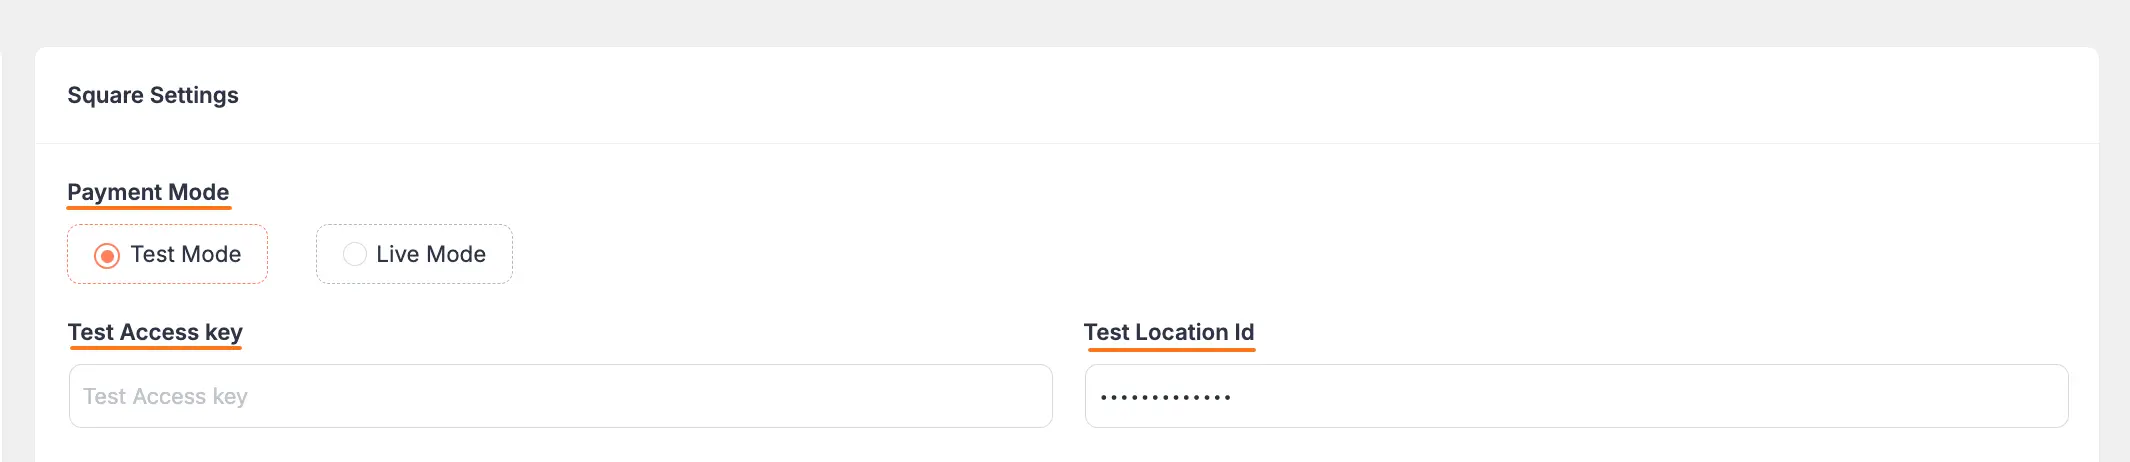
Step 2: Choose Payment Mode
Select Payment Mode: Choose between Test (for test payments) and Live (for real payments). Both options follow the same configuration process. For this example, we will use Test Mode.
Next, you need to obtain the Access key and Location ID from your Square Account.
Step 3: Get Square Credentials
To learn how to get an Access Token and Location ID from your Square account, follow the steps below.
- Note: To get the credentials for configuration, you need to create an app in your Square account. The following steps will guide you on how to do this.
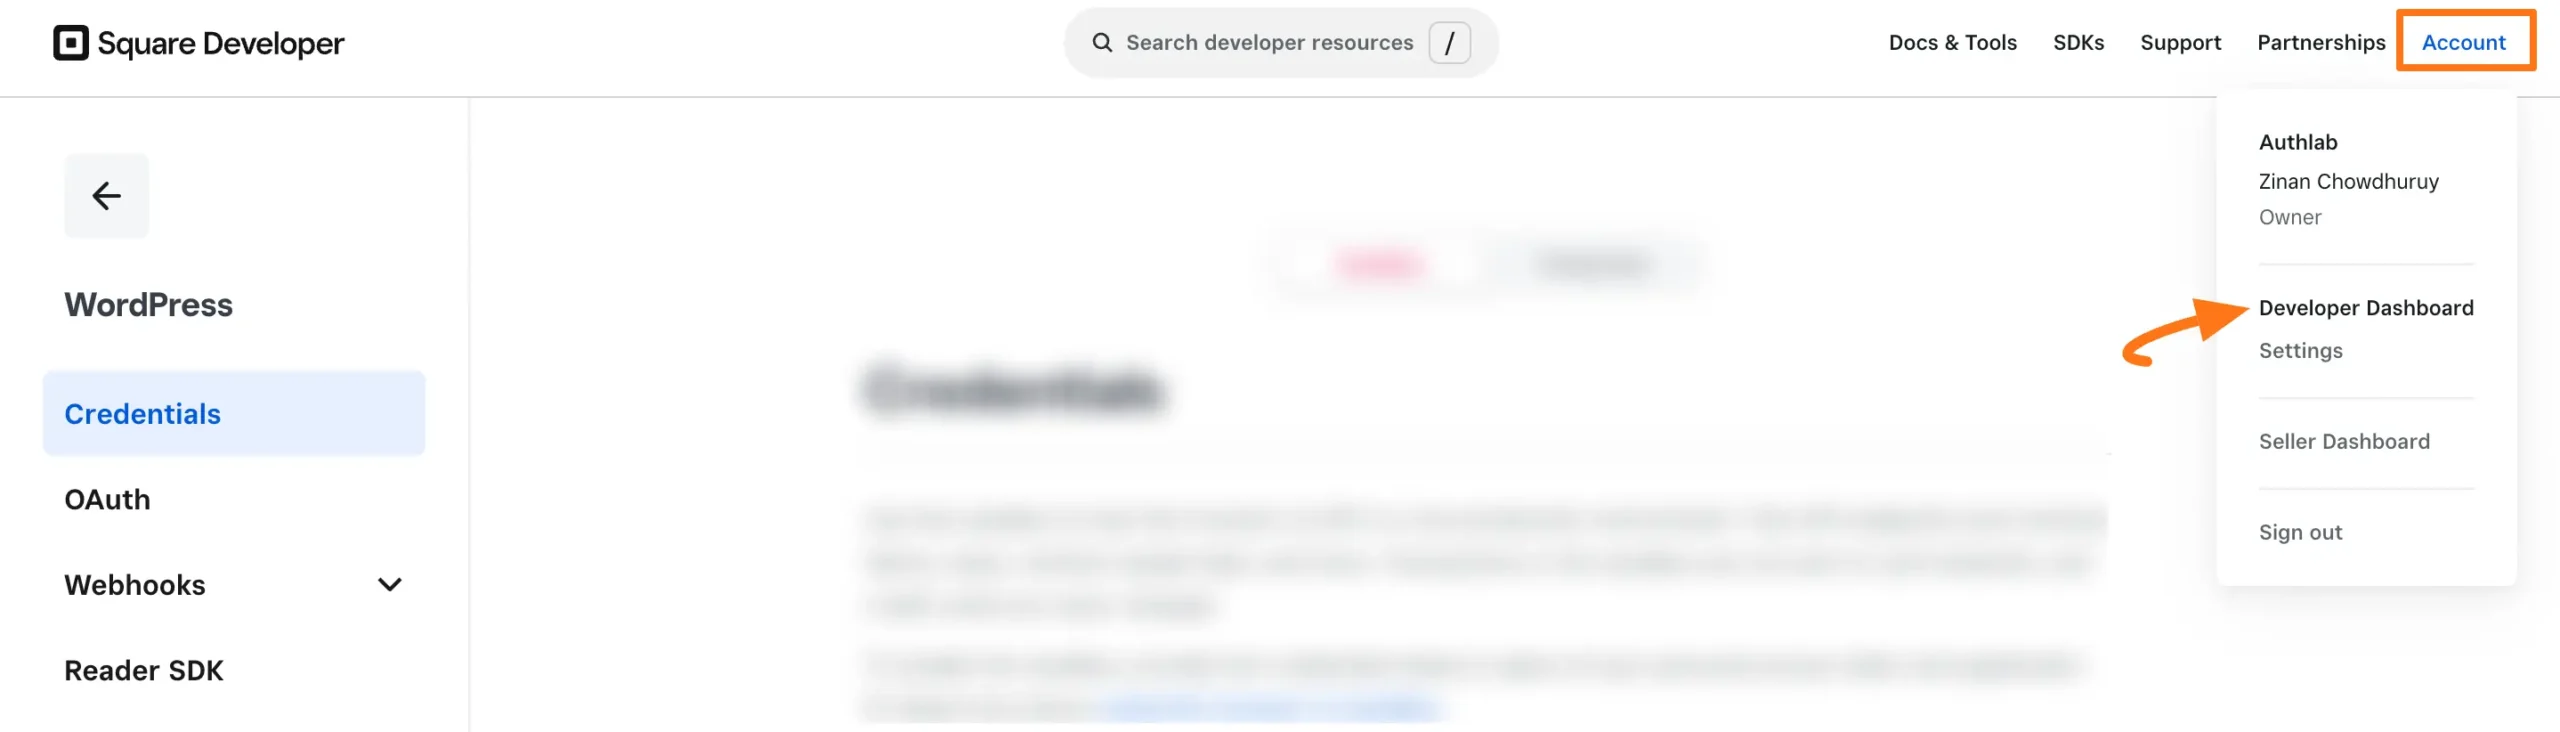
First, log in to your Square account. If you do not have an account, you must sign up first.
Once you log in to the Square Dashboard, go to the Account section from the navigation bar.
Click the Developer Dashboard tab.
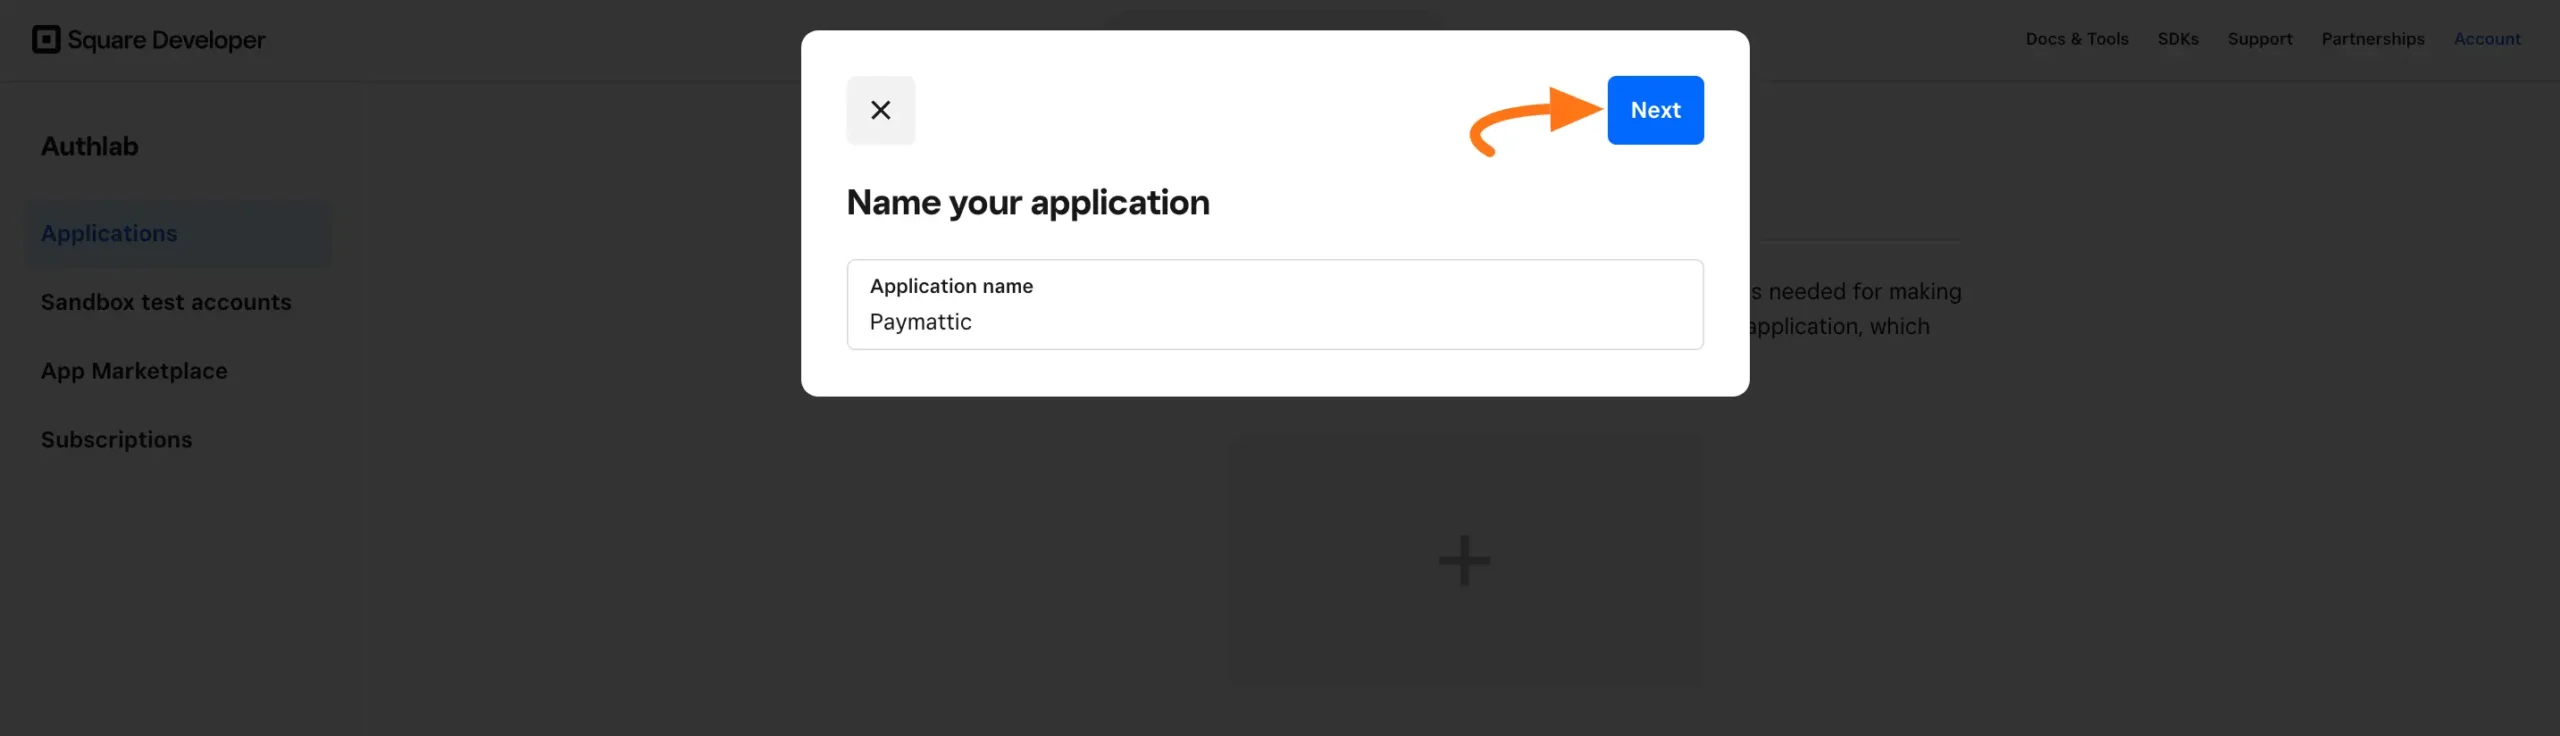
- Under the Applications tab click on the Plus Icon to create a new application
![]()
- Configure your application:
- Enter a Name for your application
- Click Next
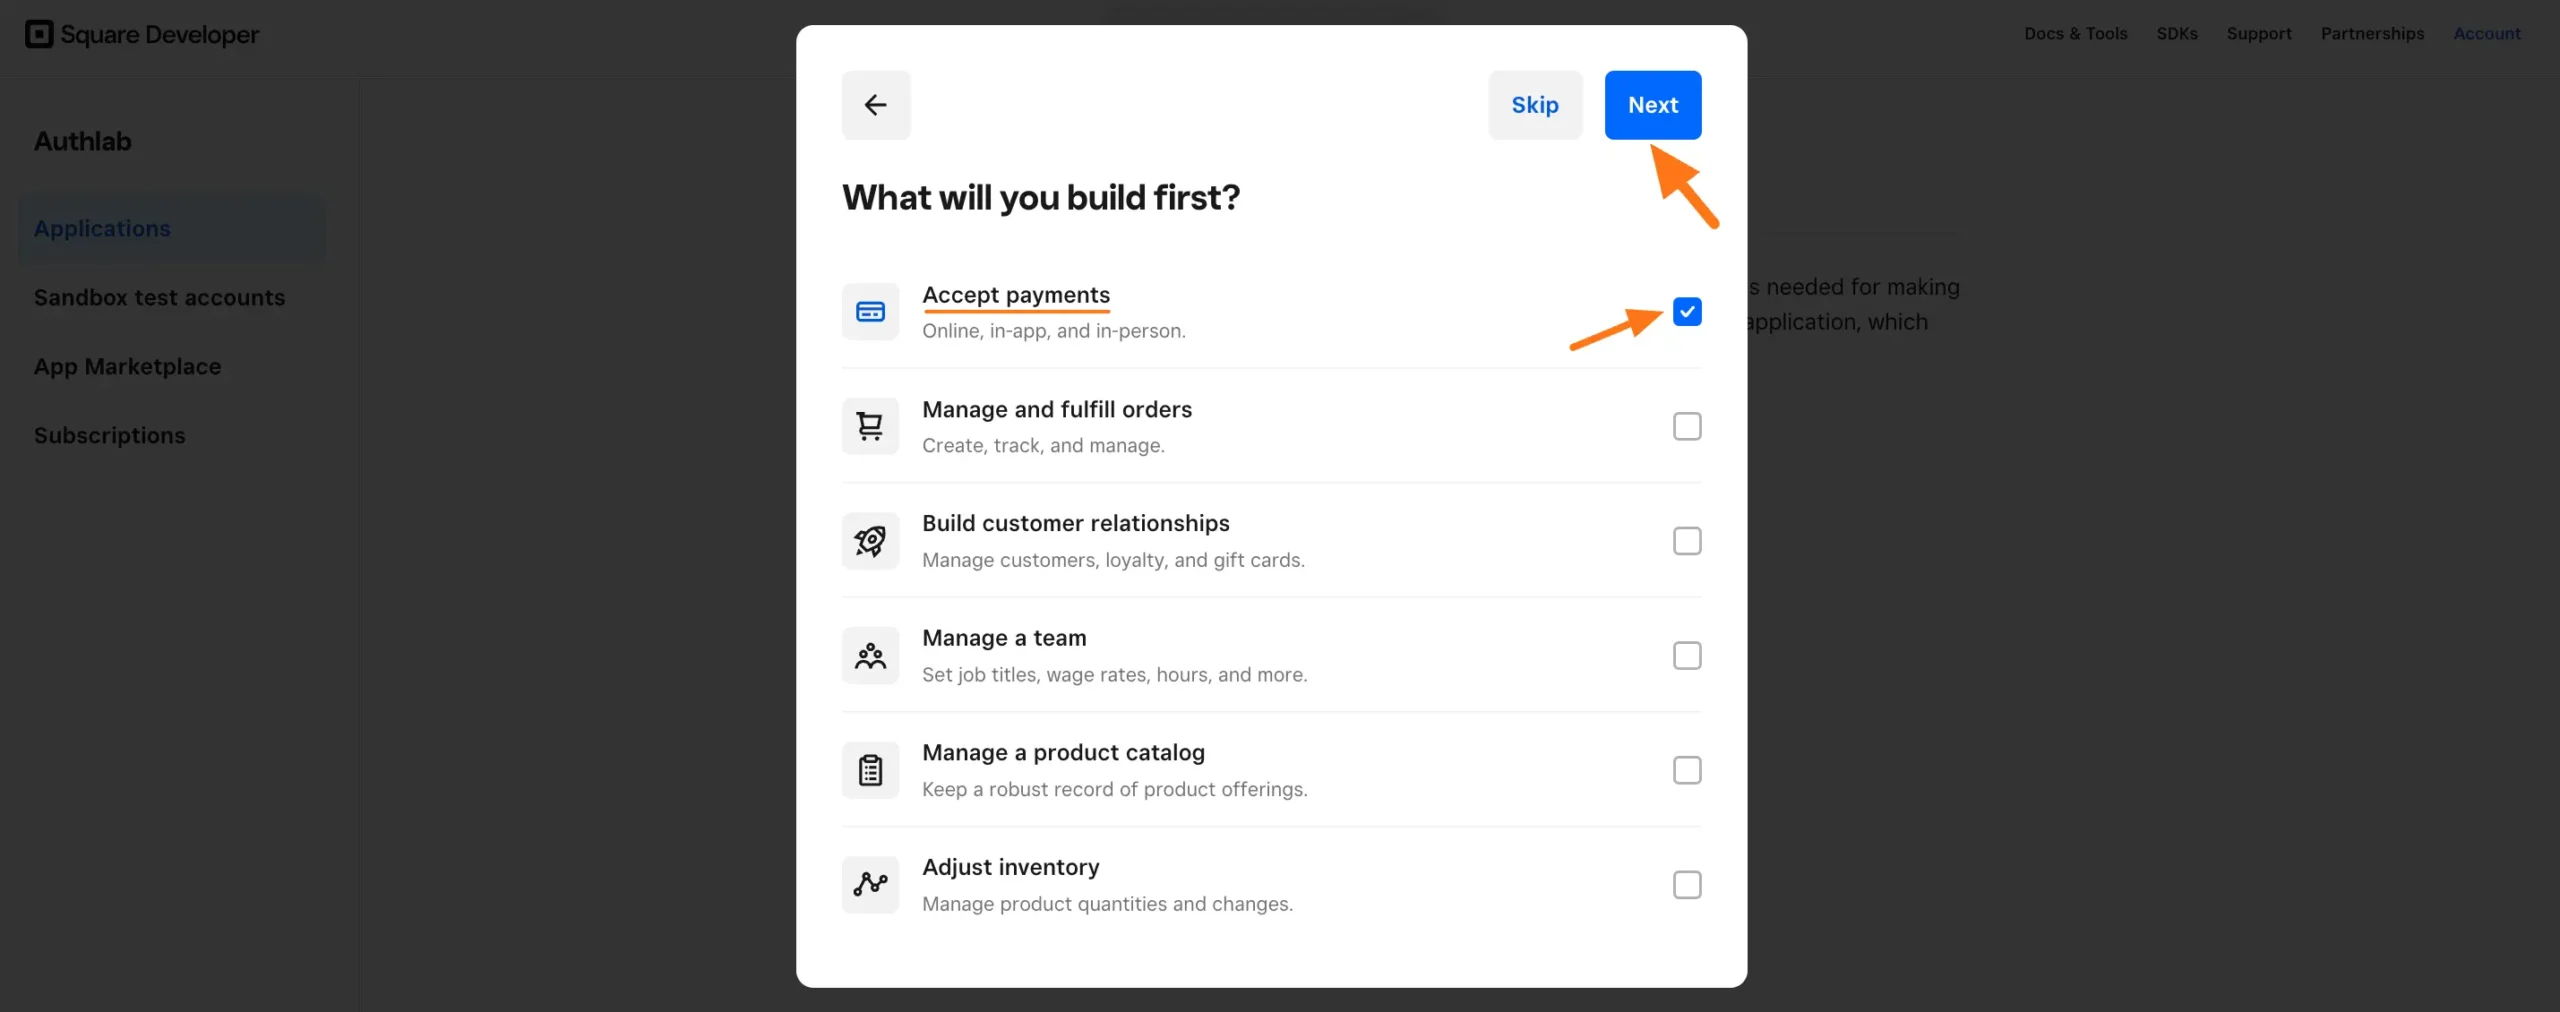
- Set application permissions:
- Check the Accept Payments box
- Click Next
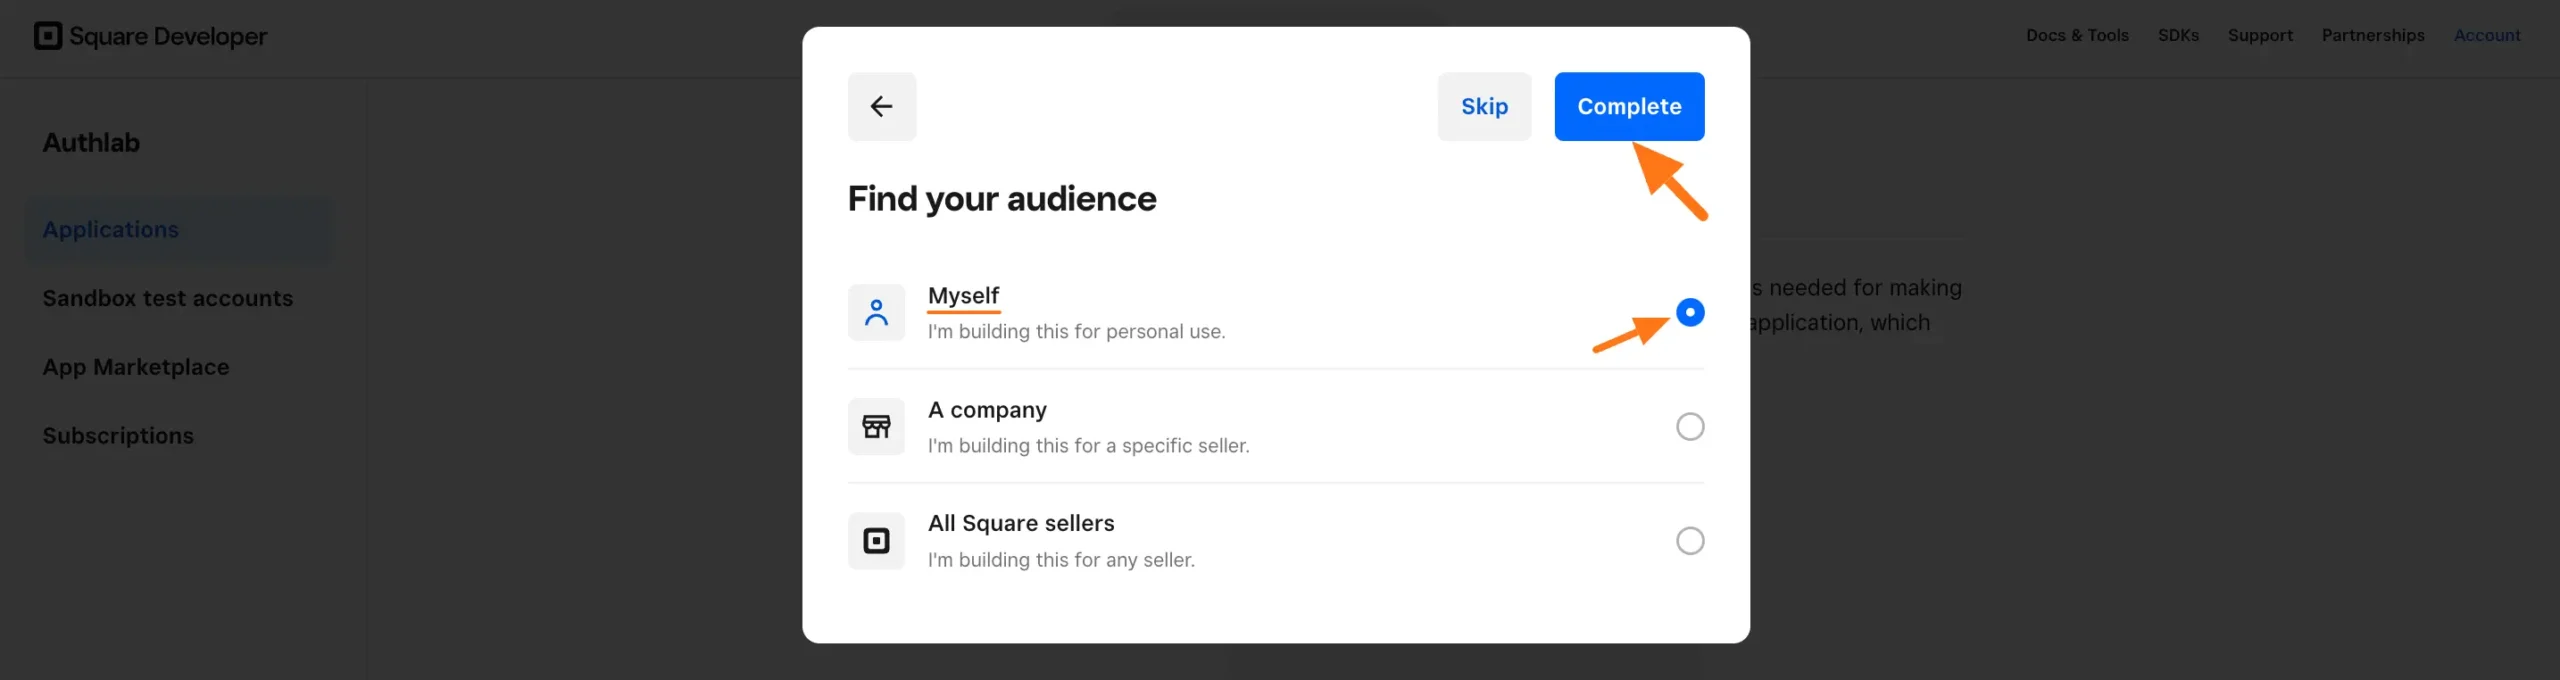
- Complete setup:
- Select your desired audience option
- Click Complete
Get Access Token and Location ID
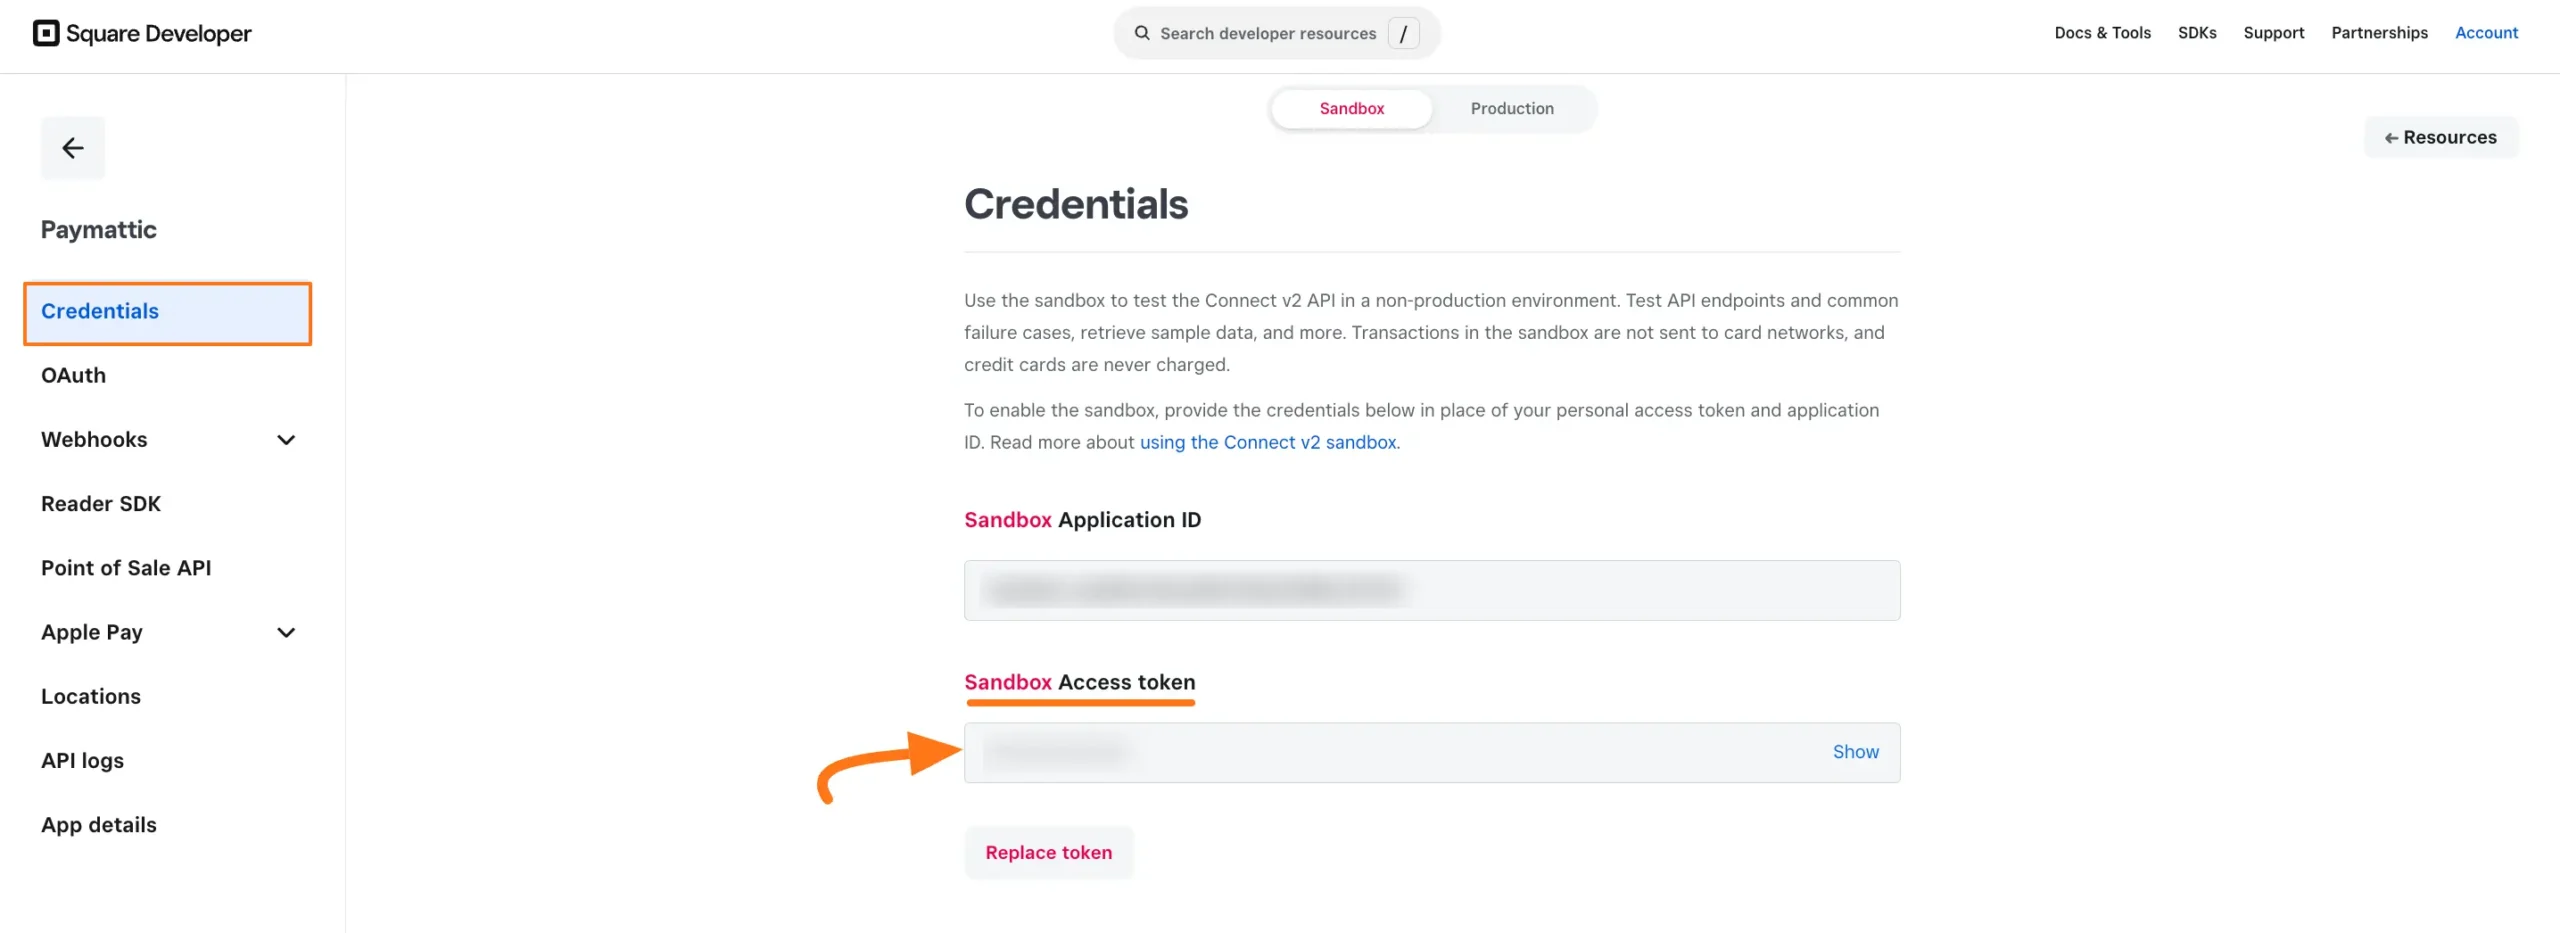
- Get Access Token:
- Find the Sandbox Access Token under Credentials
- Copy the token
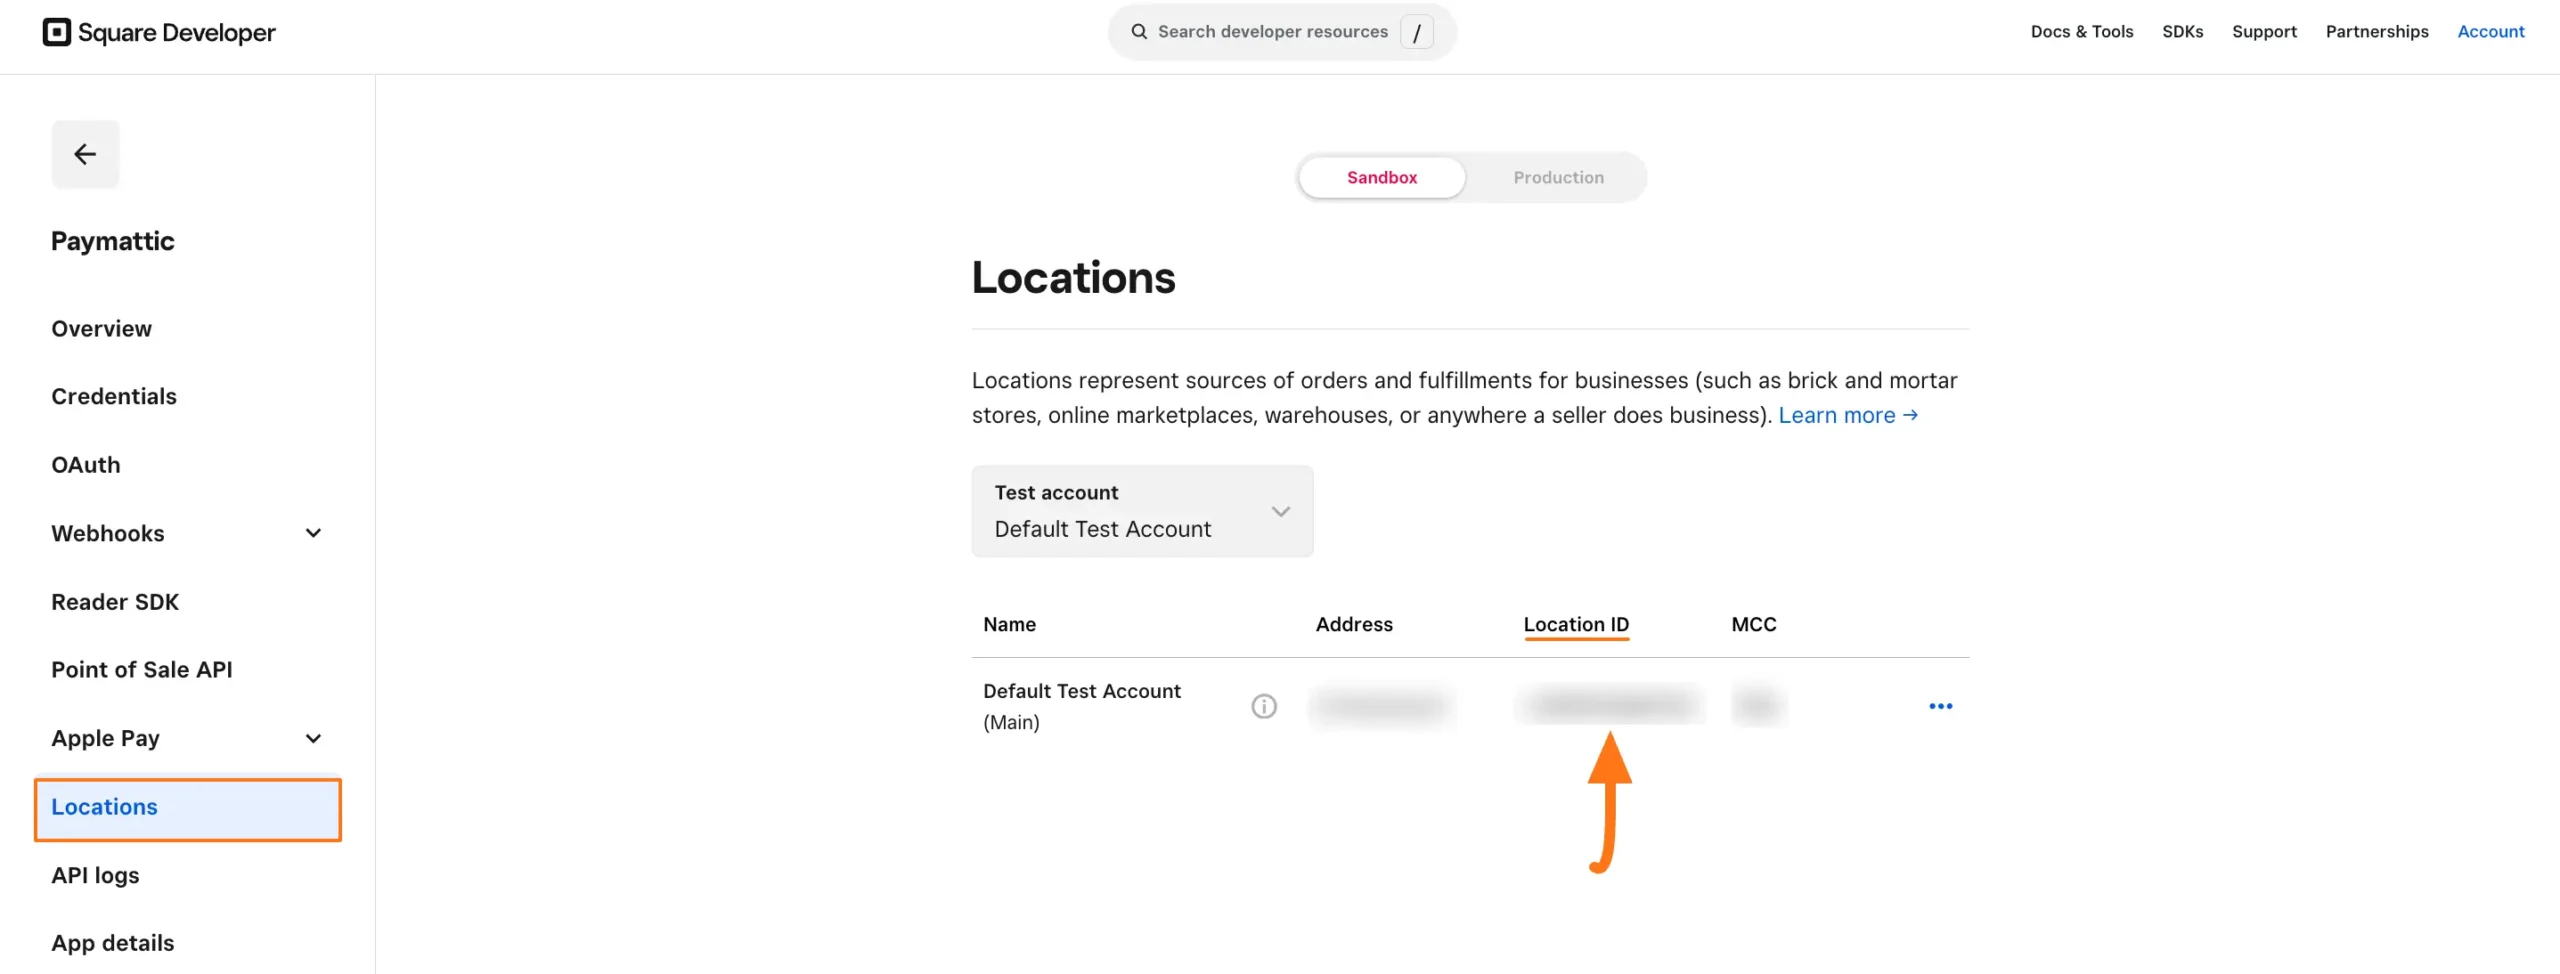
- Get Location ID:
- Go to the Locations tab in the left sidebar
- Copy your Location ID
Step 4: Configure in Paymattic
Go back to your WordPress dashboard and navigate to Paymattic → Payment Gateway, then click the Square tab.
Paste the copied Access Token into the Access key field.
Next, paste the copied Location ID into the Location ID field.
Finally, press the Save Settings button.
Your Square account will now be integrated with Paymattic for your WordPress Site.
Configuring Webhooks
Important
To ensure your Square dashboard and Paymattic dashboard stay synchronized and fully functional for all payment types (one-time/recurring), you must configure Square Webhooks.
Step 1: Get Webhook Details
To learn how to configure Square Webhooks for your WordPress Site, follow the steps with the screenshots below.
- Important: To ensure your Square dashboard and Paymattic dashboard are in sync and fully functional for all kinds of payments (one-time/recurring), you must configure the Square Webhooks.
First, you need to copy the webhook details from Paymattic.
- Copy the Webhook URL.
- Copy the recommended Webhook Events.
You will need them in the next steps to configure Square Webhooks on your WordPress Site.

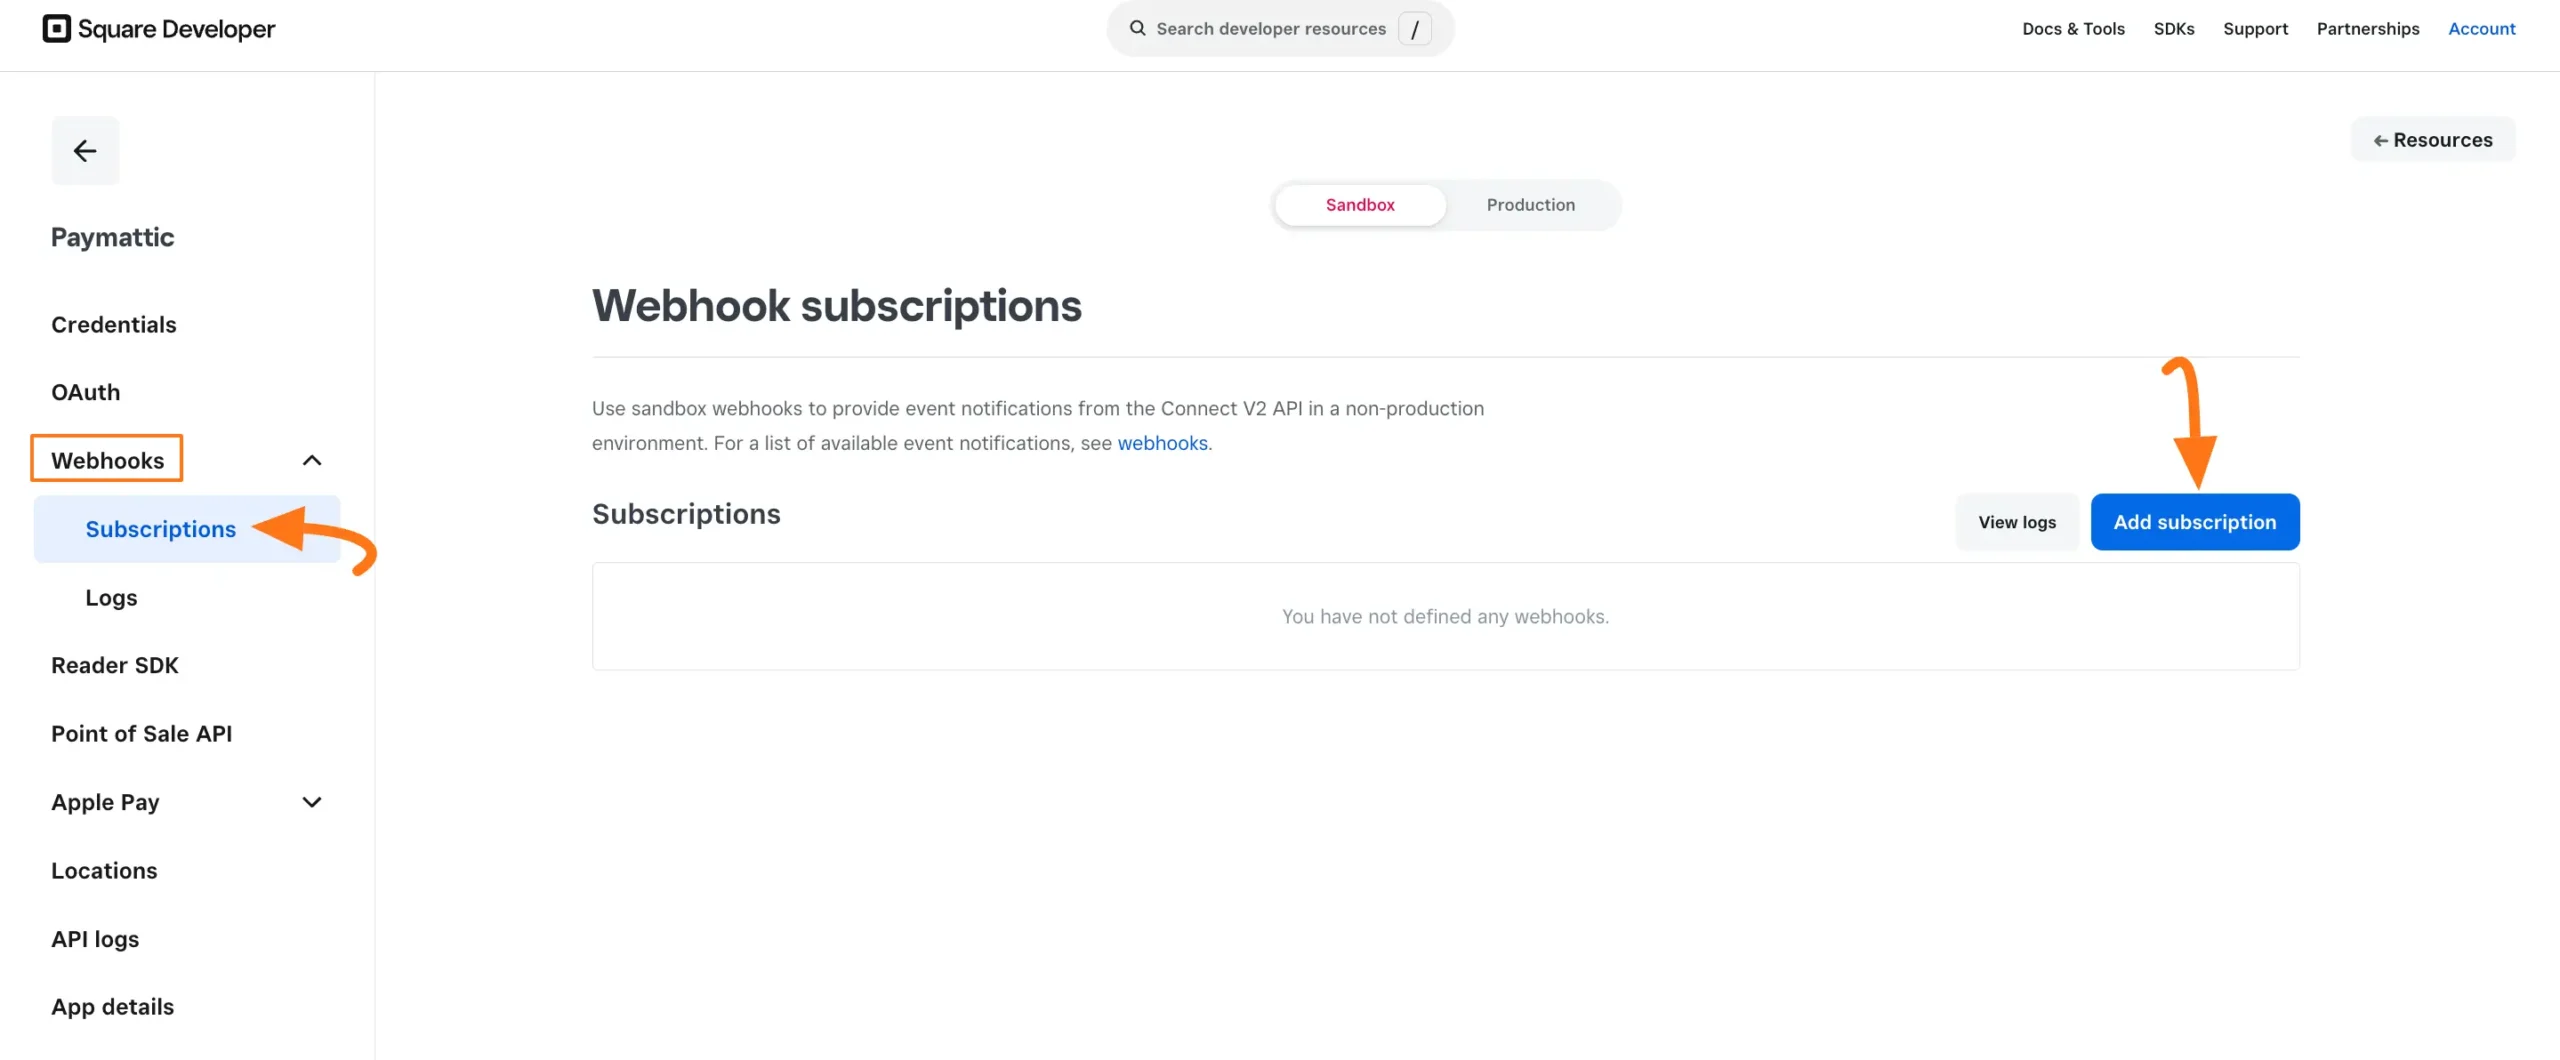
Step 2: Configure in Square
Now, go to the Square Developer Dashboard and follow these steps:
Click on the Webhooks section from the left sidebar.
Open the Subscriptions tab.
Click the Add Subscription button.
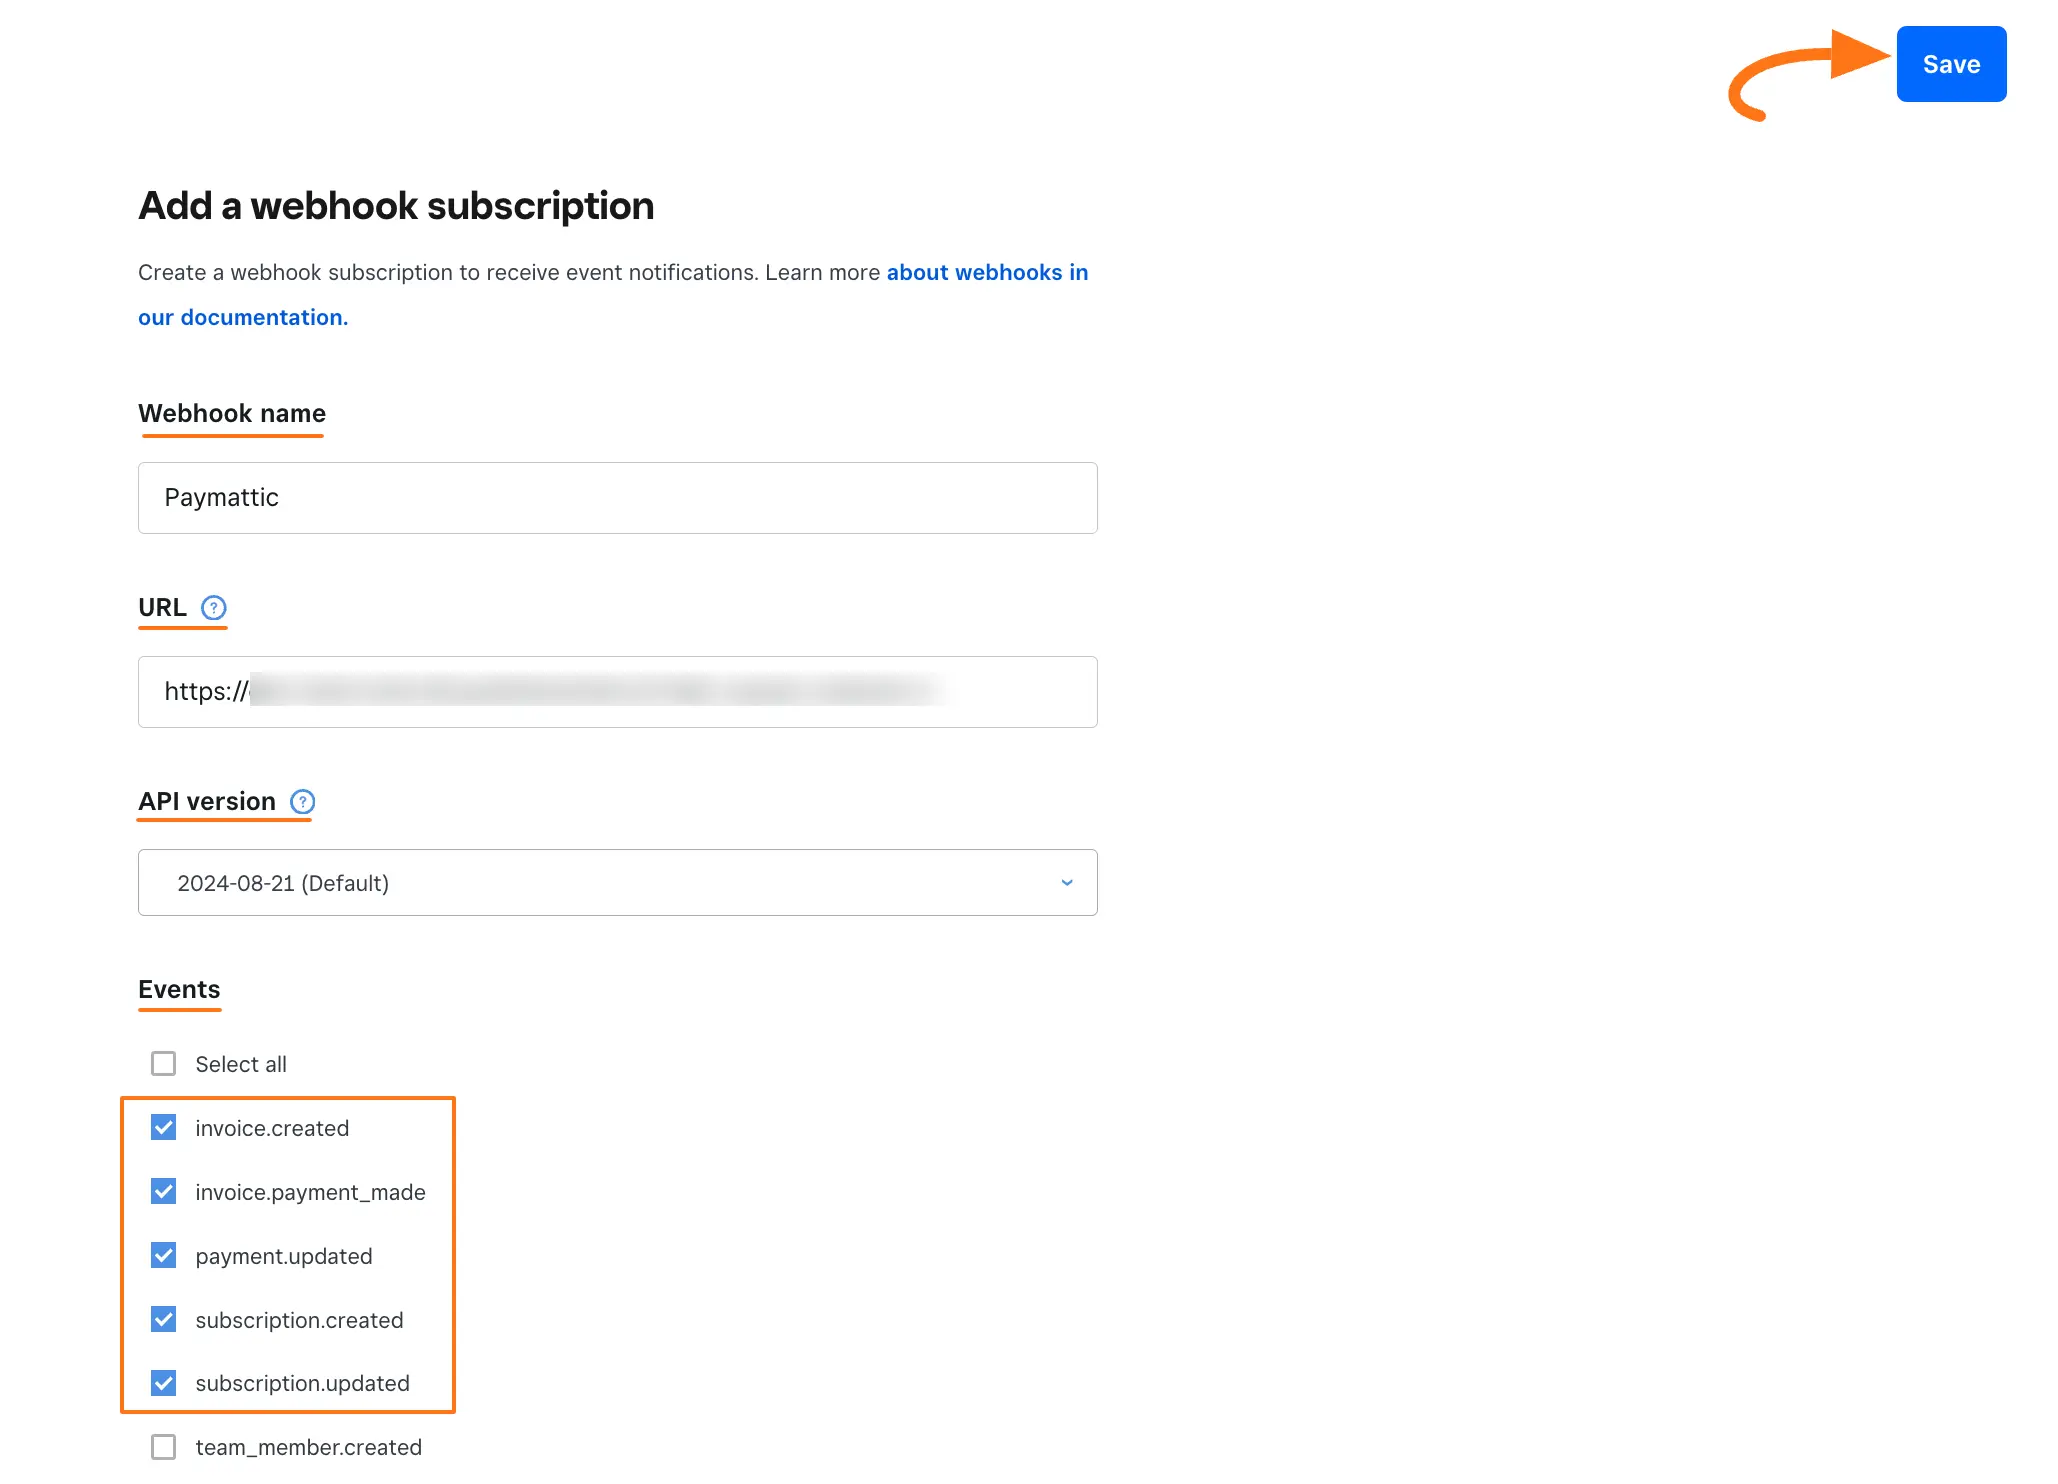
- Configure the webhook:
- Give it a Name
- Paste the Webhook URL from Paymattic
- Confirm your API version
- Select the recommended events
Webhook Events
The recommended events and their purposes:
invoice.created
- Triggers when an invoice is created
- Occurs after order placement or subscription billing cycle start
invoice.payment_made
- Triggers on successful payment completion
- Covers both partial and full payments
payment.updated
- Triggers when payment status changes
- Includes completions, declines, and refunds
subscription.created
- Triggers when a customer subscribes to a plan
subscription.updated
- Triggers when subscription details change
- Covers status changes (paused/resumed/canceled)
- Includes billing cycle or pricing updates
- Click Save to complete the webhook configuration
Using Square in Forms
Once you've completed the setup, you can add Square to your forms:
For existing forms: Add it to any Payment Form
For new forms:
Learn more about adding payment methods
Note
The Square payment method will not function unless you complete the configuration process properly.
Need Help?
If you have any questions, concerns, or suggestions, please contact our @support team. We're here to help!