How to Add Custom Payment Amount Field in WordPress with Paymattic
Paymattic provides a Custom Payment Amount field that allows users to enter their own payment amount. This feature is perfect for donations, flexible pricing, or any scenario where users need to specify their own payment value.
Adding Custom Payment Amount Field
To add the Custom Payment Amount field to your Paymattic Form, follow these steps:
First, go to the All Forms section from the Paymattic Navbar, choose a Form, and click the Pencil/Edit icon to open the Editor page of that form.
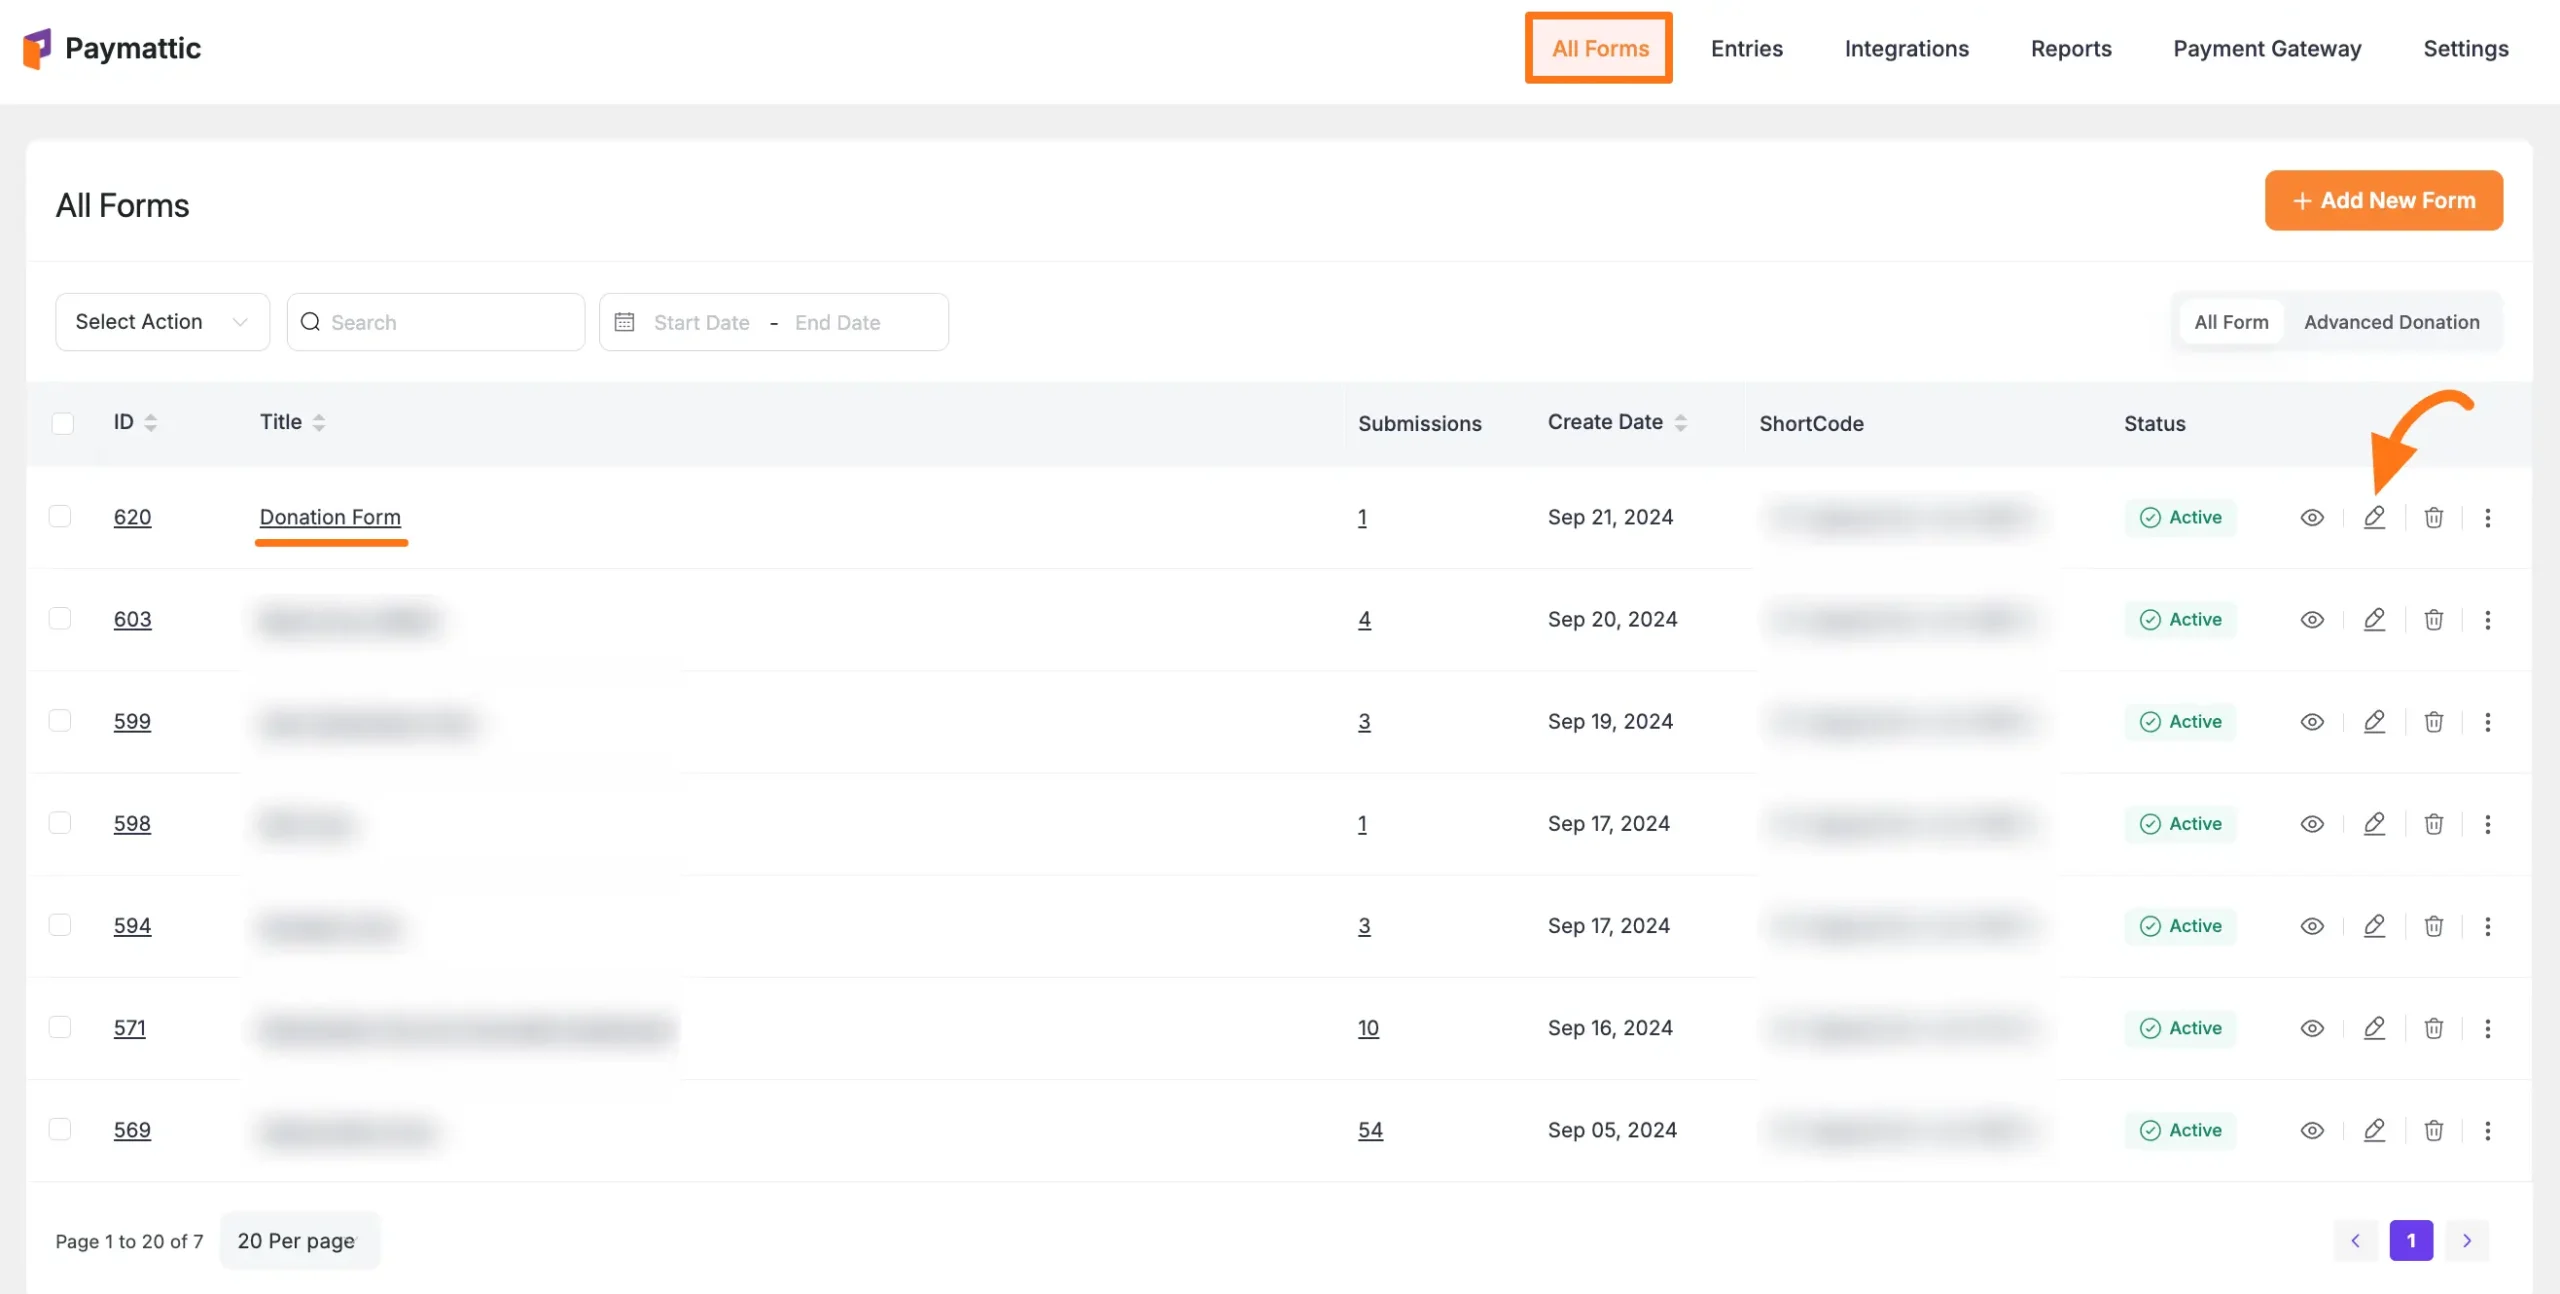
Once you open the Editor page, add the Custom Payment Amount field by either:
- Typing "/" in the editor
- Clicking the Plus Icon at the bottom
Required Fields
Always include these fields at the start of your form:
- Name Field
- Email Field
- Payment Method Field (for processing payments)
![]()
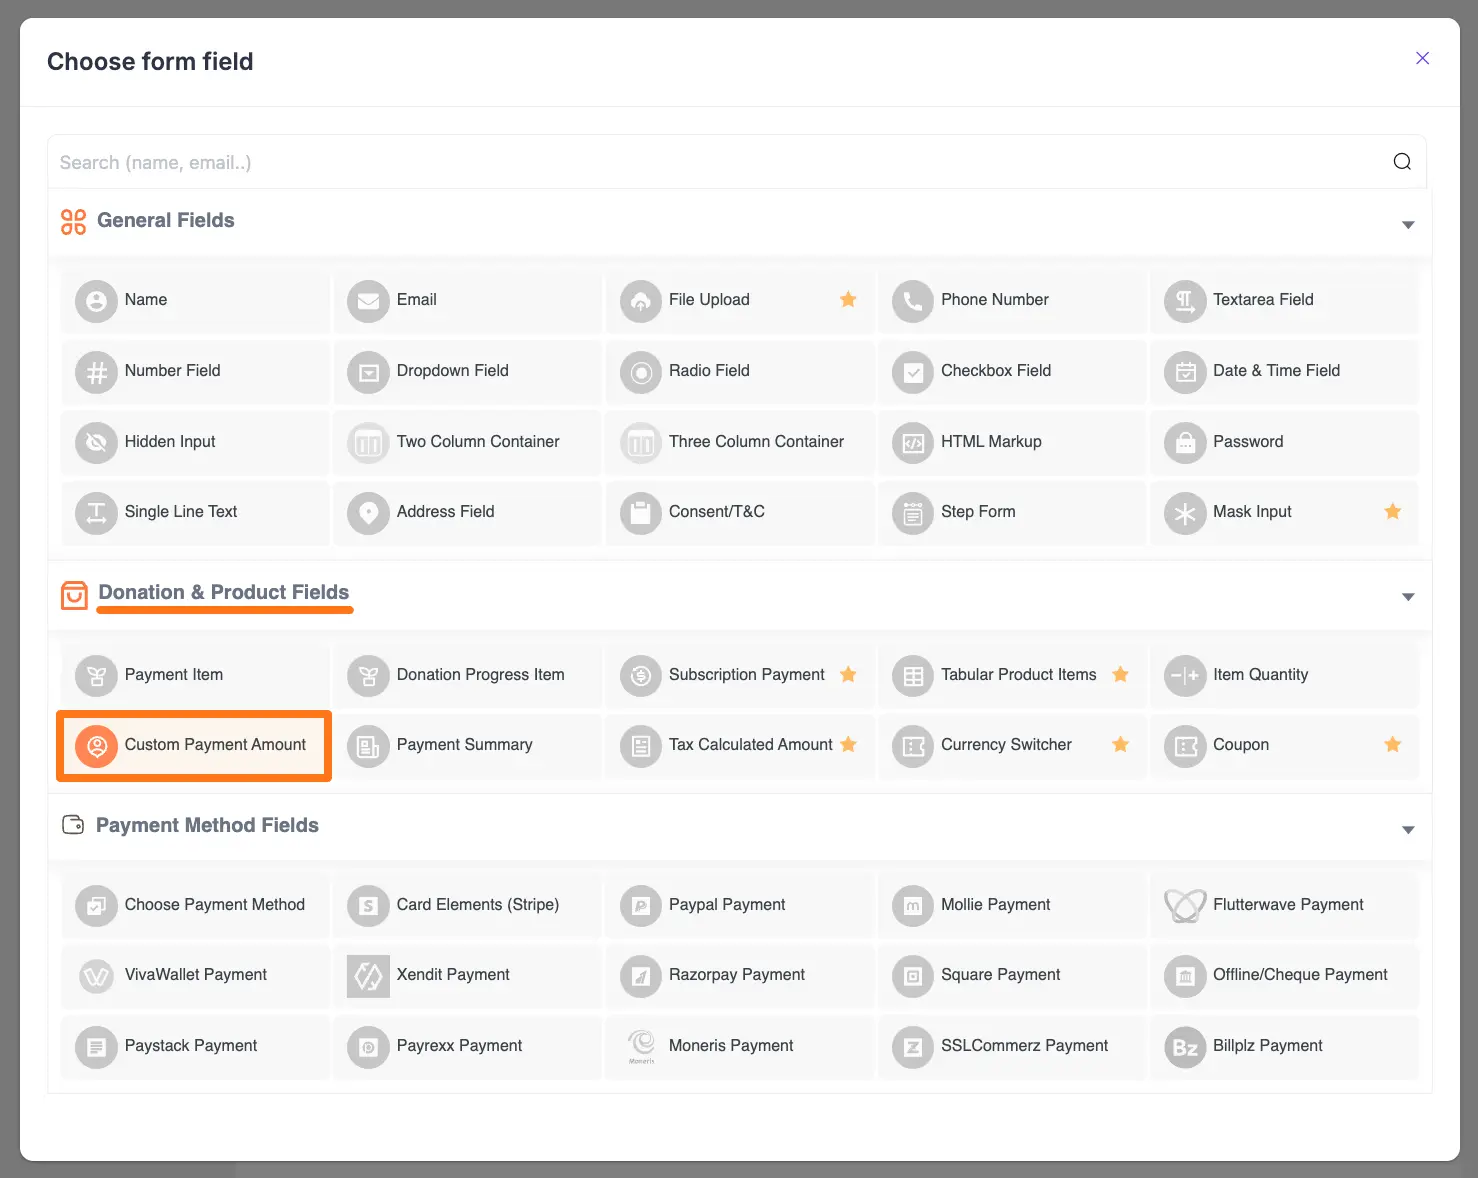
Select the Custom Payment Amount field under the Donation & Product Fields section:
Customizing the Field
To customize the Custom Payment Amount field, click the Settings Icon in the right corner:
![]()
General Settings
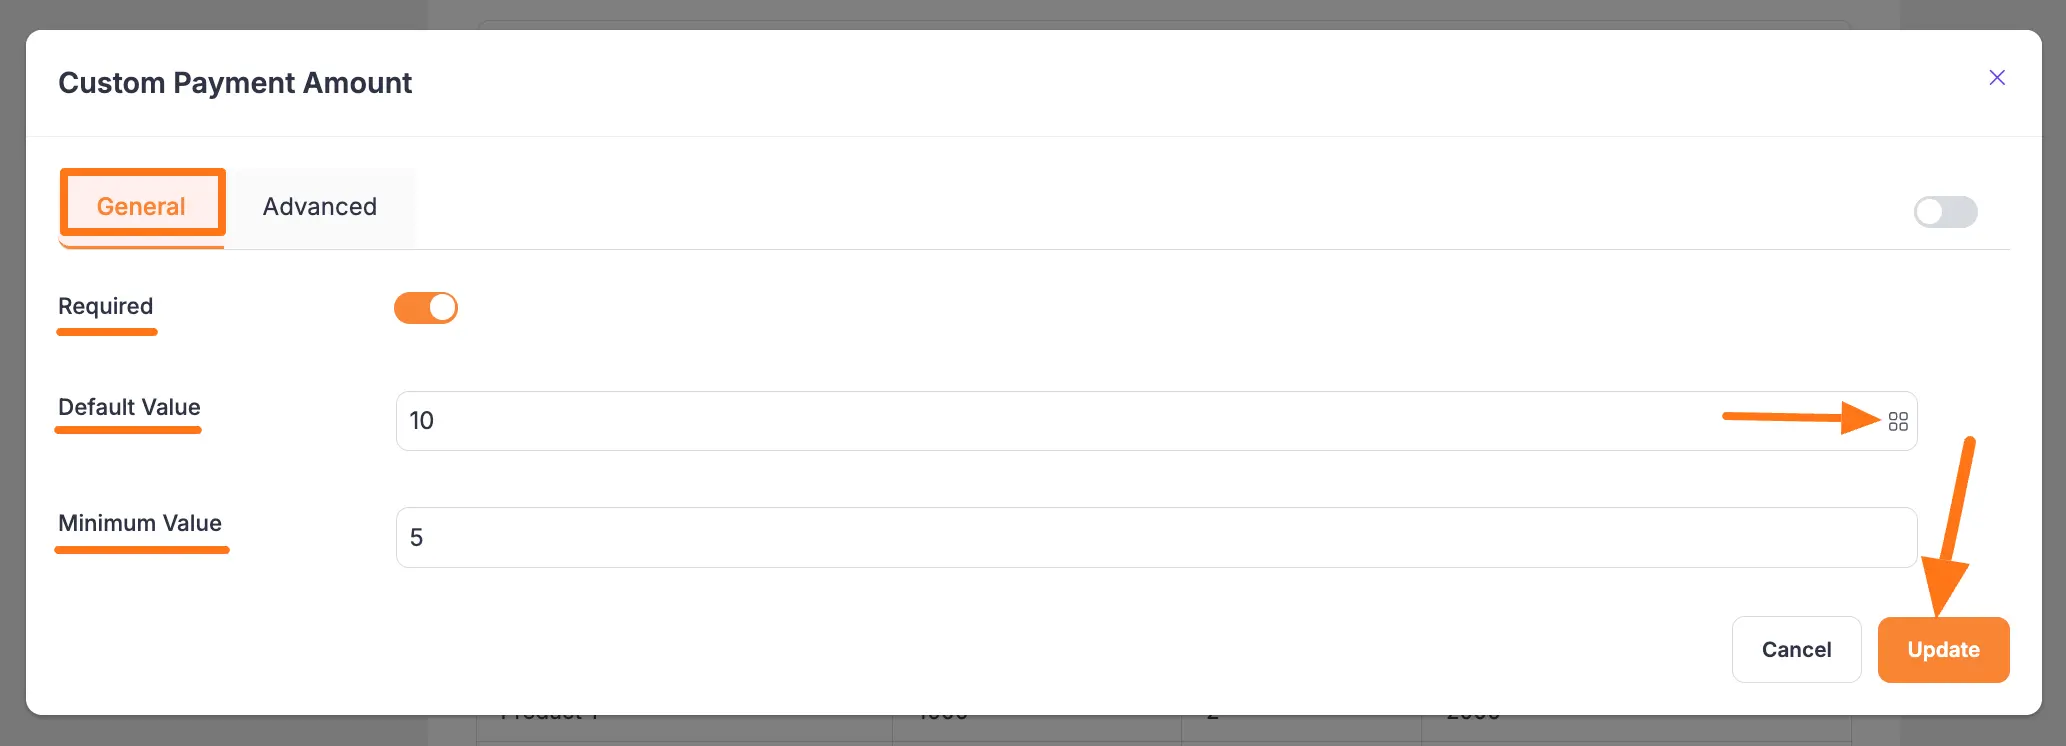
The following settings are available under the General Tab for a field that allows users to enter their own payment amount (e.g., a Custom Payment Amount or Donation field).
Required
Enable this toggle to make this field mandatory. If this option is turned on, a user will not be able to submit the form without entering a value in this field.
Default Value
You can set a pre-filled amount that will appear in the field when the page loads.
- This field also supports Smartcodes for dynamic values. For example, you can use a Smartcode like
{querystring:YOUR_KEY}by clicking the Shortcode Icon. This allows you to populate the amount from a URL parameter, which is useful for custom payment links.
Minimum Value
With this option, you can specify the minimum amount that a user must enter to proceed with the payment. If the user enters a value lower than what you set here, they will be prompted to enter a higher amount.
Once you have finished, click the Update button at the top of the form editor to save all your configurations.
Advanced Settings
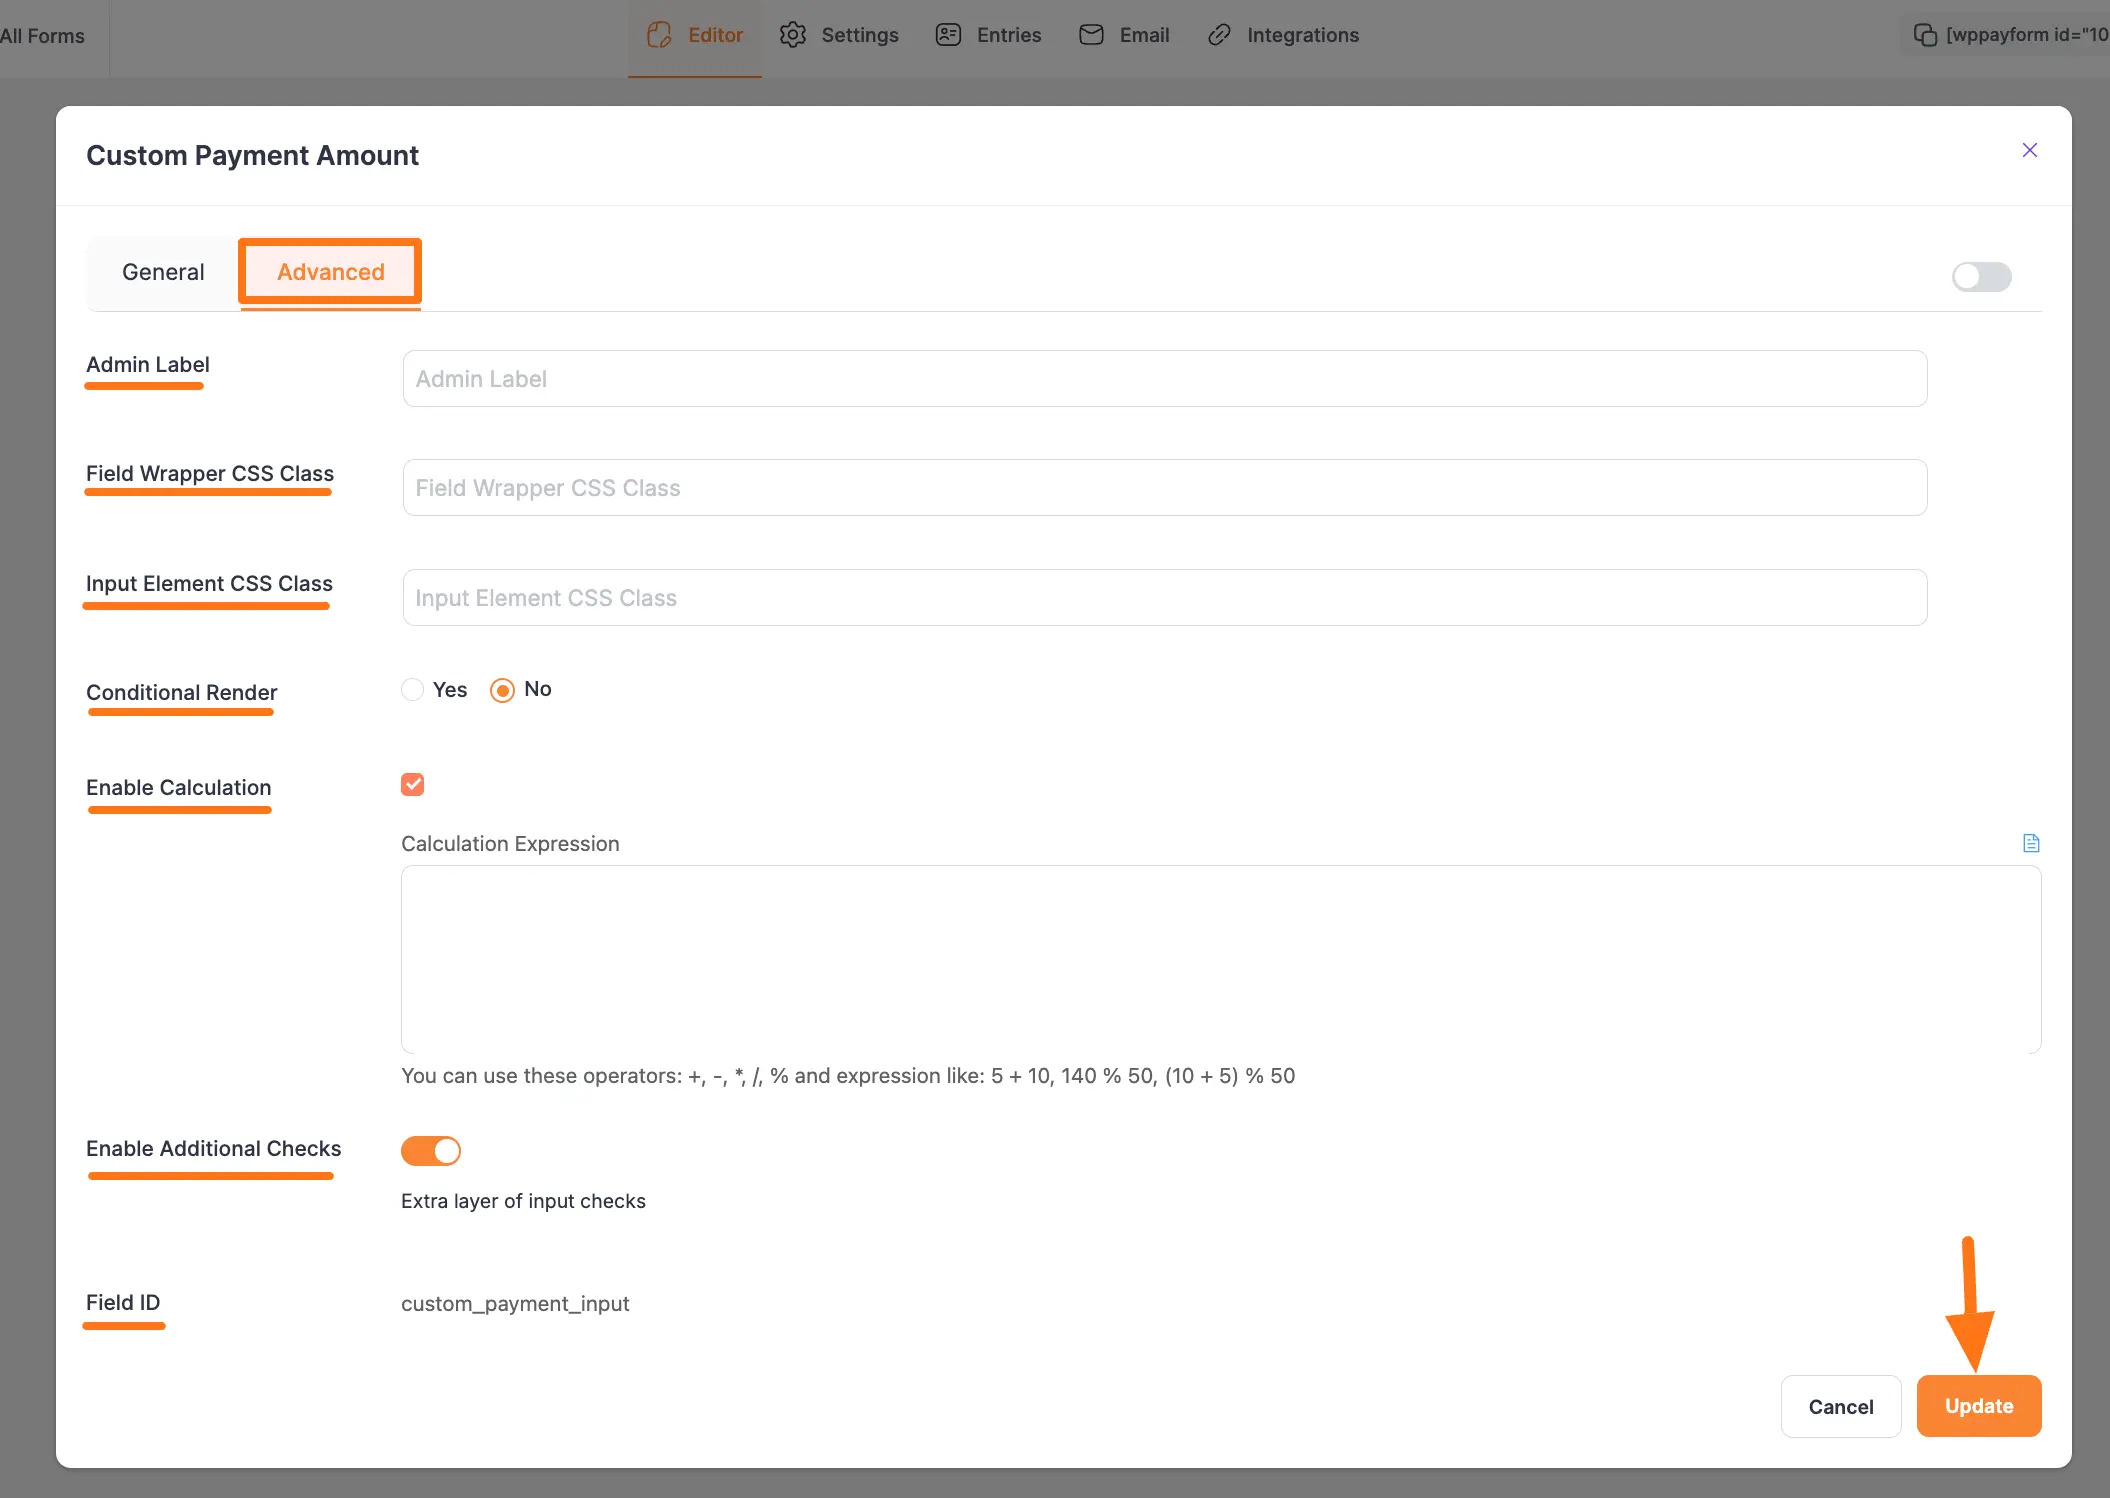
Once you complete the General settings, go to the Advanced tab to find more technical options for your Custom Amount field.
Admin Label
This label is for internal use only. The text you enter here will be used as the field’s label in the admin backend (for example, on the Entries page) to help you identify submissions. It will not be visible to your site visitors.
Field Wrapper CSS Class
This option is used for adding custom CSS classes to the entire field container (the wrapper). This is useful if you want to apply unique styling like borders, margins, or background colors to the whole field.
- Note: To learn more, see our guide on applying Custom CSS to forms.
Input Elements CSS Class
This is used for adding custom CSS classes specifically to the <input> element itself (the box where users type the amount). Use this to control the font, color, or other styles of the text input area.
- Note: To learn more, see our guide on applying Custom CSS to forms.
Conditional Render
You can enable conditional logic to show or hide this field based on a user's input in other fields. This allows you to create dynamic forms that change based on user selections.
- Note: For a detailed guide on this feature, please read our documentation on Conditional Logic.
Enable Calculation
Enabling this feature will allow you to use the value from this field in real-time mathematical operations with other Number and Product fields within your form.
- When enabled, an equation box will appear. Add your desired formula to the Calculation Expression box to define the calculation you want to perform.
- Note: To learn the detailed guidelines for this feature, please read our Calculation Feature documentation.
Enable Additional Checks
Enable this option to set an extra layer of data integrity validation for the value entered by the user.
Field ID
This option displays the unique ID for this form field. It is used for tracking and can be used by developers to target the field with custom CSS or JavaScript.
Once you finish, click the Update button to save all your configurations.
Adding to Your Site
Once you have added the Custom Amount field and configured all other necessary fields, the final step is to save your work and embed the form on your website.
Here is how to finalize your form:
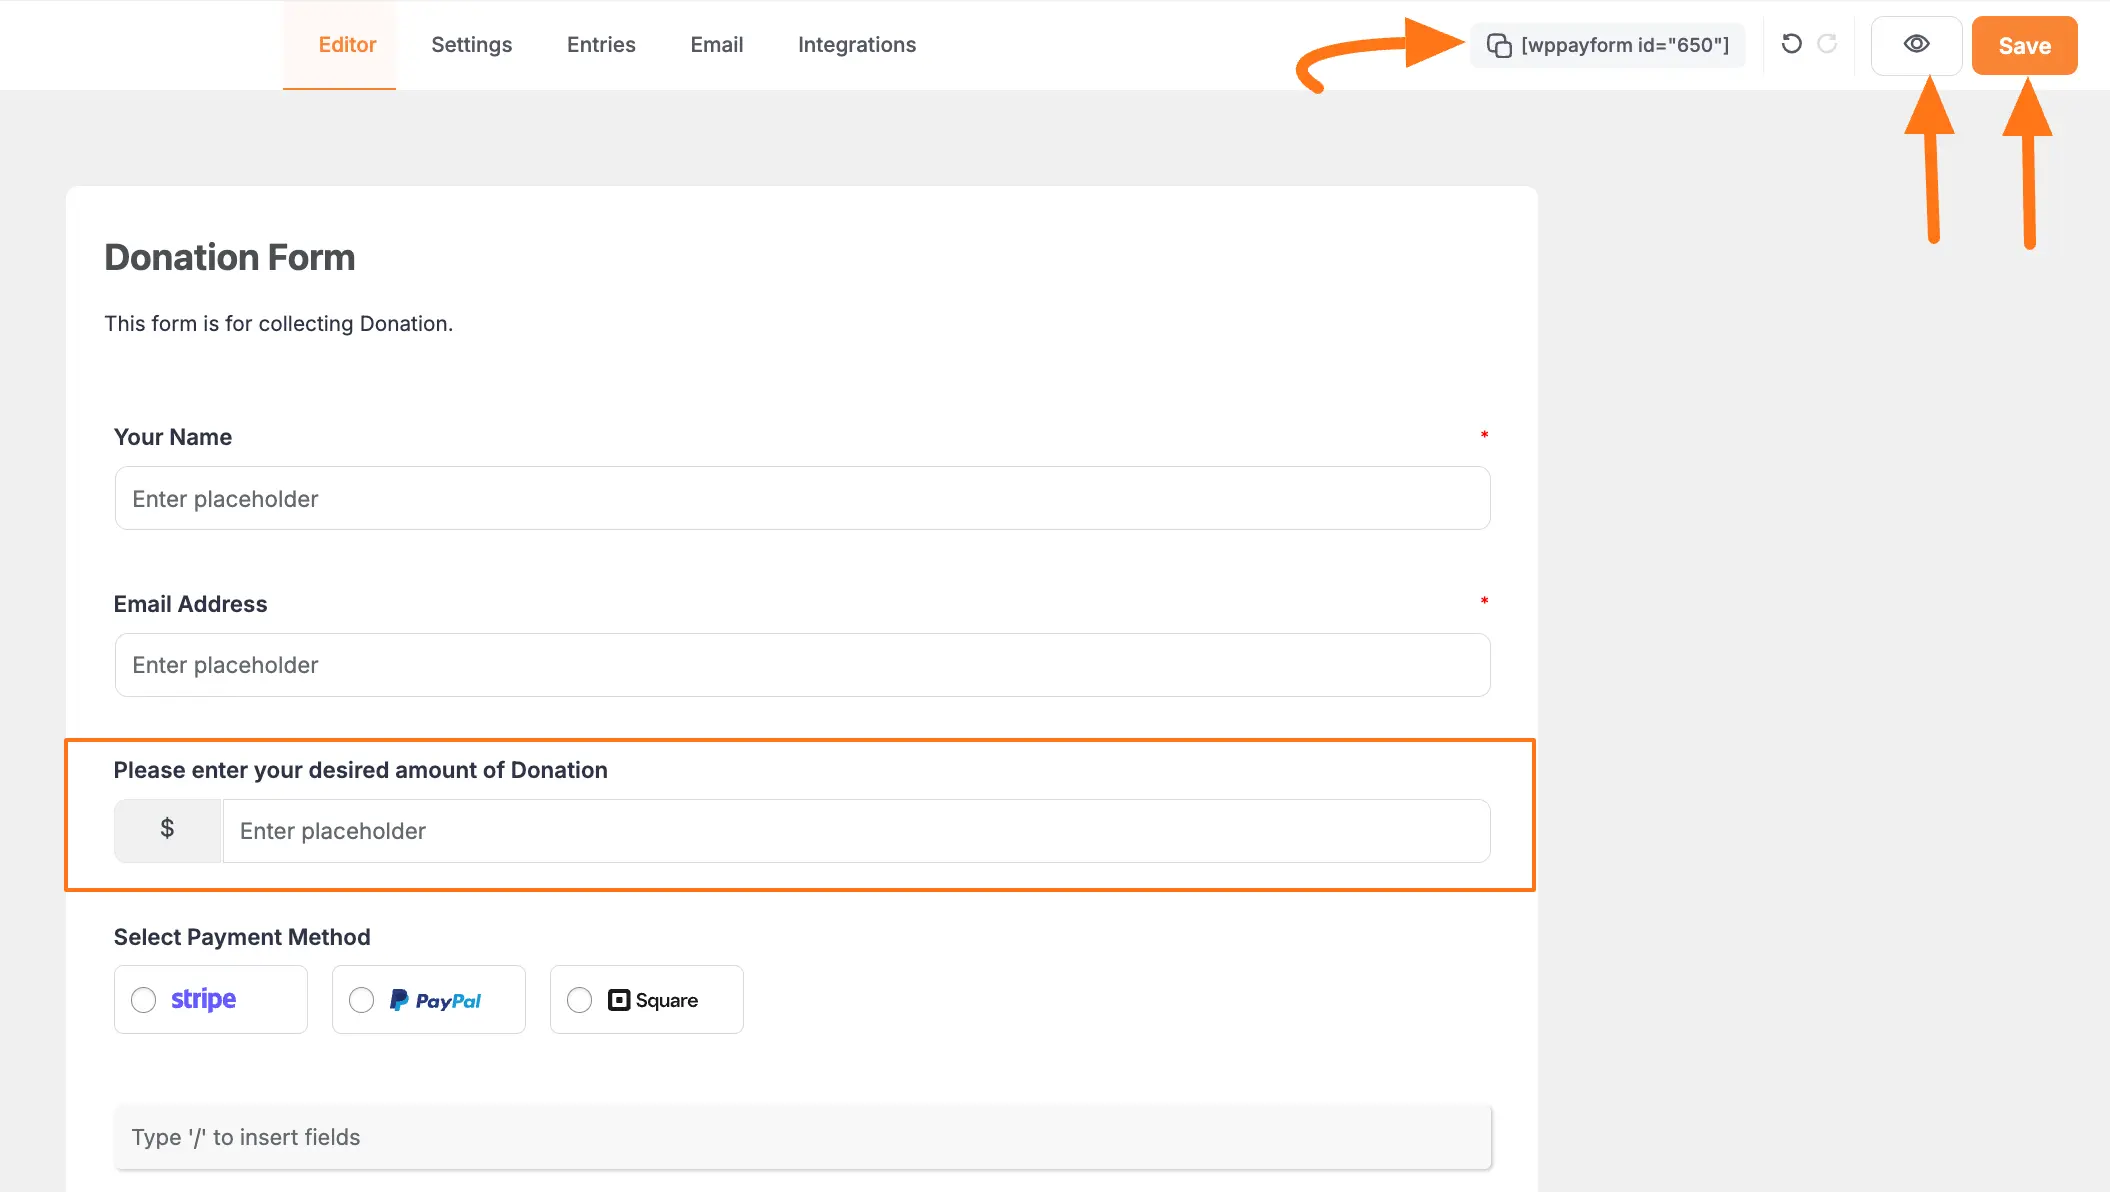
Save Your Changes After you finish editing, click the Save button located in the top-right corner of the editor. This will save all the configurations you have made.
Preview the Form To see how your form will appear to your website visitors, click the Preview button (the Eye icon) located next to the Save button. This will open a new browser tab showing a live preview of your form.
Copy the Shortcode To embed the form on a page or post, you will use its unique Shortcode. You can find the Shortcode at the top of the form editor.
- Simply click on the Shortcode itself to copy it to your clipboard. It will look similar to this:
[paymattic_form id="123"] - Navigate to the WordPress post or page where you want to display the form and paste the copied Shortcode into the editor.
- Simply click on the Shortcode itself to copy it to your clipboard. It will look similar to this:
Once you publish or update the page, your Paymattic form will be live and ready to accept payments.
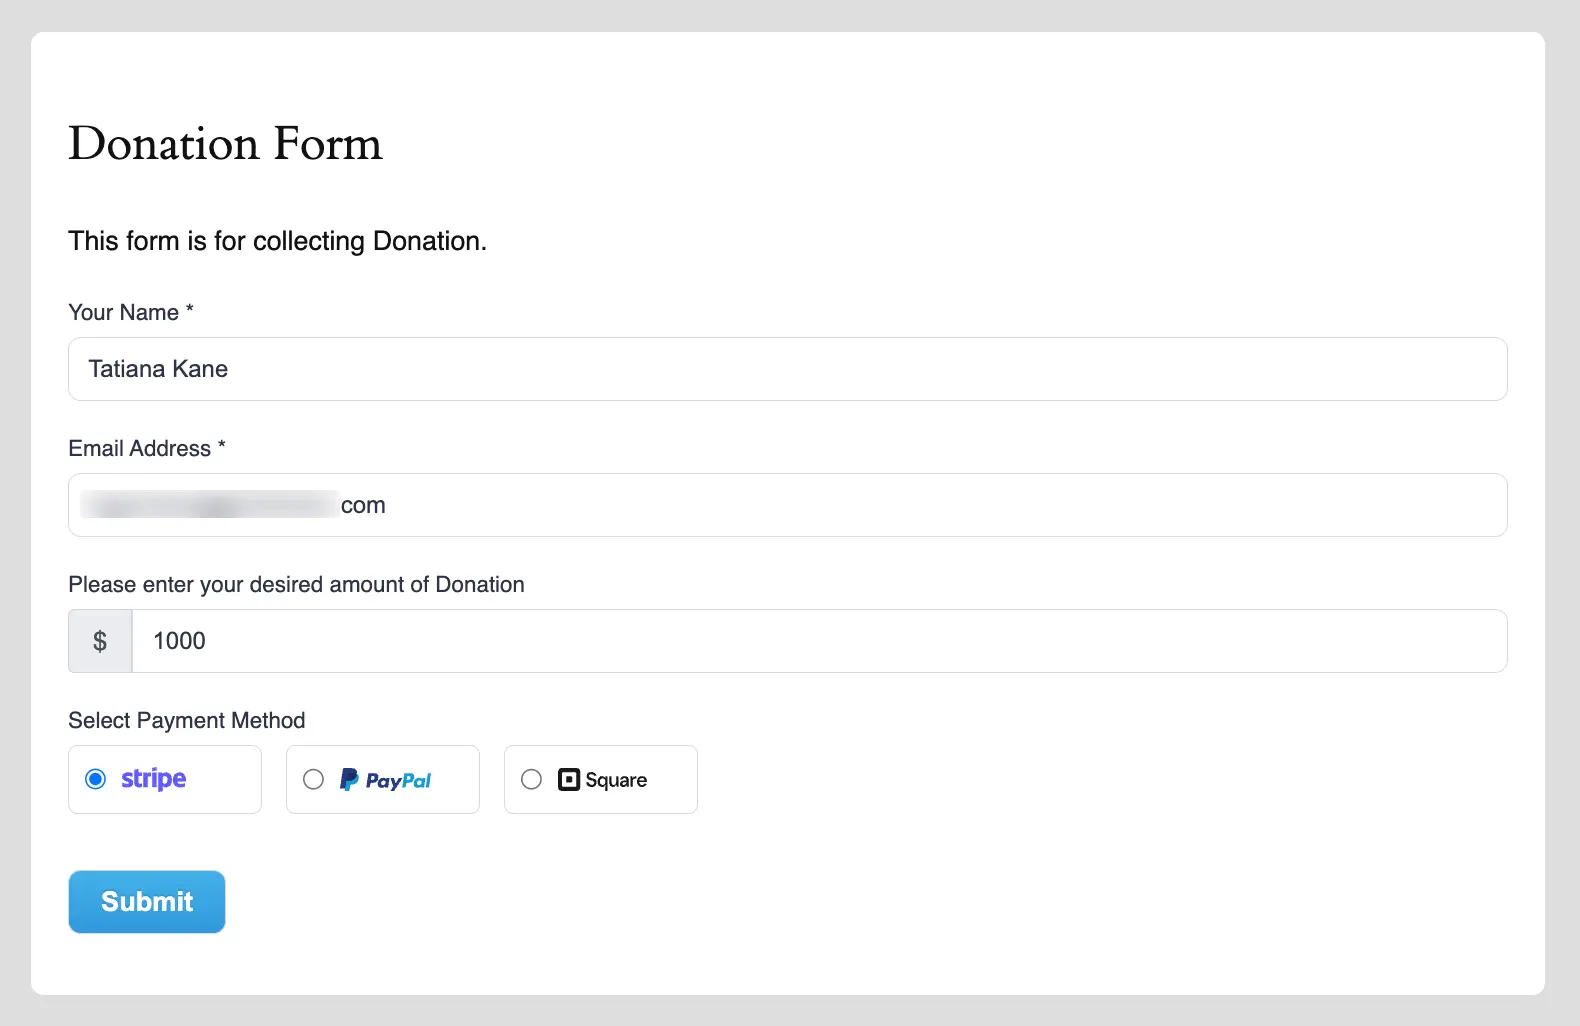
Preview
Here's how the Custom Payment Amount field appears to users:
Best Practices
Amount Suggestions:
- Set reasonable default values
- Use clear minimum amounts
- Consider your target audience
Validation:
- Enable required field for important forms
- Set appropriate minimum values
- Use additional checks for sensitive forms
User Experience:
- Add clear field labels
- Include currency symbols
- Provide amount guidelines
Need Help?
Need help? Contact our support team for assistance!