How to Add Payment Item Fields in WordPress with Paymattic
Paymattic provides a versatile Payment Item field that allows you to create product listings in your forms. Users can select and purchase items directly through your form. This guide will show you how to set up and customize payment item fields.
Adding a Payment Item Field
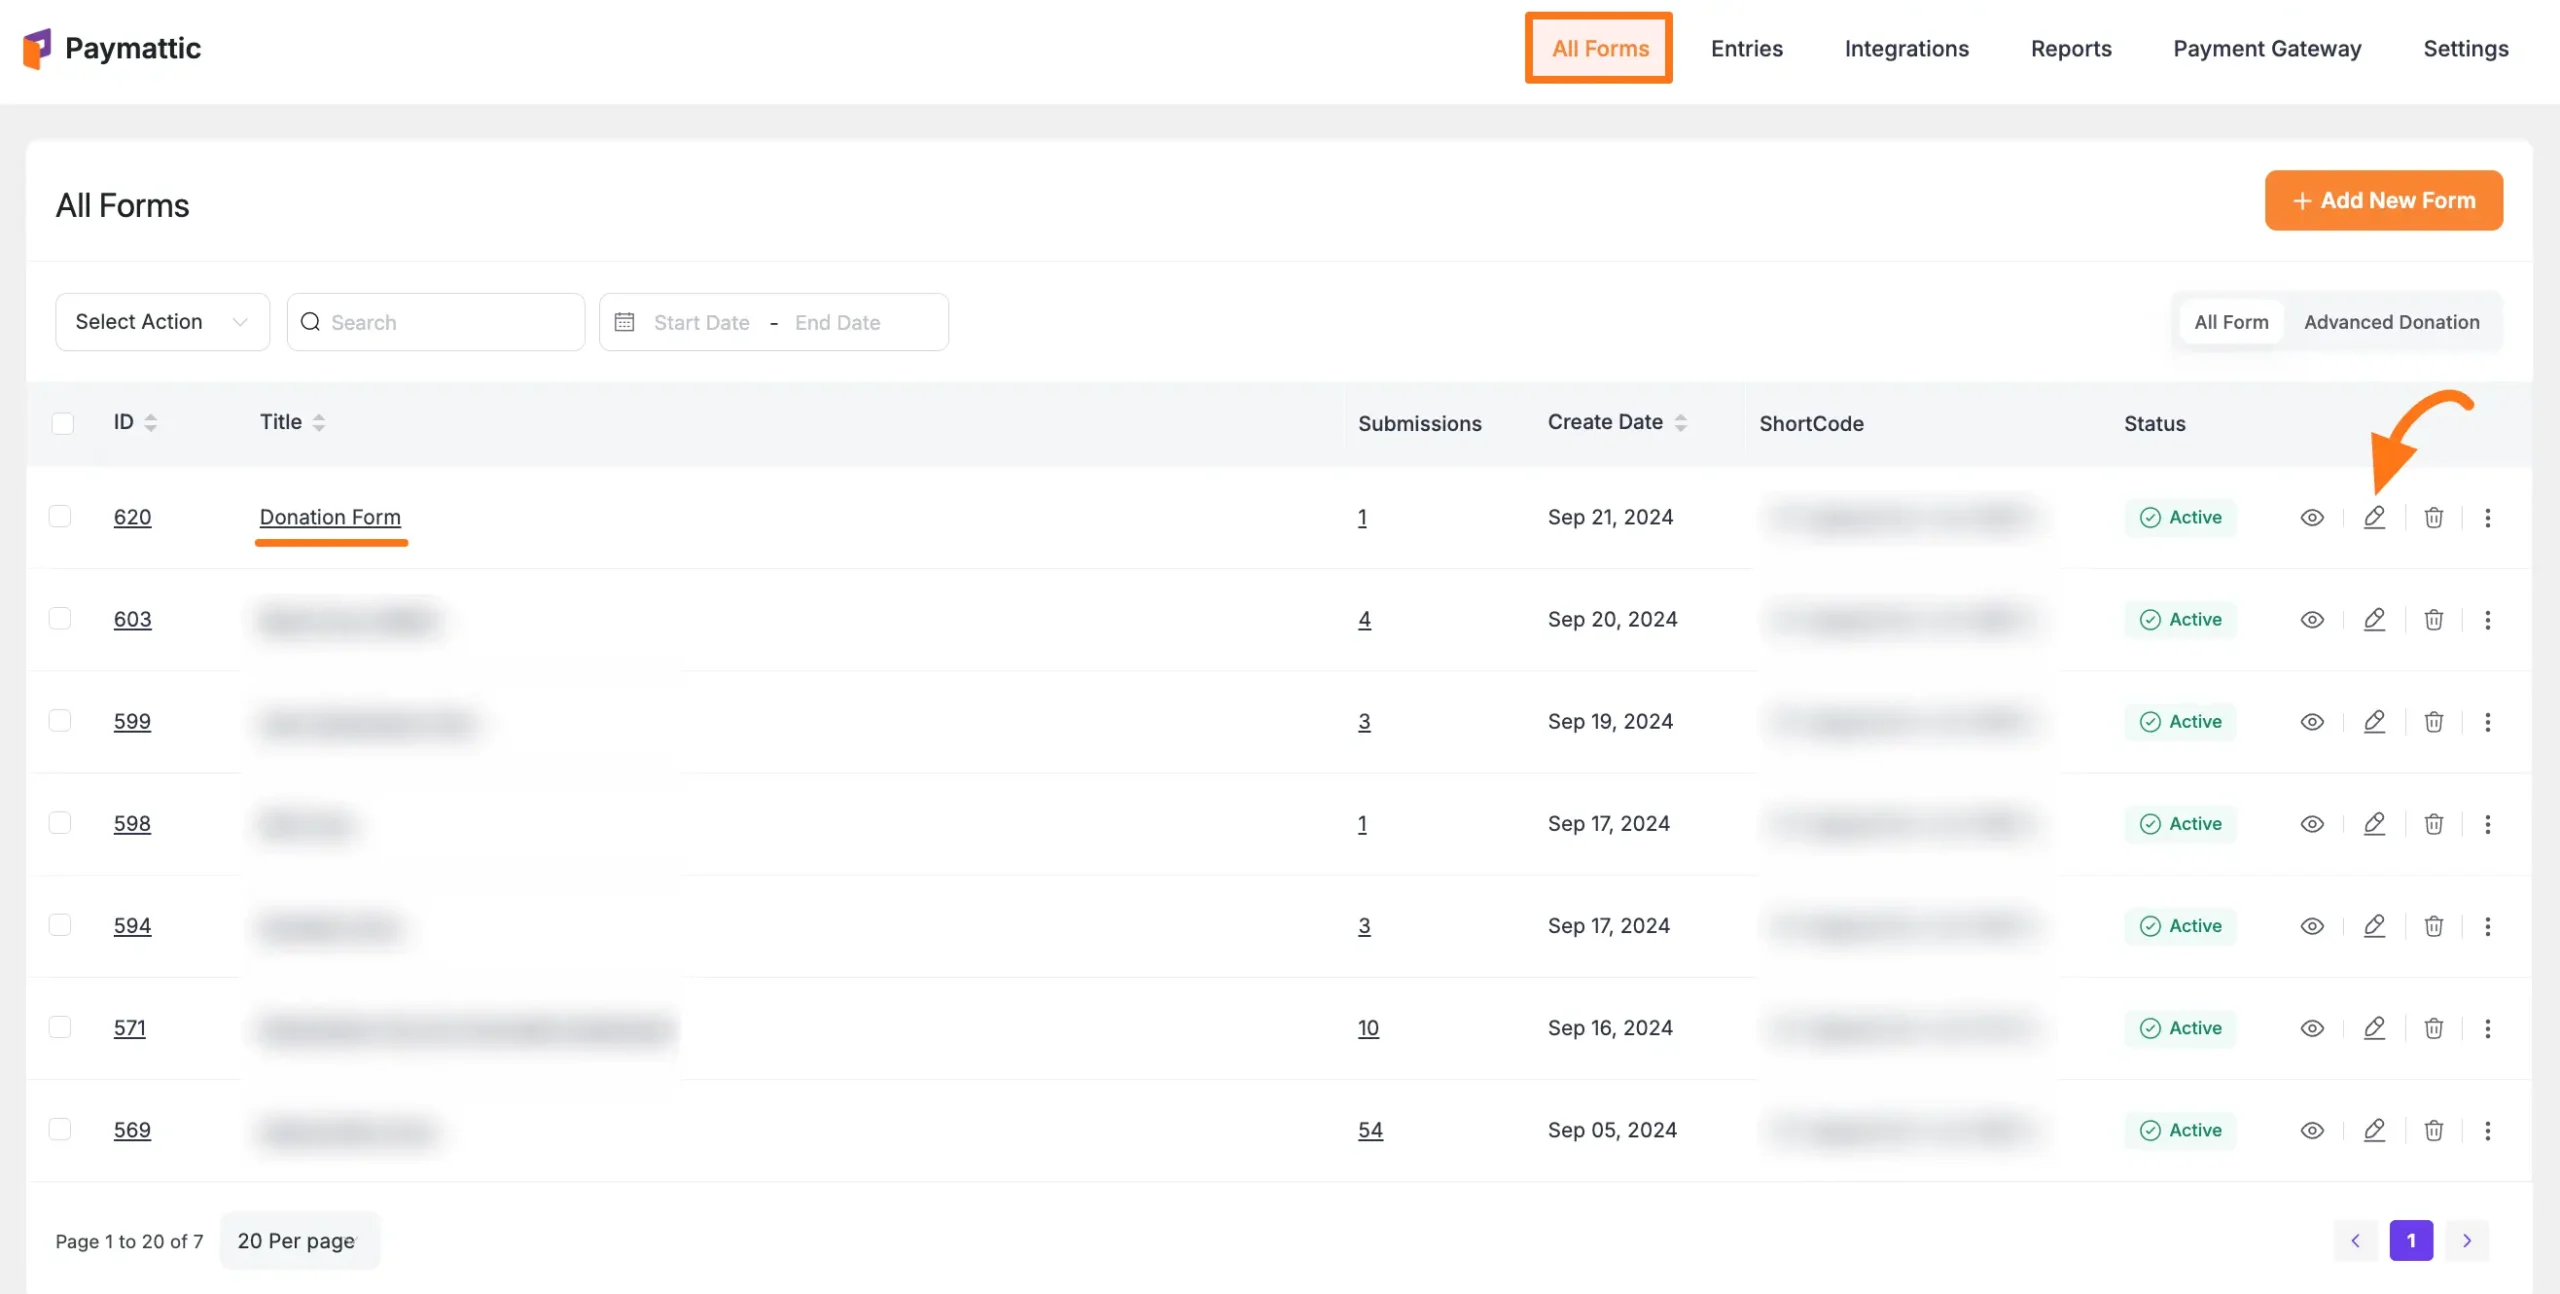
Step 1: Access Form Editor
- Go to All Forms from the Paymattic Navbar
- Select your target form
- Click the Pencil/Edit icon to open the editor
Step 2: Add the Field
You can add the Payment Item field in two ways:
- Type "/" in the editor
- Click the Plus Icon at the bottom
TIP
We always suggest to include these fields at the start of your form:
- Name Field
- Email Field
- Payment Method (for processing payments)
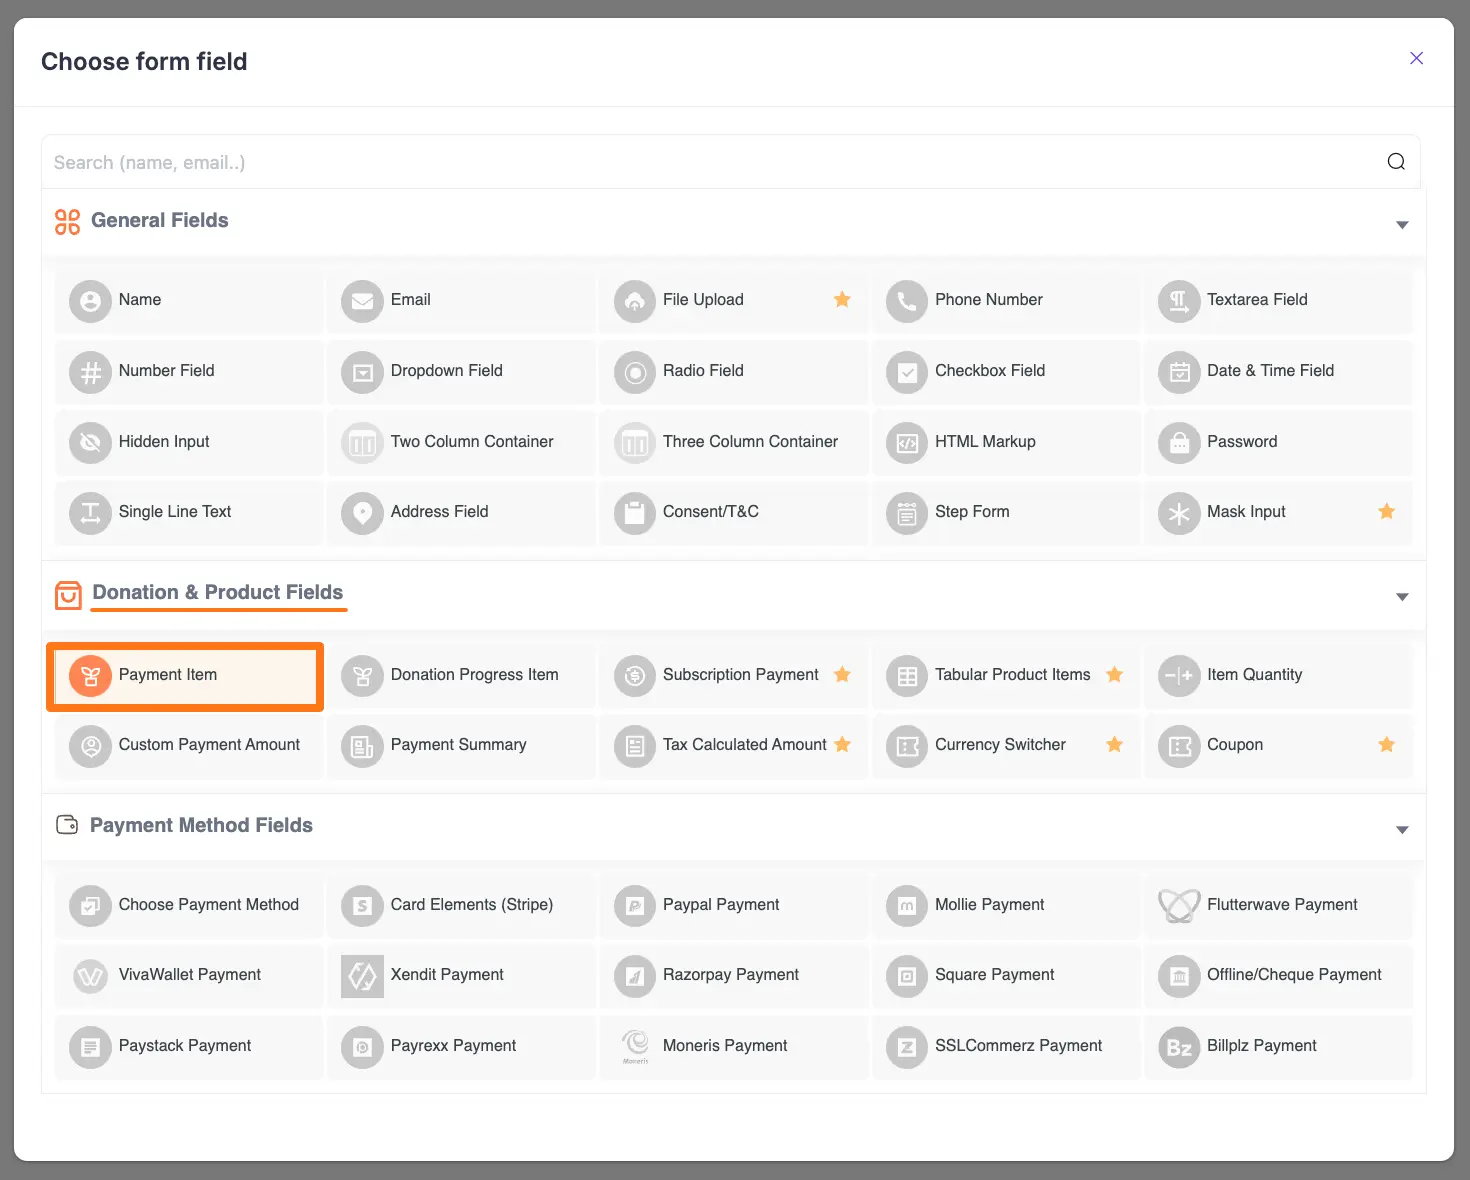
![]()
Select "Payment Item" under the "Donation & Product Fields" section:
Configuring Payment Items
To customize the field, click the Settings Icon in the right corner:
![]()
Now, a pop-up page will appear with various settings options for customizing the field.
General Settings
Under this tab, you will find all the General settings for customizing the field according to your needs.
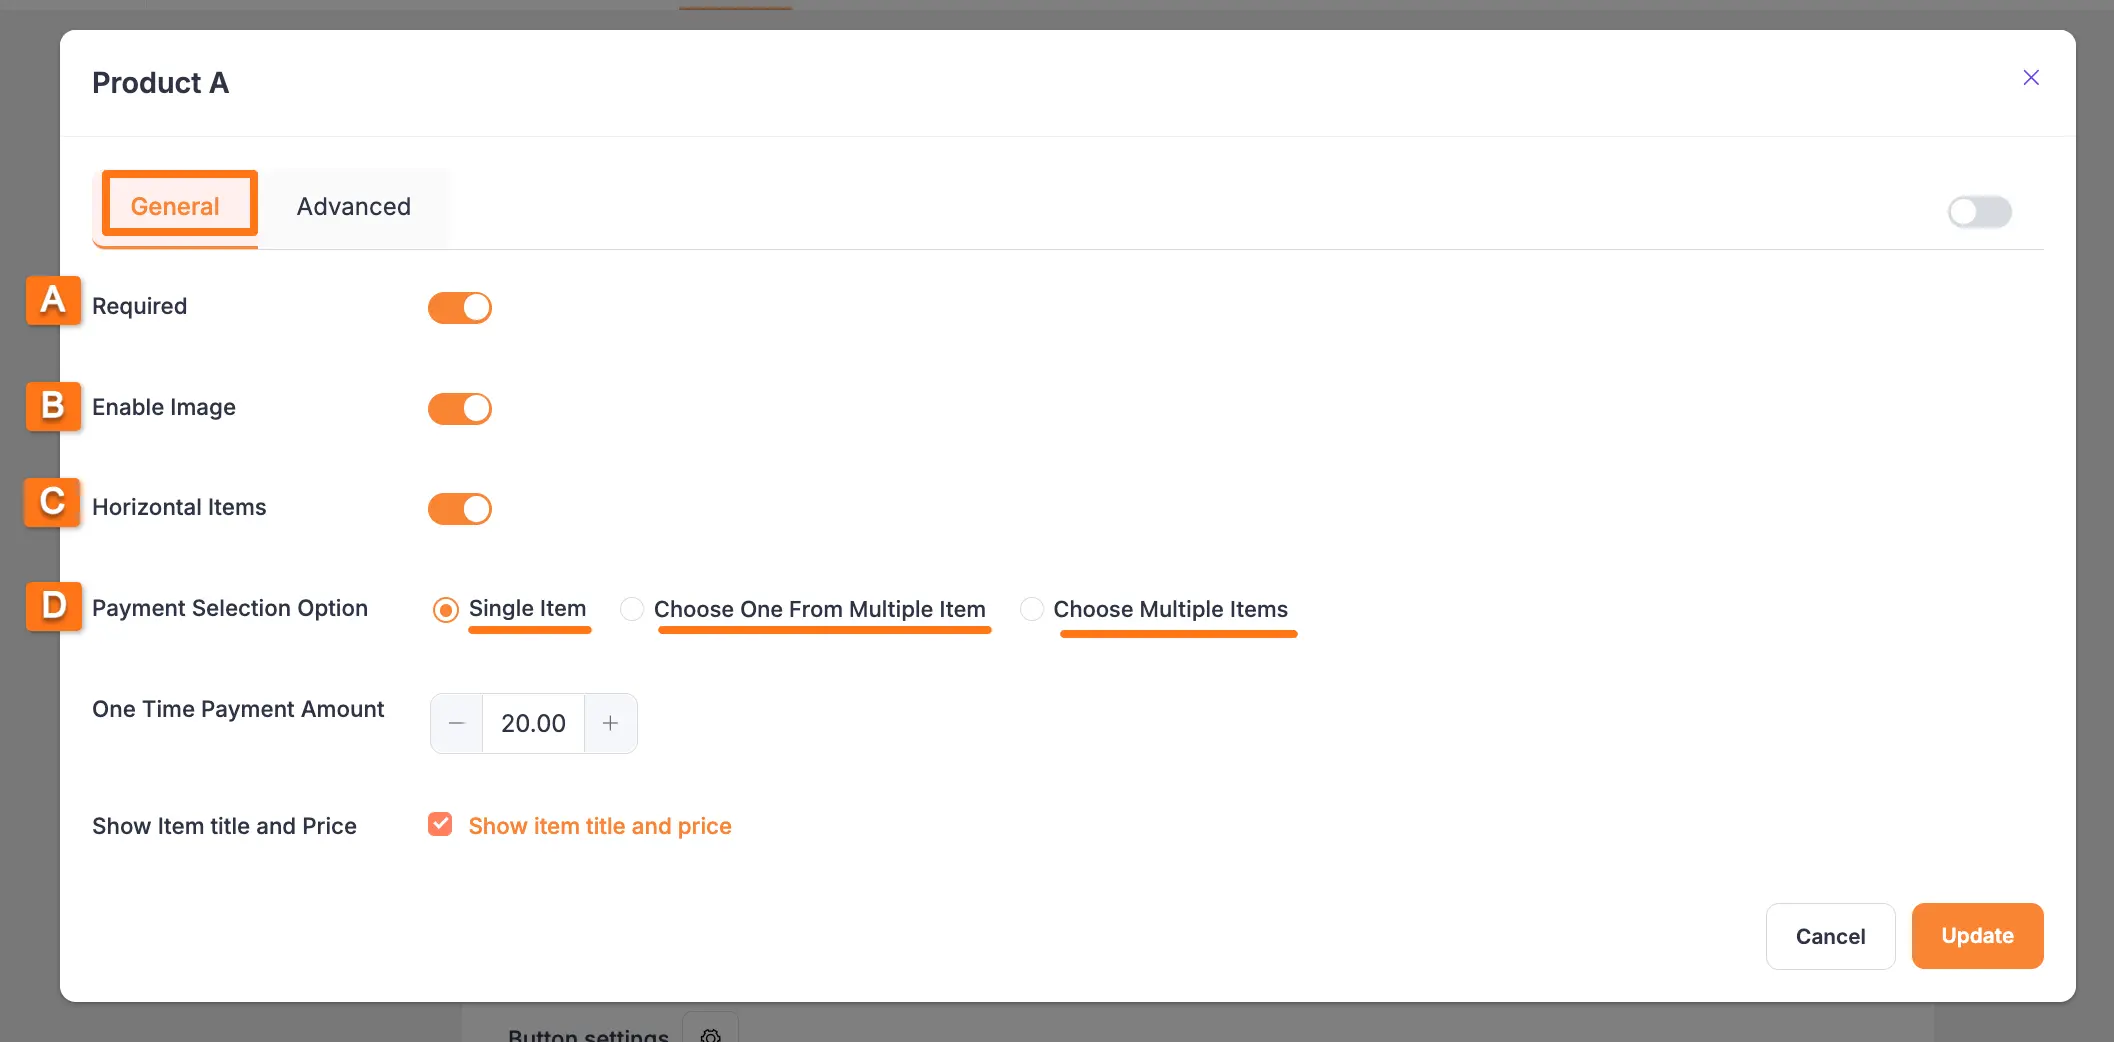
When you add a payment field, such as Payment Item, to your form, you can configure its behavior from the General tab in the field settings panel. Each options are explaind here:
Required
Enable this toggle to make the payment field mandatory. If enabled, users will not be able to submit the form without selecting an item or making a payment.
Enable Image
You can display images for your payment items by toggling this option on.
- To add an image, click the Plus Icon under the Upload Image section.
Horizontal Items
By default, payment items are displayed vertically. Enable the Horizontal Items option to showcase your products horizontally in a single line, which is useful for saving space.
Payment Selection Option
This setting defines how users can select products. There are three available choices:
- Single Item: Use this when you are offering only one item for purchase.
- Choose one from Multiple Item: Use this when you have multiple options, but the user must choose only one (e.g., different package levels).
- Choose Multiple Items: Use this when you want to allow users to select and purchase several different items in a single submission.
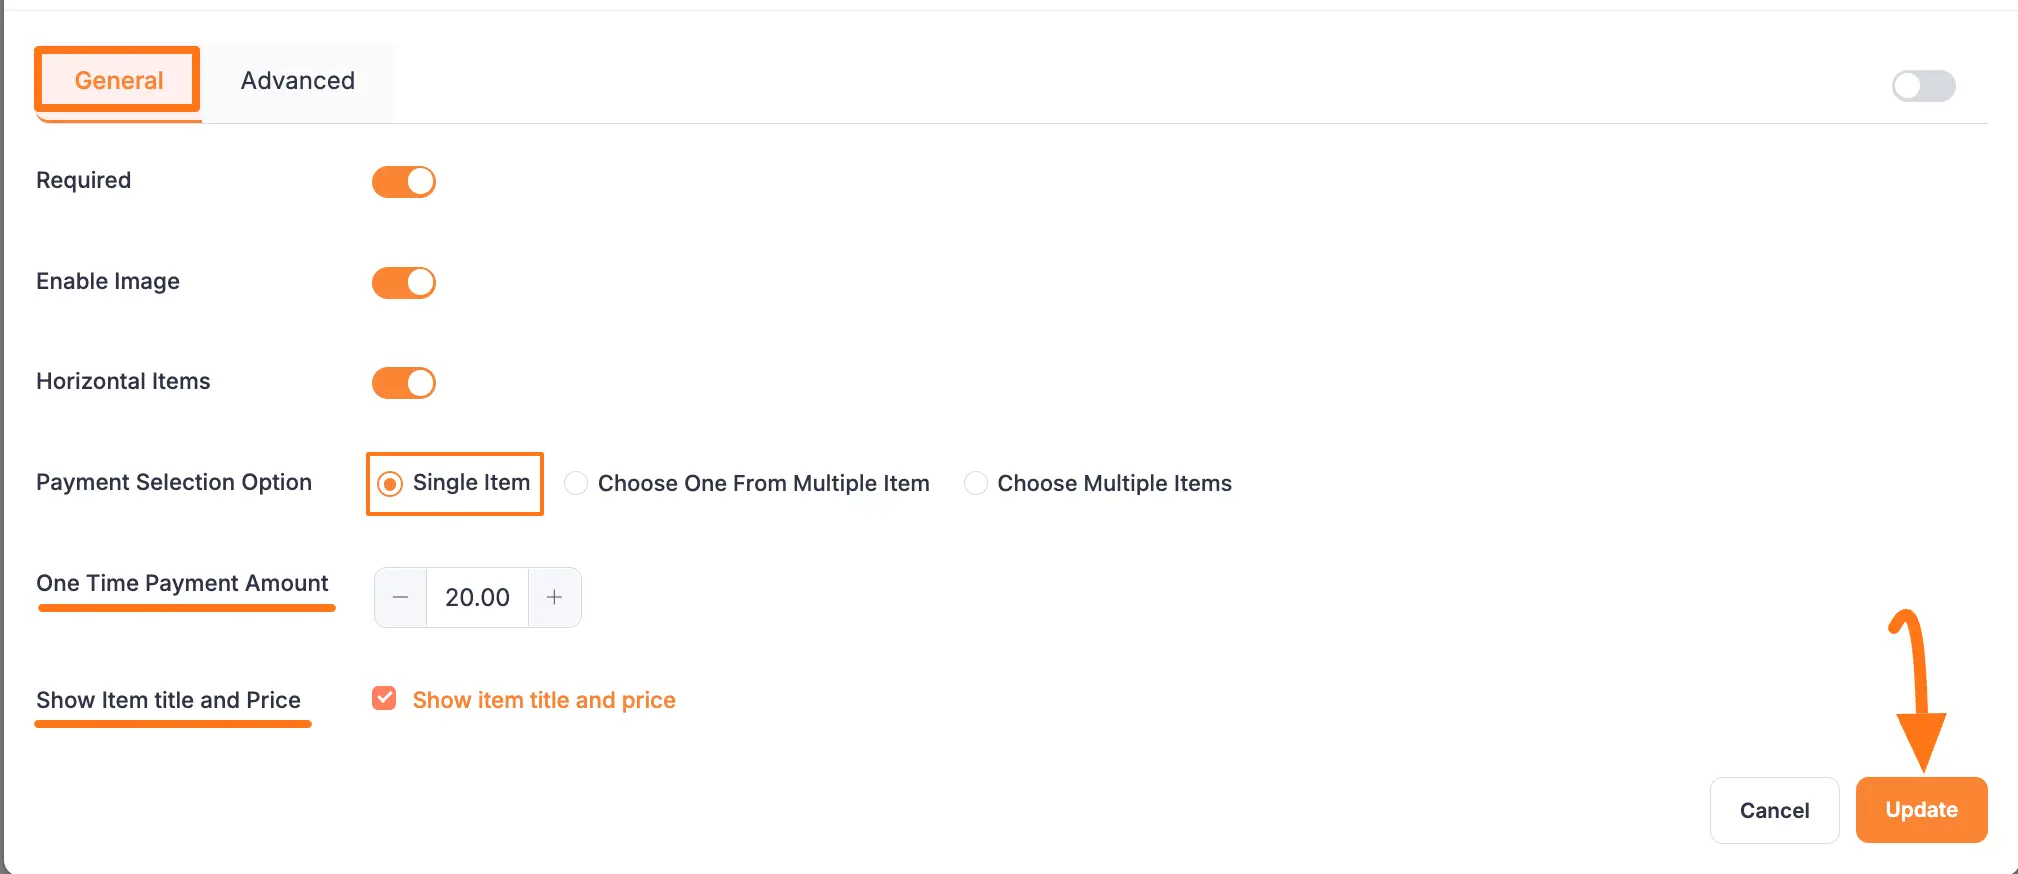
1. Single Item
Select this payment option to offer a single product or service. When you choose Single Item, you will find the following settings:
- One Time Payment Amount: Set the price for the item in this field.
- Show Item Title and Price: Enable this toggle to display the item's title and its price directly on the form.
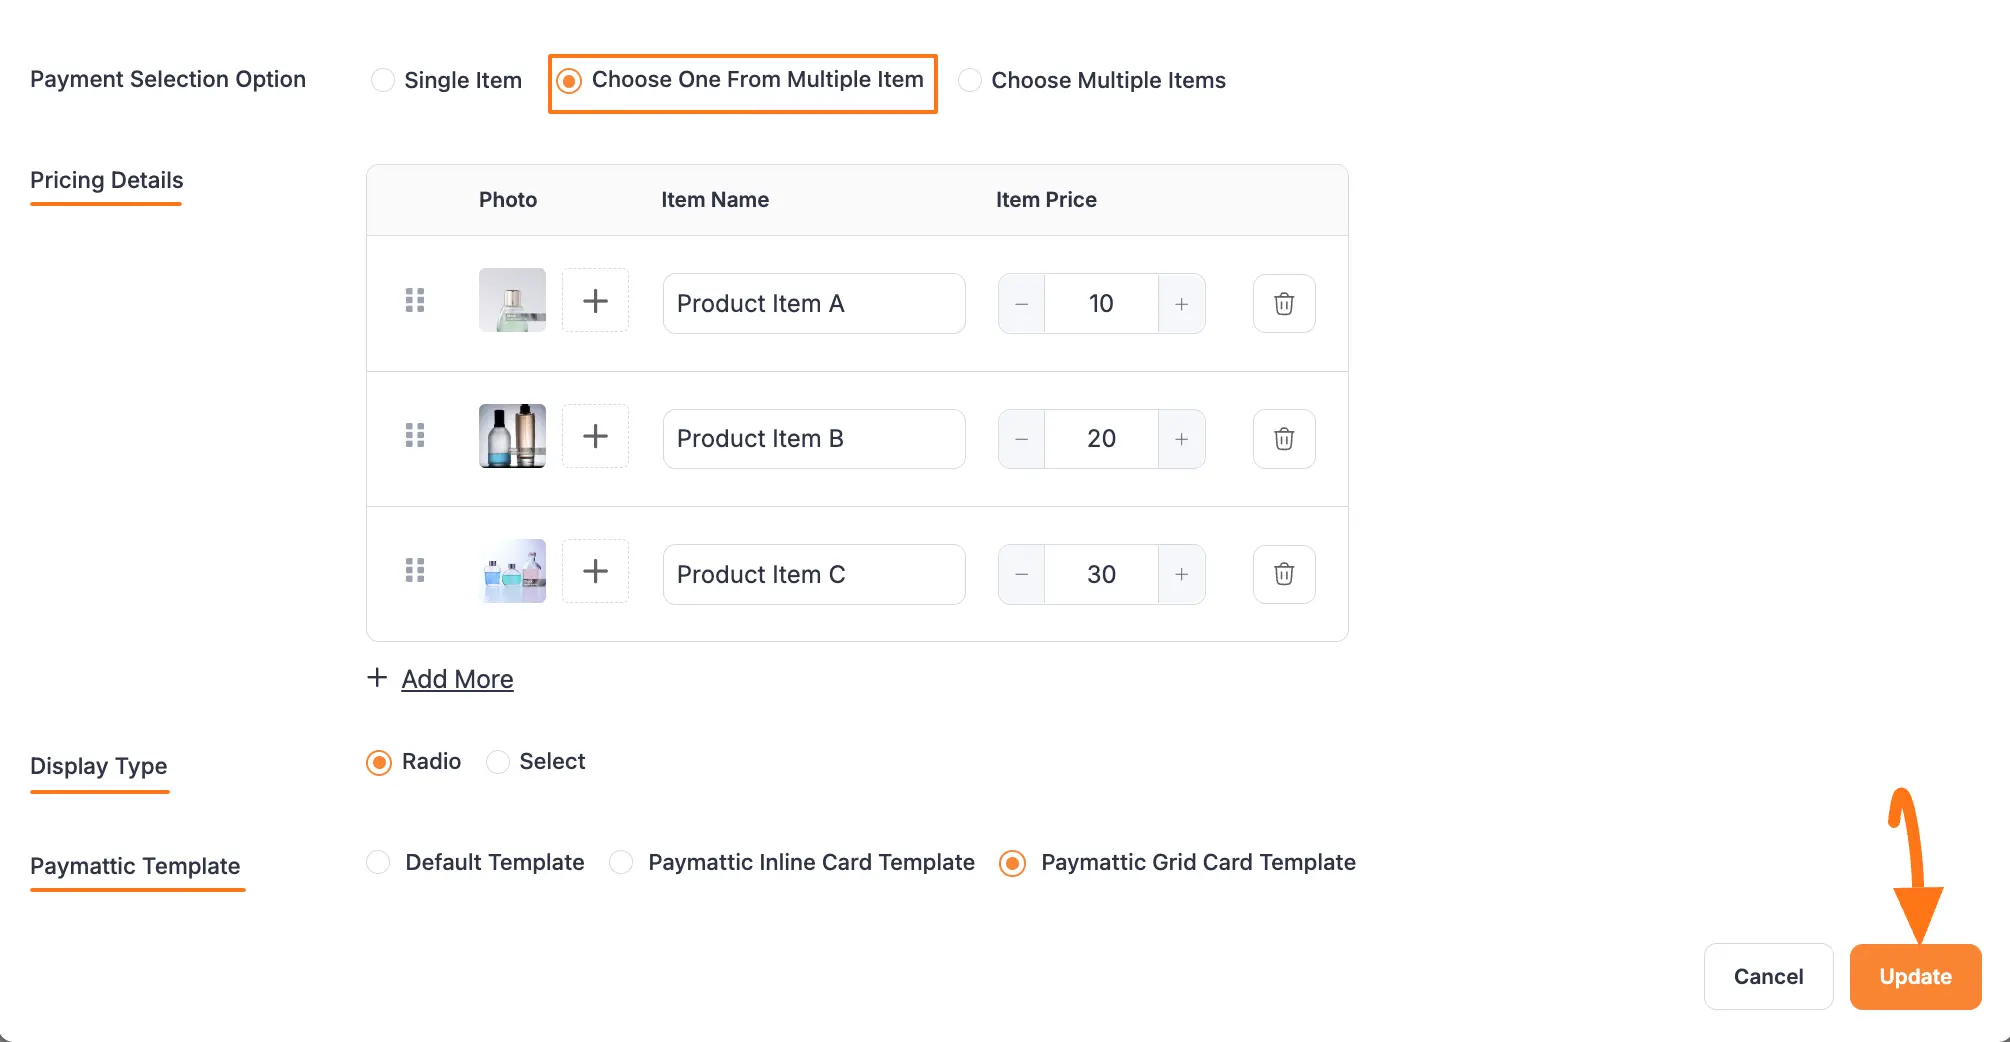
2. Choose one from Multiple Item
Select this option if you want to offer multiple items but require the user to choose only one to purchase. This is ideal for different pricing tiers, membership levels, or package selections.
When you select Choose one from Multiple Item, the following settings become available:
Pricing Details This section allows you to build your list of selectable items.
- To add a new product to the list, click the +Add More button.
- For each item, you can enter a price and upload a corresponding image using the Plus Icon.
- The item list can be reordered at any time using the Drag-and-drop handle.
- To delete an item from the list, simply click the Trash icon.
Display Type This setting controls how the options are presented on the live form.
- Radio: Shows all items in a list with a radio button next to each. This is great for when you want all options to be immediately visible.
- Select: Presents the items in a compact dropdown list. Users click the dropdown to see the options and make a selection.
Paymattic Template Use this option to select a pre-designed template that defines the visual layout for how your products are displayed in the form.
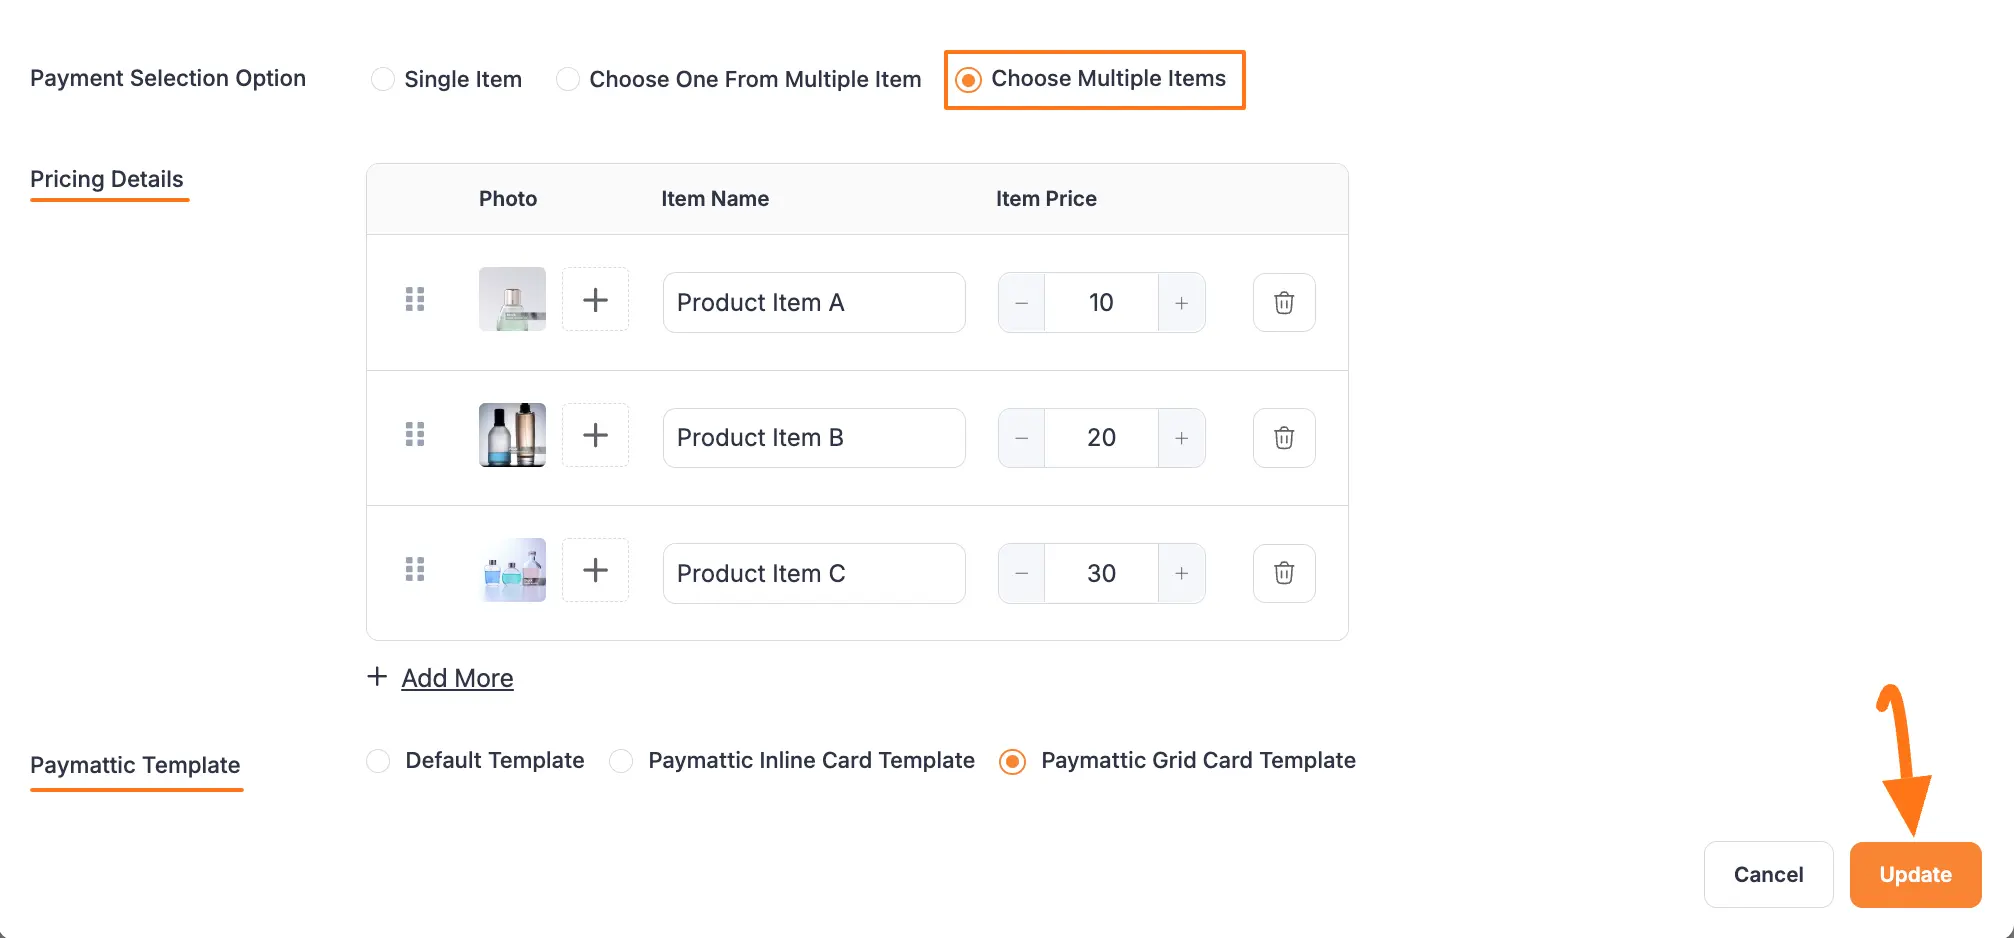
3. Choose Multiple Items
Select this option when you want to allow users to choose and purchase several different items in a single transaction. This is perfect for selling a list of products, offering optional add-ons, or listing various services. On the form, these items will be displayed with checkboxes, allowing users to make multiple selections.
When you select Choose Multiple Items, the following settings will be available:
Pricing Details This section is where you build your complete list of purchasable items.
- To create a new item, click the +Add More button.
- For each item row, you can set a fixed price and upload a product image by clicking the Plus Icon.
- You can easily reorder the items using the Drag-and-drop handle.
- To remove an item you no longer need, simply click the Trash icon on the right side of the item row.
Paymattic Template Use this option to choose a pre-designed layout that controls how your products are visually presented in the form.
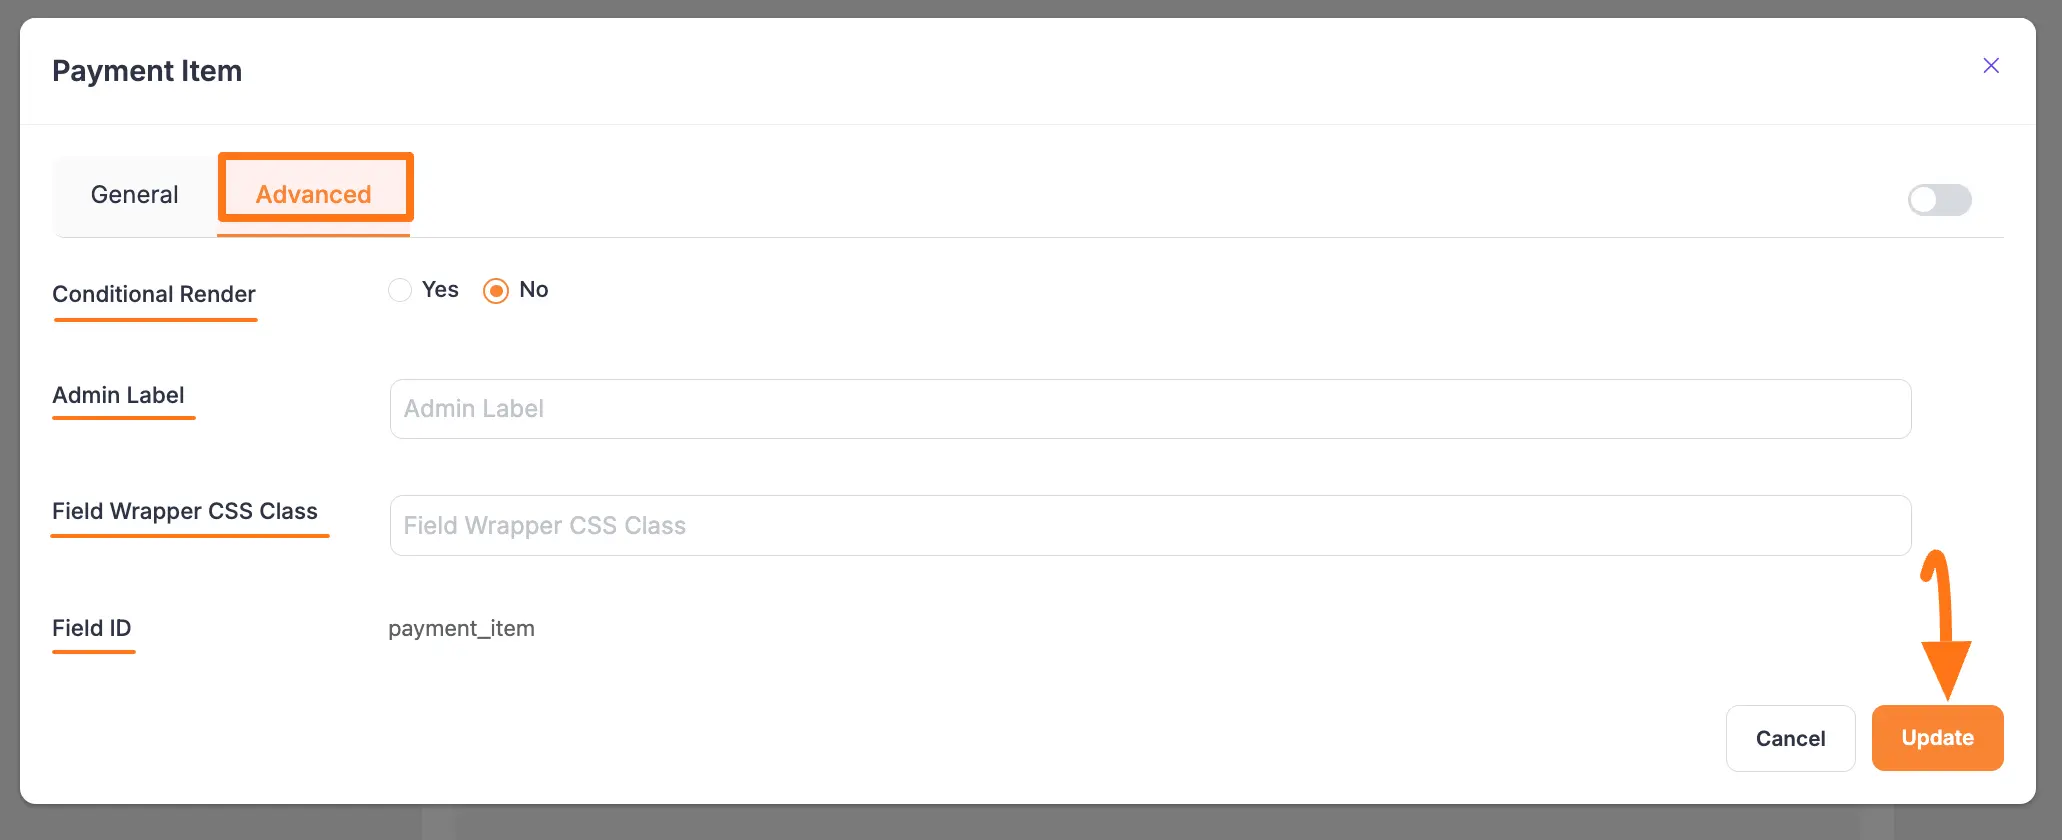
Advanced Settings
Once you have finished with the General settings, you can click on the Advanced tab to find more technical options for your Payment Item field.
Conditional Render
This powerful feature allows you to create "smart forms" by showing or hiding this field based on a user's input in a previous field. You can set specific conditions that must be met for this field to appear on the form.
- Note: For a complete walkthrough, please see our detailed guide on Conditional Logic.
Admin Label
This label is for internal use only. The text you enter here will be used as the field's label in the admin dashboard, such as on the Entries page. It will not be visible to the public, making it useful for adding notes or clarifying a field's purpose for your team.
Field Wrapper CSS Class
If you want to apply custom styling (CSS) to this specific field, you can add one or more CSS class names here. This gives you a way to target the entire field container for custom design adjustments.
- Note: To learn more, read our documentation on applying Custom CSS to form fields.
Field ID
This is a unique ID assigned to the form field. It is primarily used for custom development, such as targeting the field with custom JavaScript or integrating with other services. This ID is typically generated automatically, but you can define a custom one here if needed.
After configuring these settings, always remember to click the Update button to save your changes.
Adding the Form to Your Site
Once you have added the Payment Item field and configured all other necessary fields, the final step is to save your work and embed the form on your website.
Here is how to finalize your form:
Save Your Changes After you finish editing, click the Save button located in the top-right corner of the editor. This will save all the configurations you have made.
Preview the Form To see how your form will appear to your website visitors, click the Preview button (the Eye icon) located next to the Save button. This will open a new browser tab showing a live preview of your form.
Copy the Shortcode To embed the form on a page or post, you will use its unique Shortcode. You can find the Shortcode at the top of the form editor.
- Simply click on the Shortcode itself to copy it to your clipboard. It will look similar to this:
[paymattic_form id="123"] - Navigate to the WordPress post or page where you want to display the form and paste the copied Shortcode into the editor.
- Simply click on the Shortcode itself to copy it to your clipboard. It will look similar to this:
Once you publish or update the page, your Paymattic form will be live and ready to accept payments.
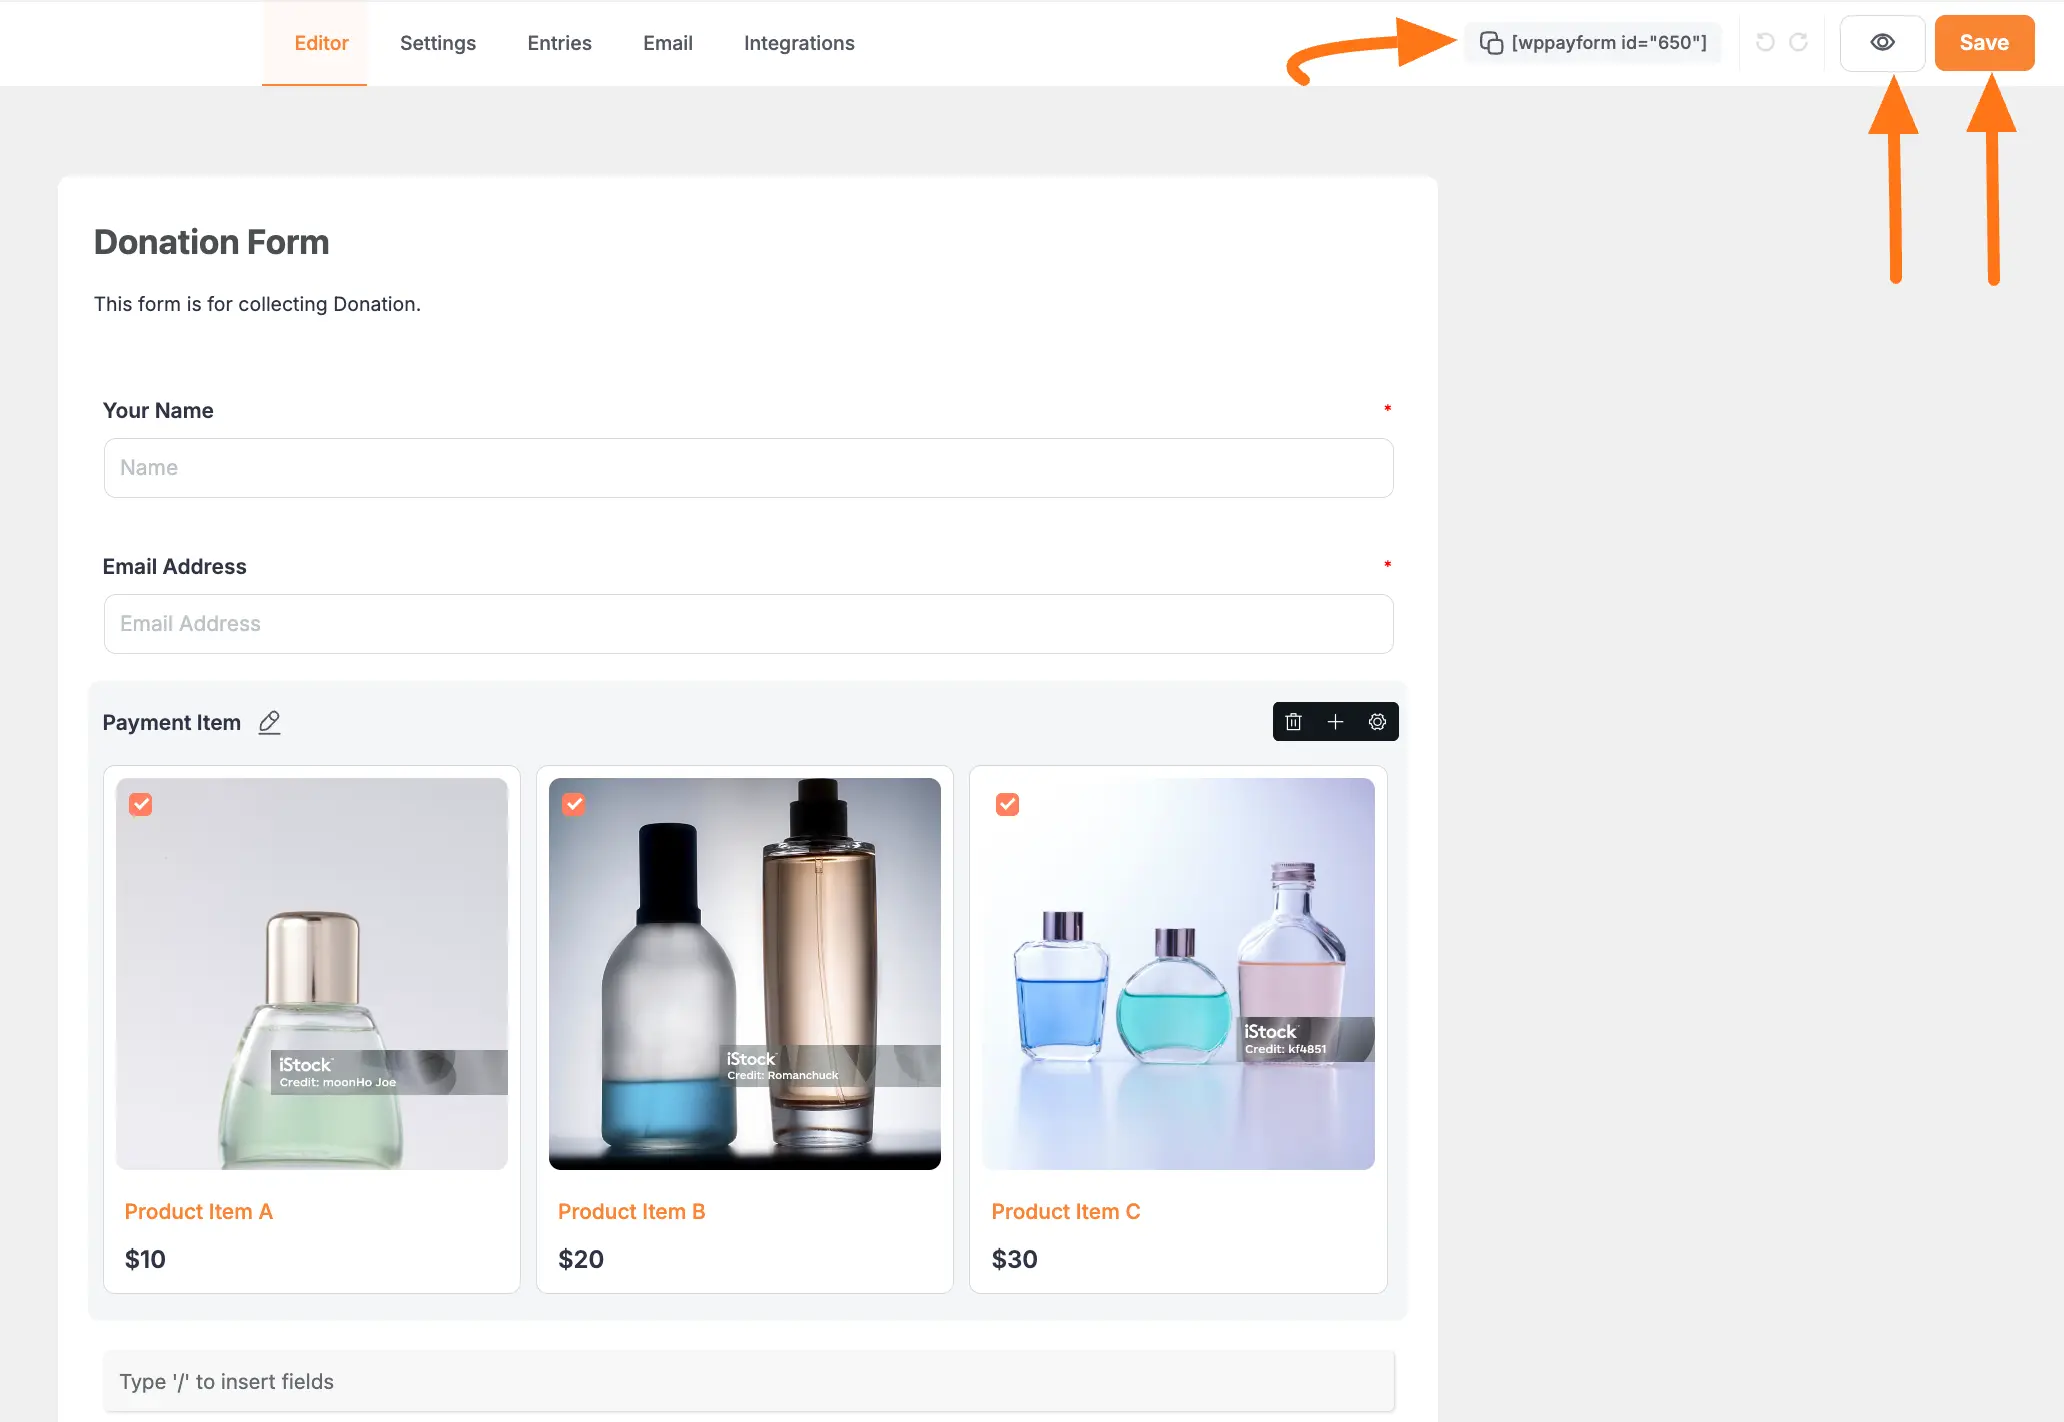
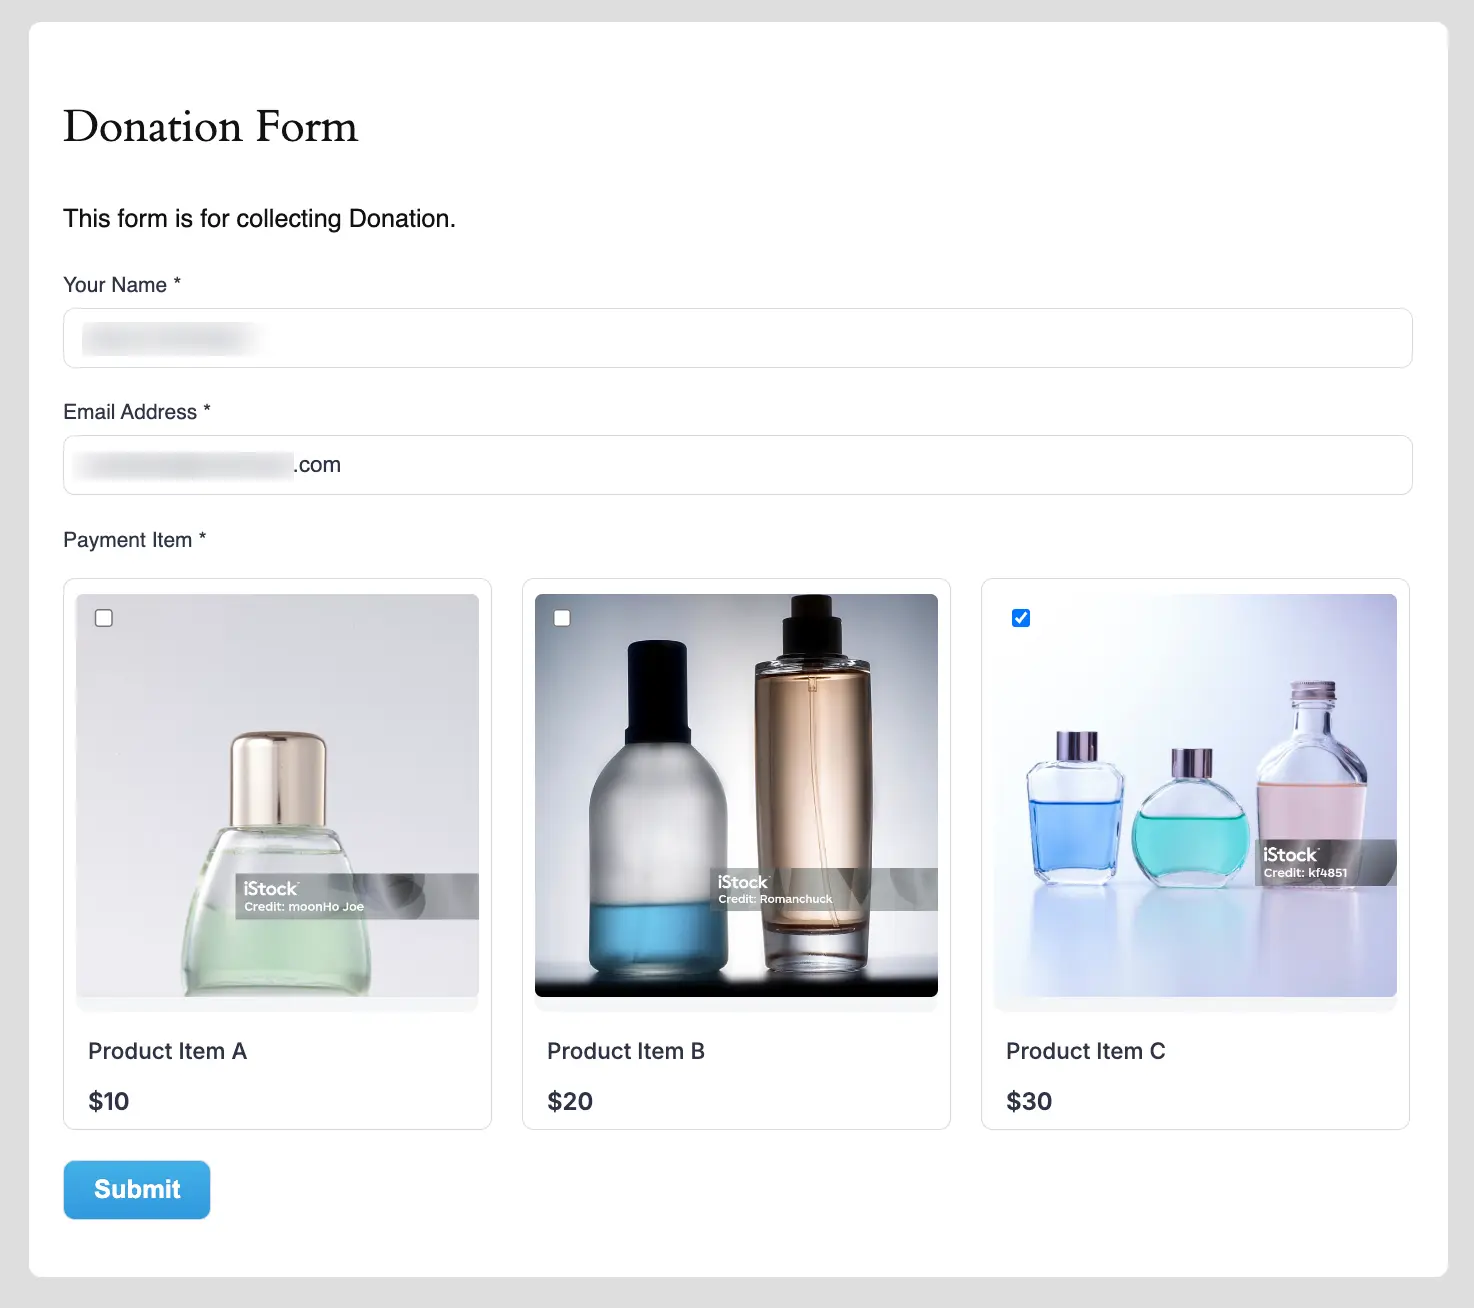
Preview
Here's how your payment form will appear to customers:
Best Practices
Product Display Tips
Images:
- Use high-quality product photos
- Maintain consistent image sizes
- Optimize for web performance
Pricing:
- Display prices clearly
- Include currency symbols
- Consider bulk pricing options
Layout:
- Choose layout based on product count
- Use horizontal for few items
- Use vertical for detailed descriptions
User Experience:
- Group similar products
- Provide clear descriptions
- Include product variations if needed
Important
Always test your payment form thoroughly:
- Verify all payment options work
- Test on mobile devices
- Check email notifications
- Verify order processing
Need Help?
Our support team is ready to assist with any questions or concerns!