How to Add User Dashboard Module in Paymattic?
In Paymattic the User Dashboard feature allows users to manage their payment activities directly from their WordPress dashboard and view all the submitted information and payment history. This article will guide you on how to add and configure the User Dashboard in Paymattic.
Pro Feature
The User Dashboard is a premium feature available only in [Paymattic Pro](/# 1-toc-title).
Enable User Dashboard
First, go to Settings from the Paymattic Navbar, open the User Dashboard tab from the left sidebar, and click the Enable User Dashboard Module button.
NOTE
This needs to be enabled the first time you open the User Dashboard module.
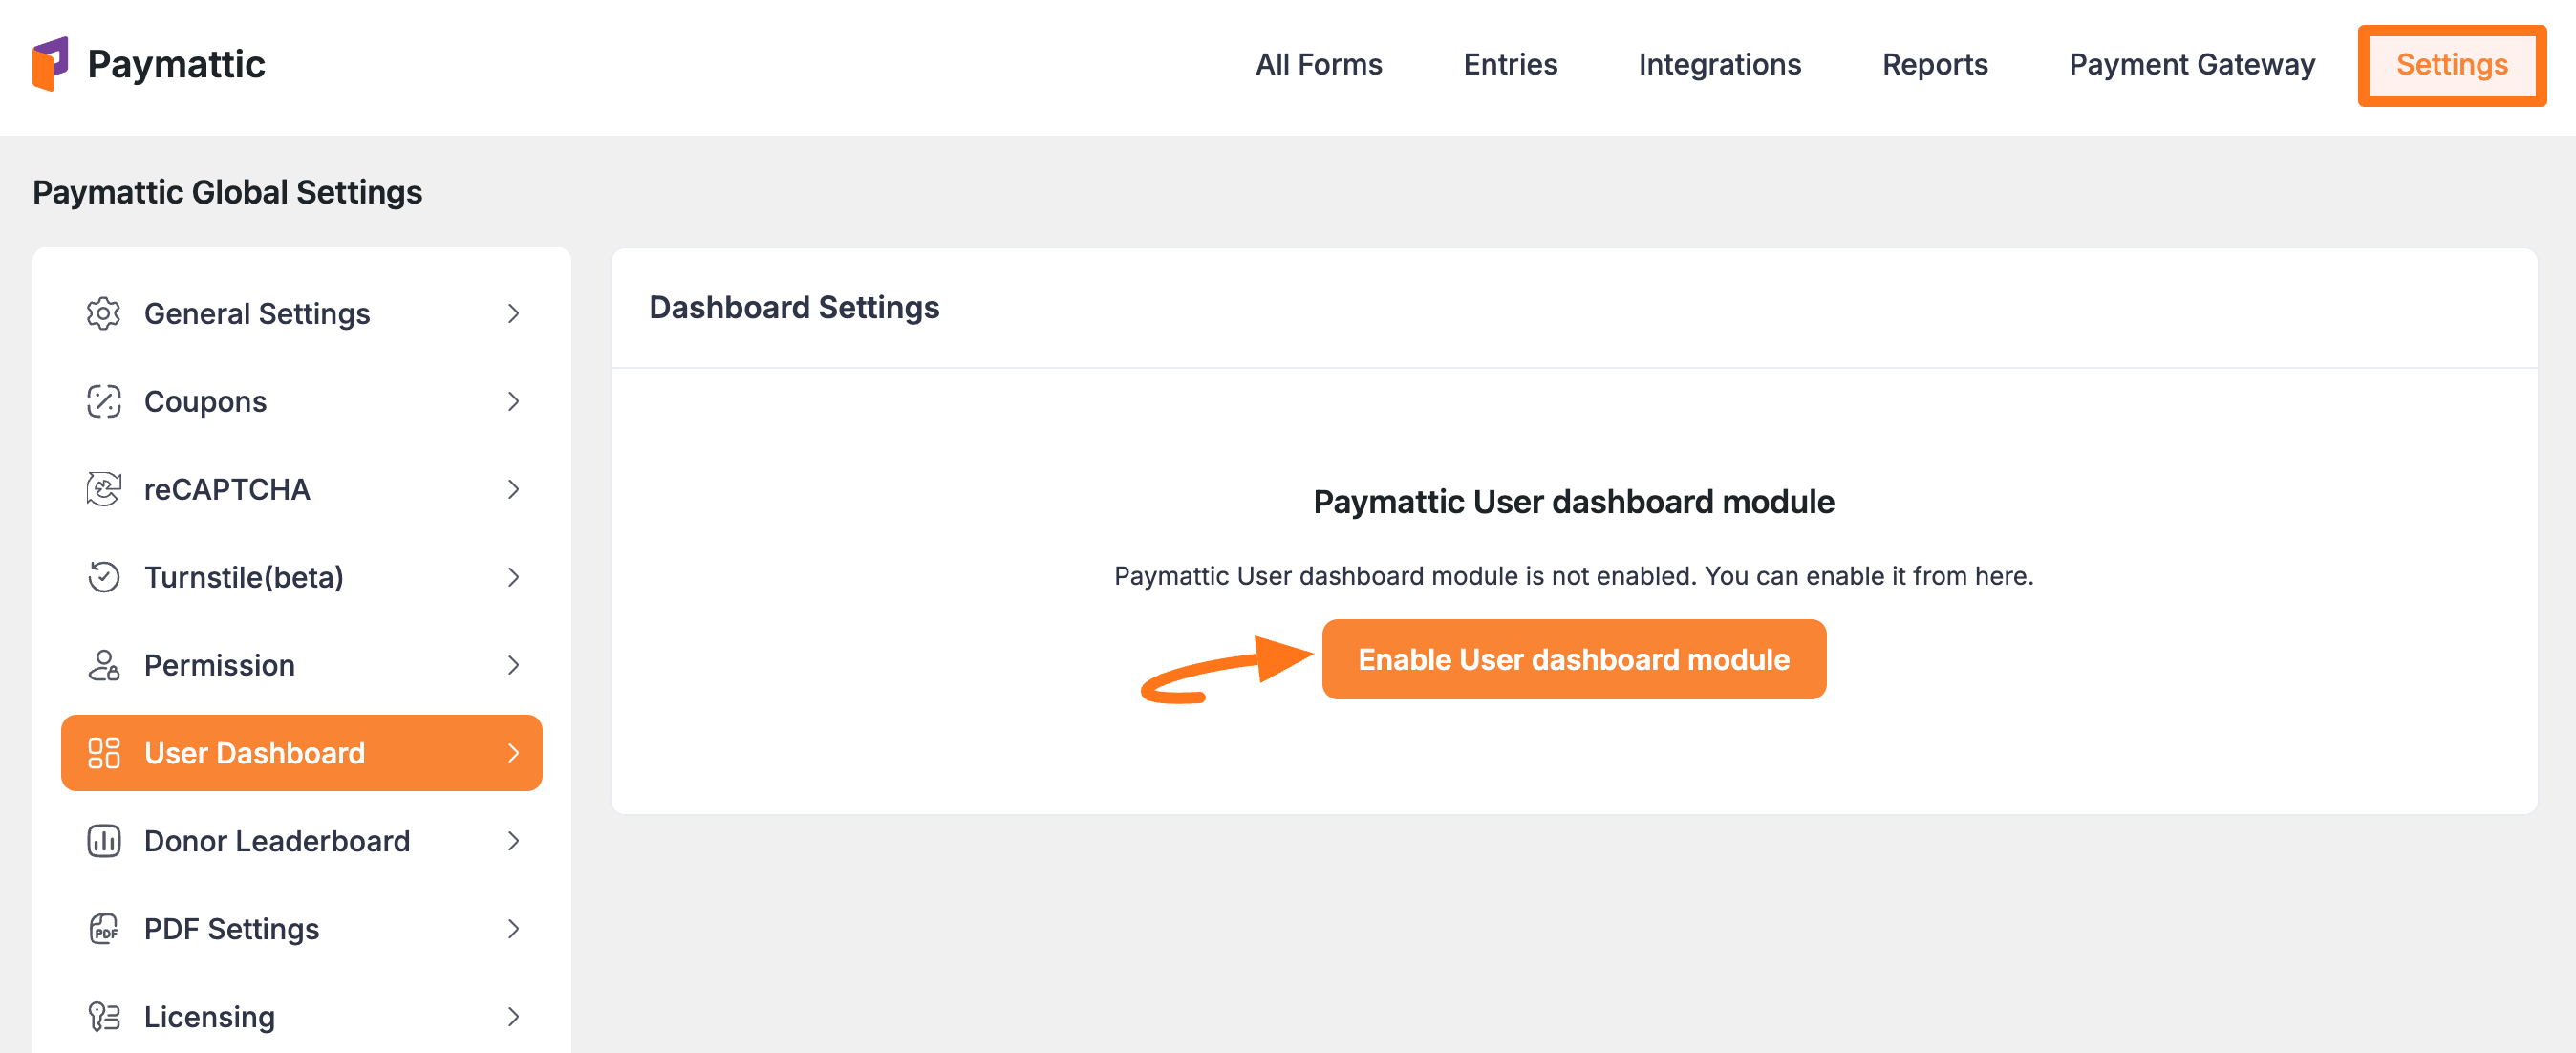
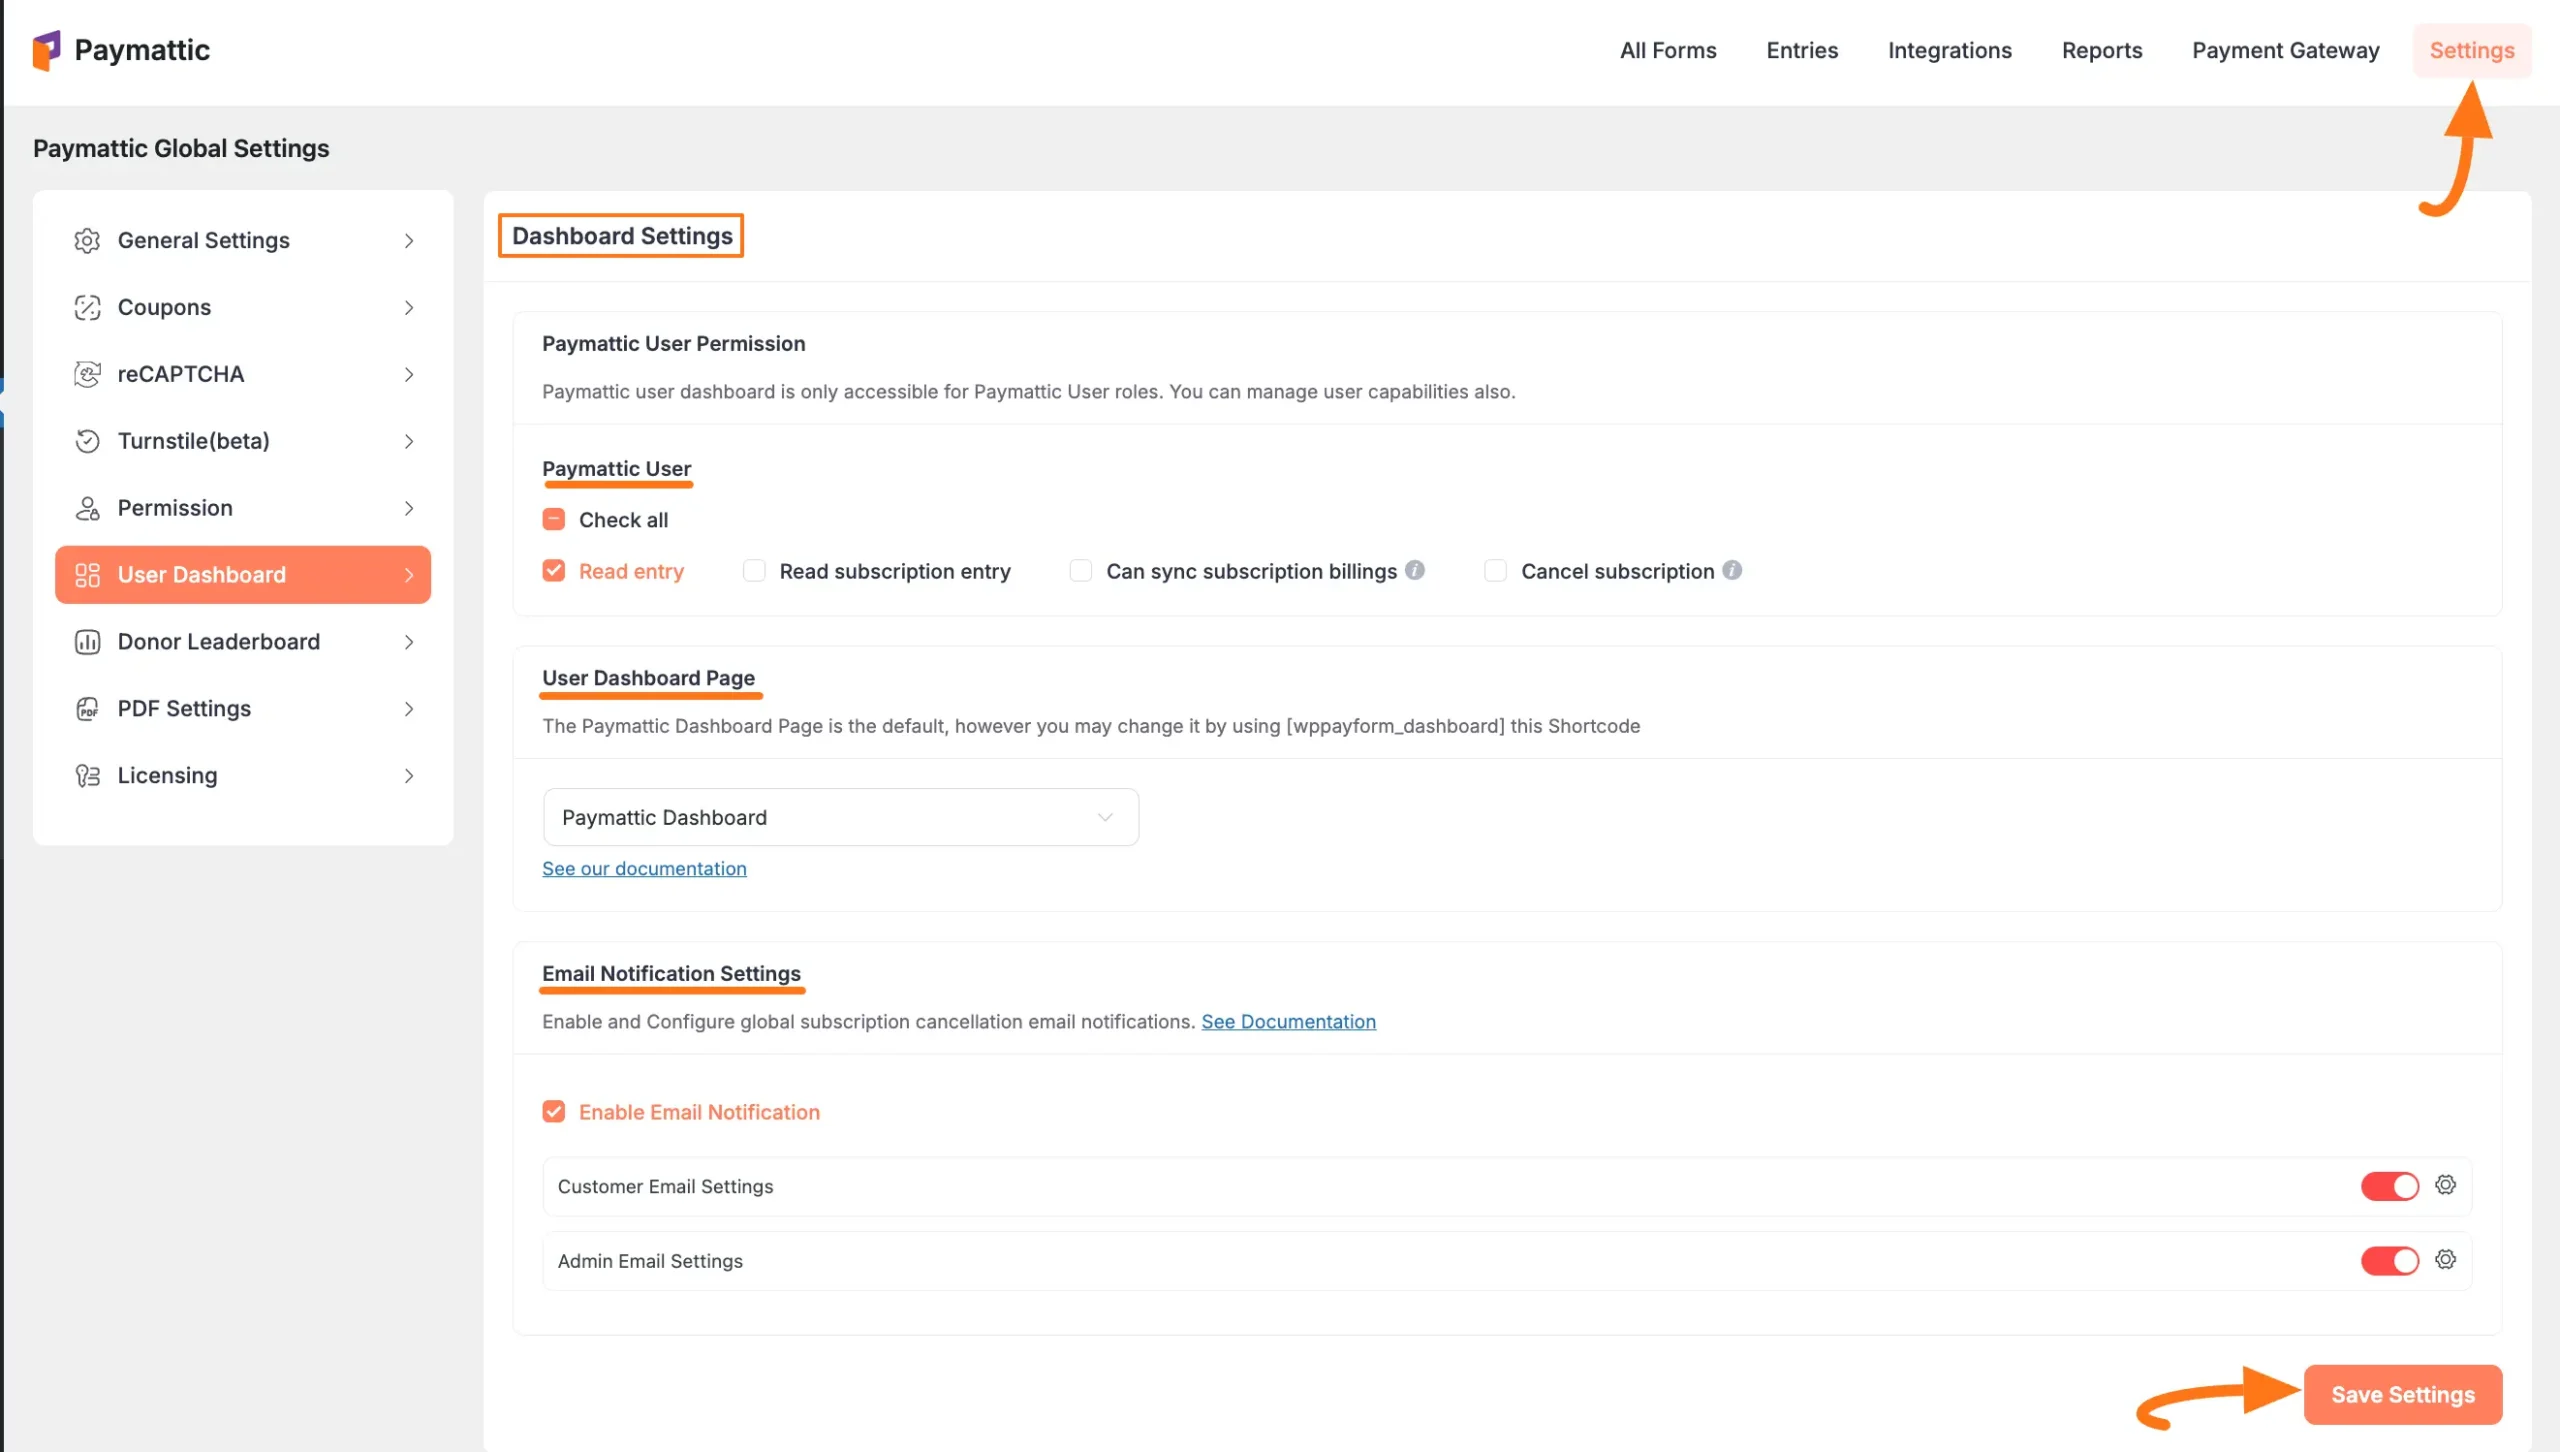
Once you enable the module, the Dashboard Settings page will appear with different settings options.
After setting up all the settings according to your needs, click the Save Settings button to save all your changes.
Configuration Options
User Permissions
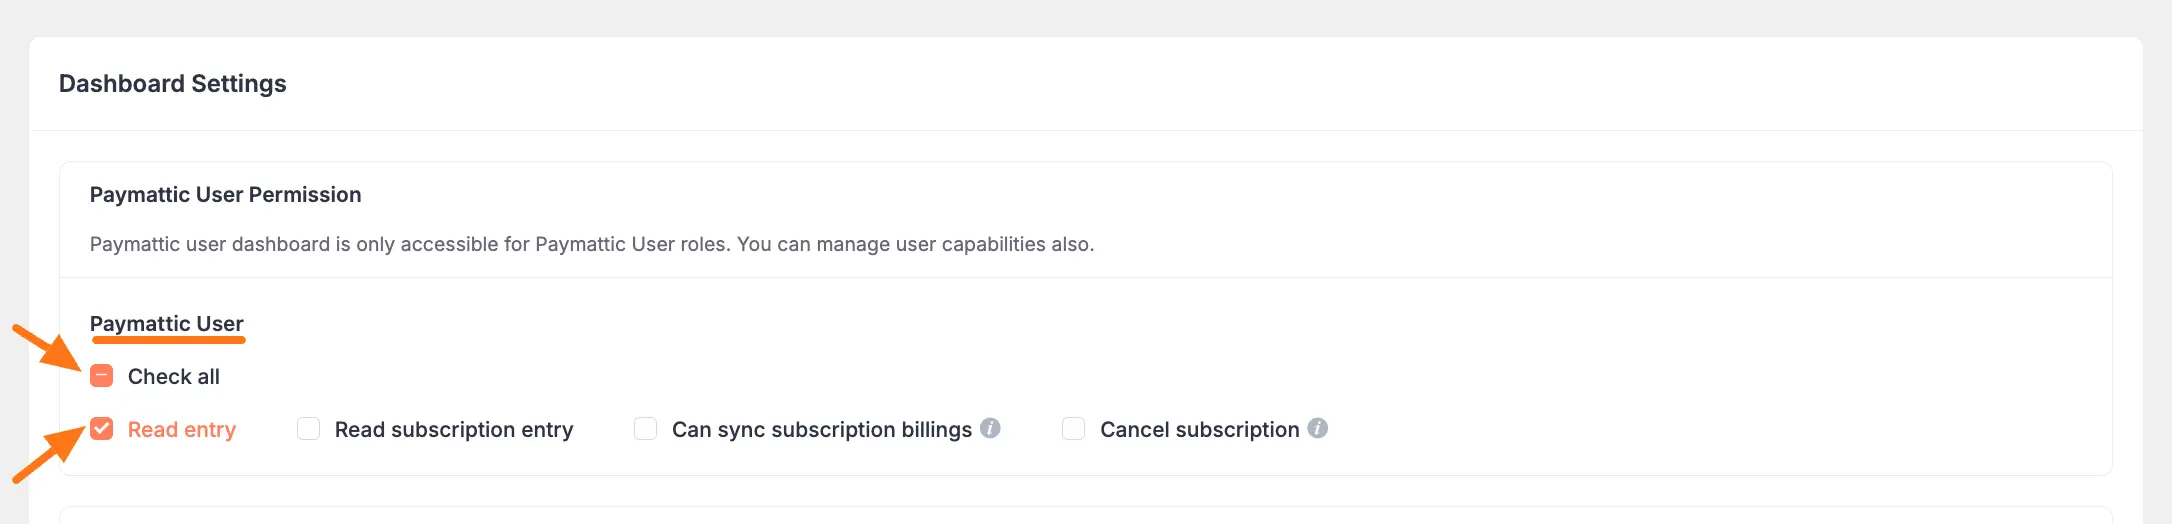
The Paymattic User option allows you to choose the level of access you want to give your users.
Now, select the roles by clicking the checkbox according to your preference. For example, I selected the Read entry roles.
But, if you want to select all the roles at once, simply click the Check All button.
WARNING
Remember, if you want your users to be able to cancel their subscriptions from their user dashboard, make sure to check the “Cancel Subscription” box.
Dashboard Page
Paymettic automatically creates a page for your users named Paymattic Dashboard. Simply, select the Payamattic Dashboard page by clicking the dropdown arrow.
Also, if you want any custom page for your user you can select it from the Dropdown menu.
TIP
But we recommend selecting our Paymattic Dashboard page for your user.

Email Notifications
With this setting option, you can enable Email Notification for Customers and Admin by clicking the Toggle buttons.
Then, every customer/admin will get an email notification after each subscription cancellation. Plus, click on the Settings icon to customize the settings if needed.
NOTE
To learn about enabling email notification for Submission Cancellation in detail, read this Documentation .

User Registration Setup
You will need a User Registration Form for your user to register in your Paymattic Dashboard.
Create Registration Form
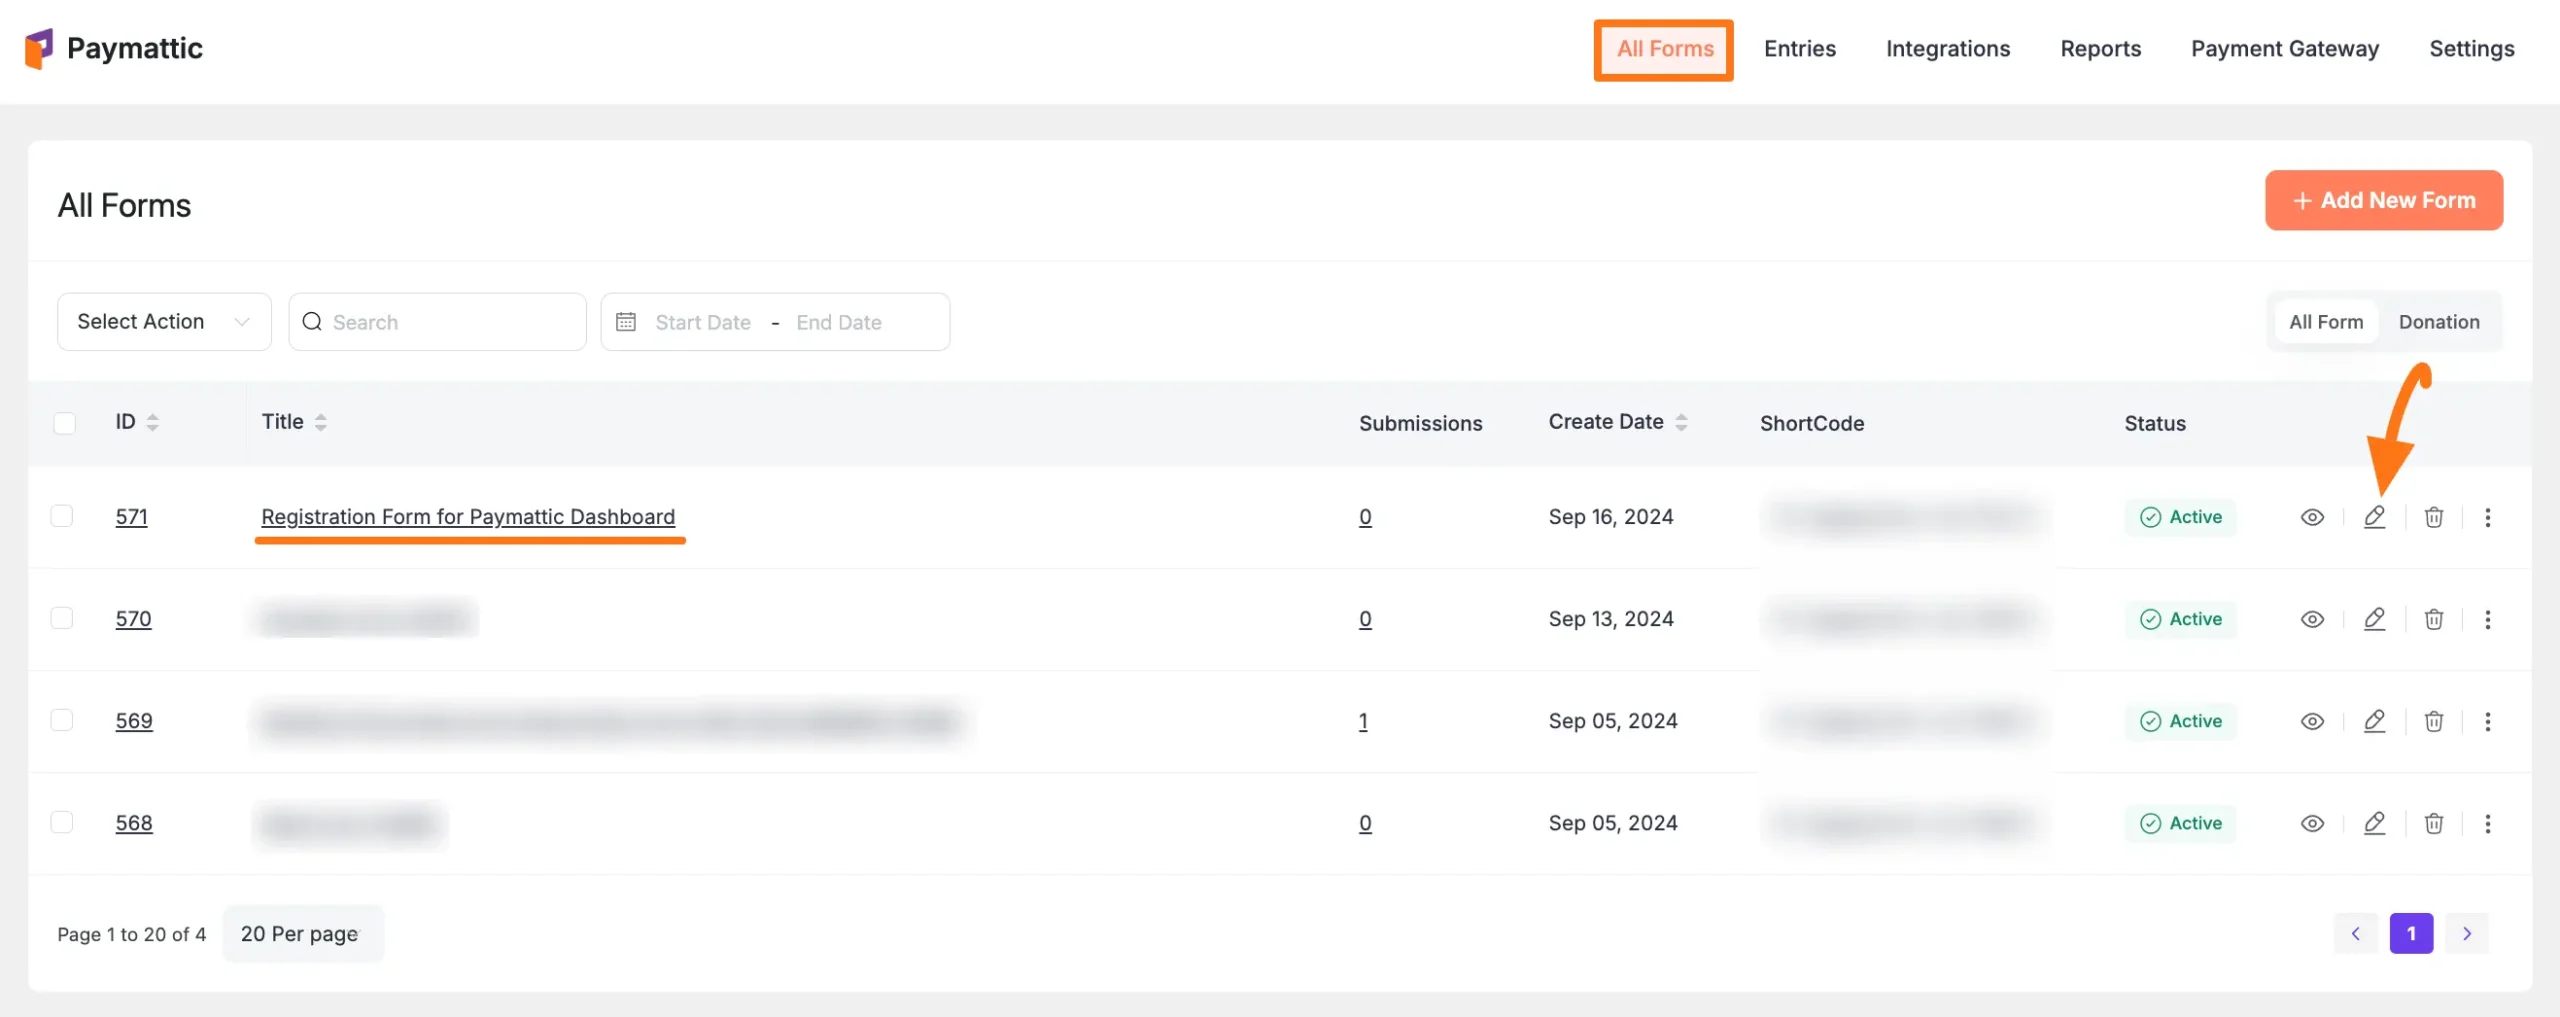
First, go to All Forms from the Paymattic Navbar, choose any existing User Registration Form you have, and click the Pencil/Editor icon.
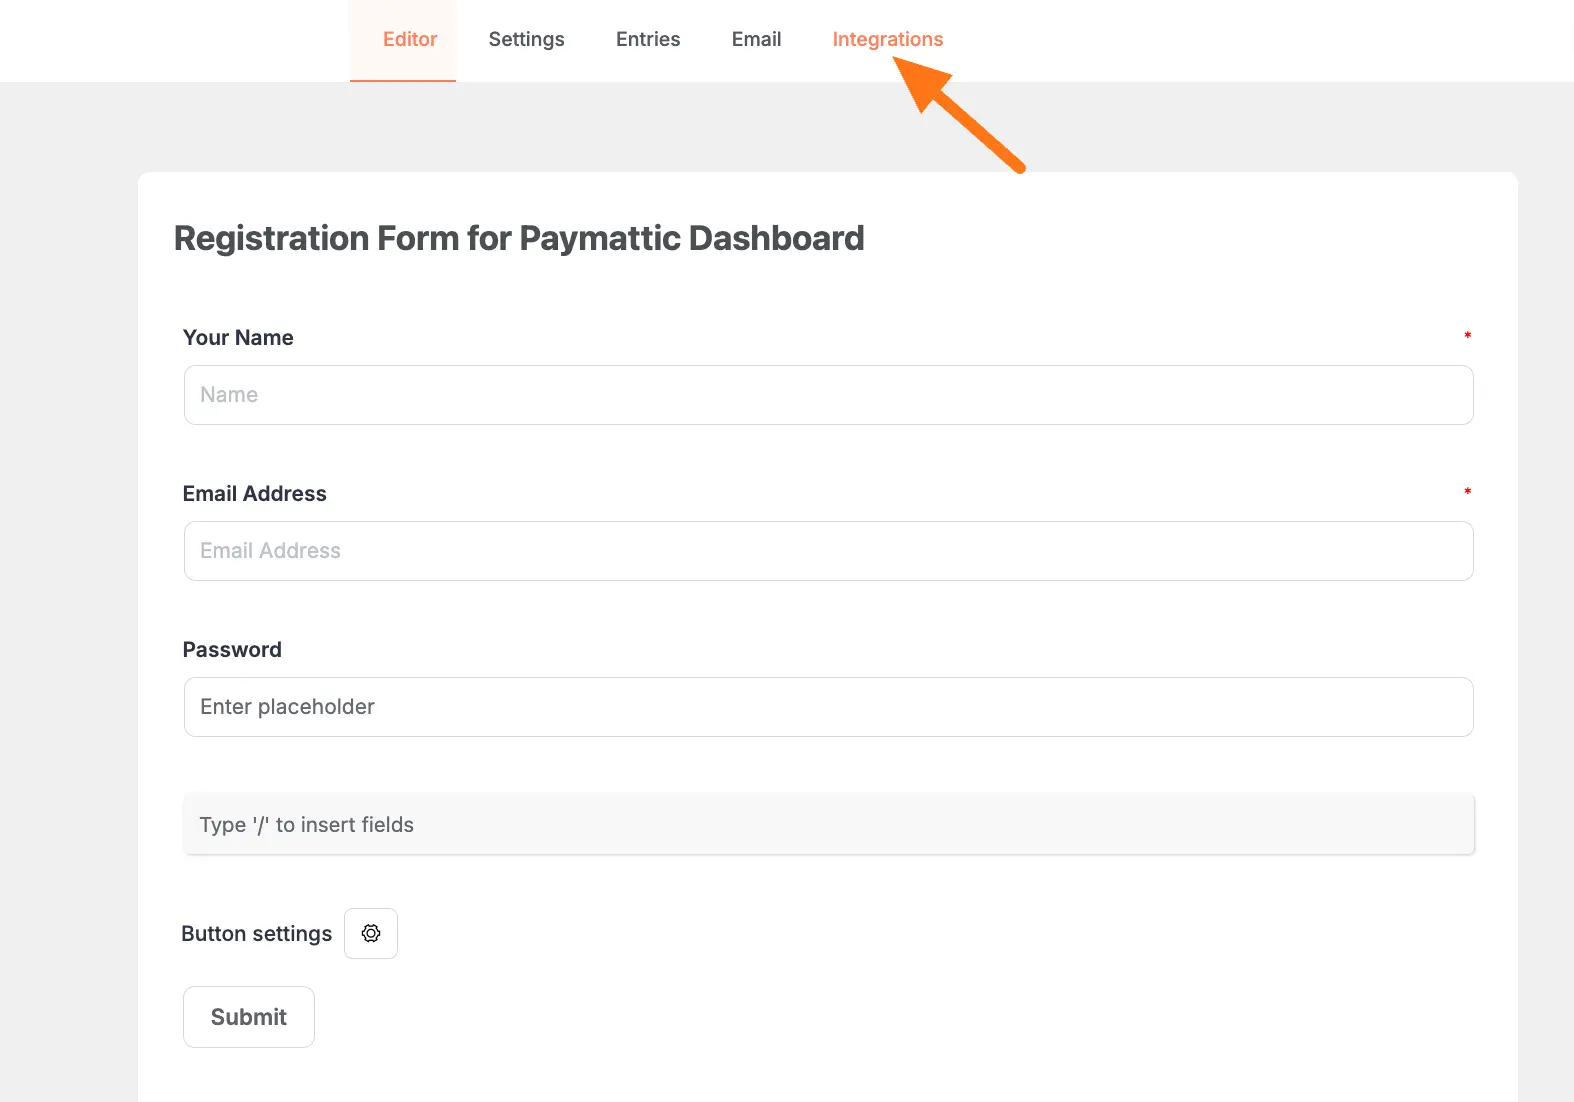
For example, I choose the Registration Form for the Paymattic Dashboard to show the process.
If you do not have any existing forms, read the create a from scratch or Create a Form using using templates documentation.
Enable User Registration
Once the Editor page opens, go to the Integrations tab.
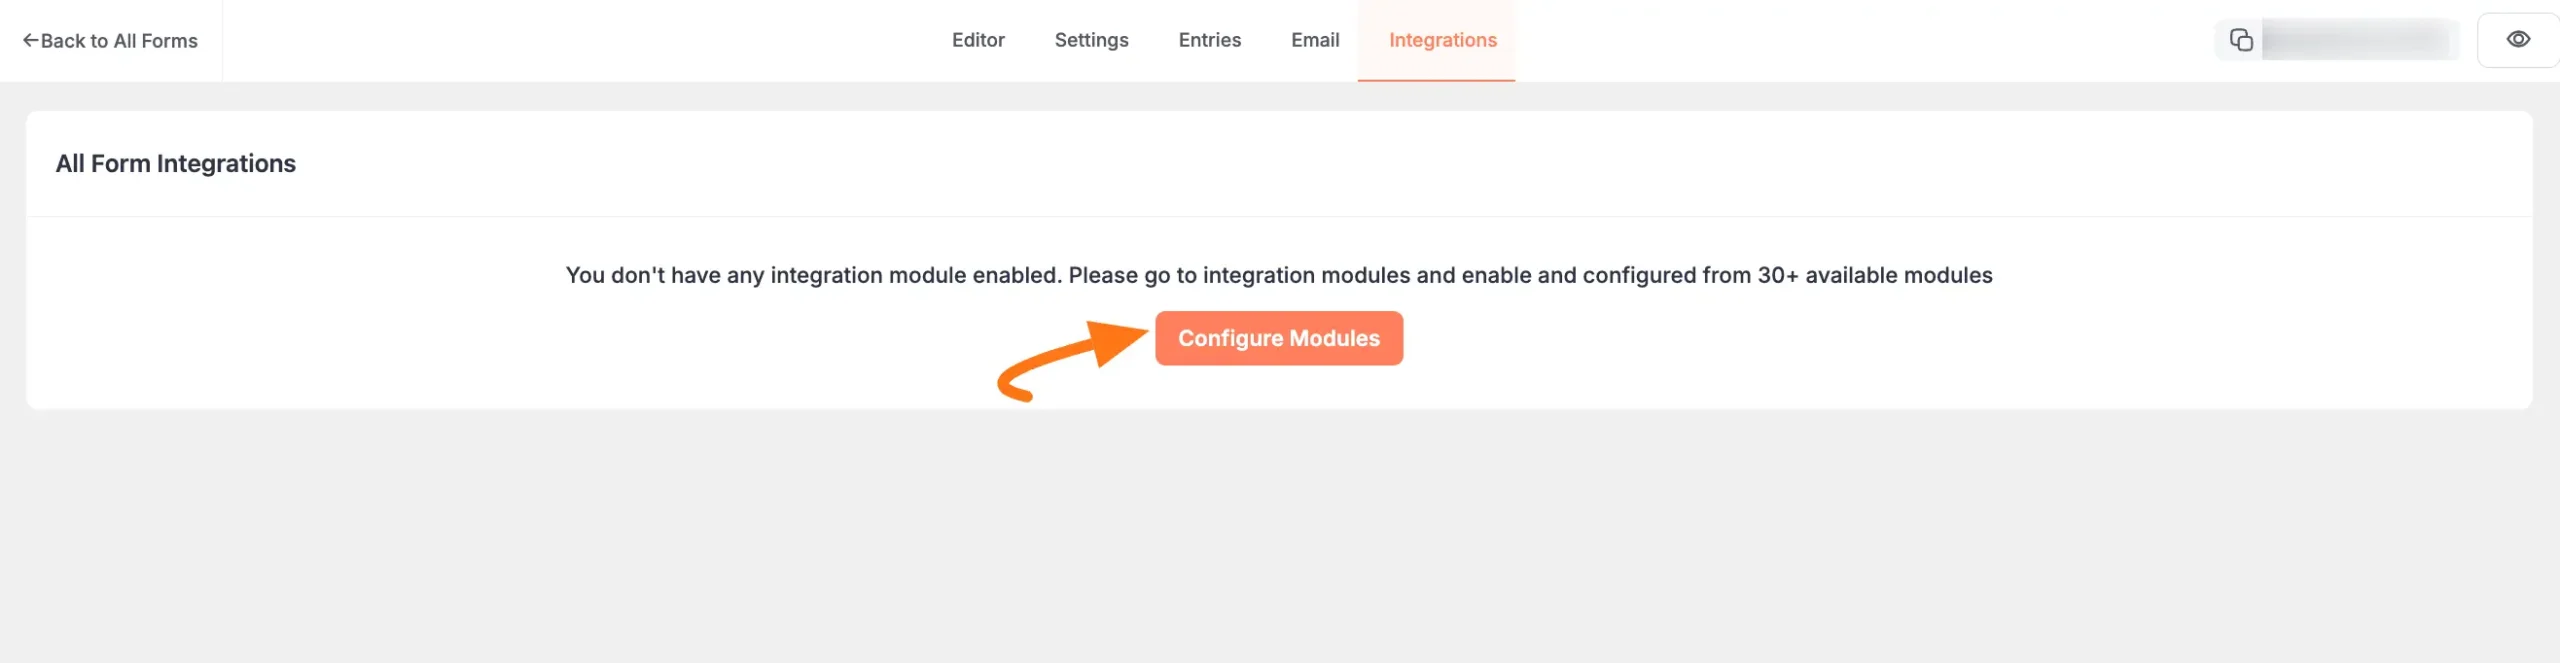
Click the Configure Modules button and it will redirect you to the Integration section from Paymattic Navbar.
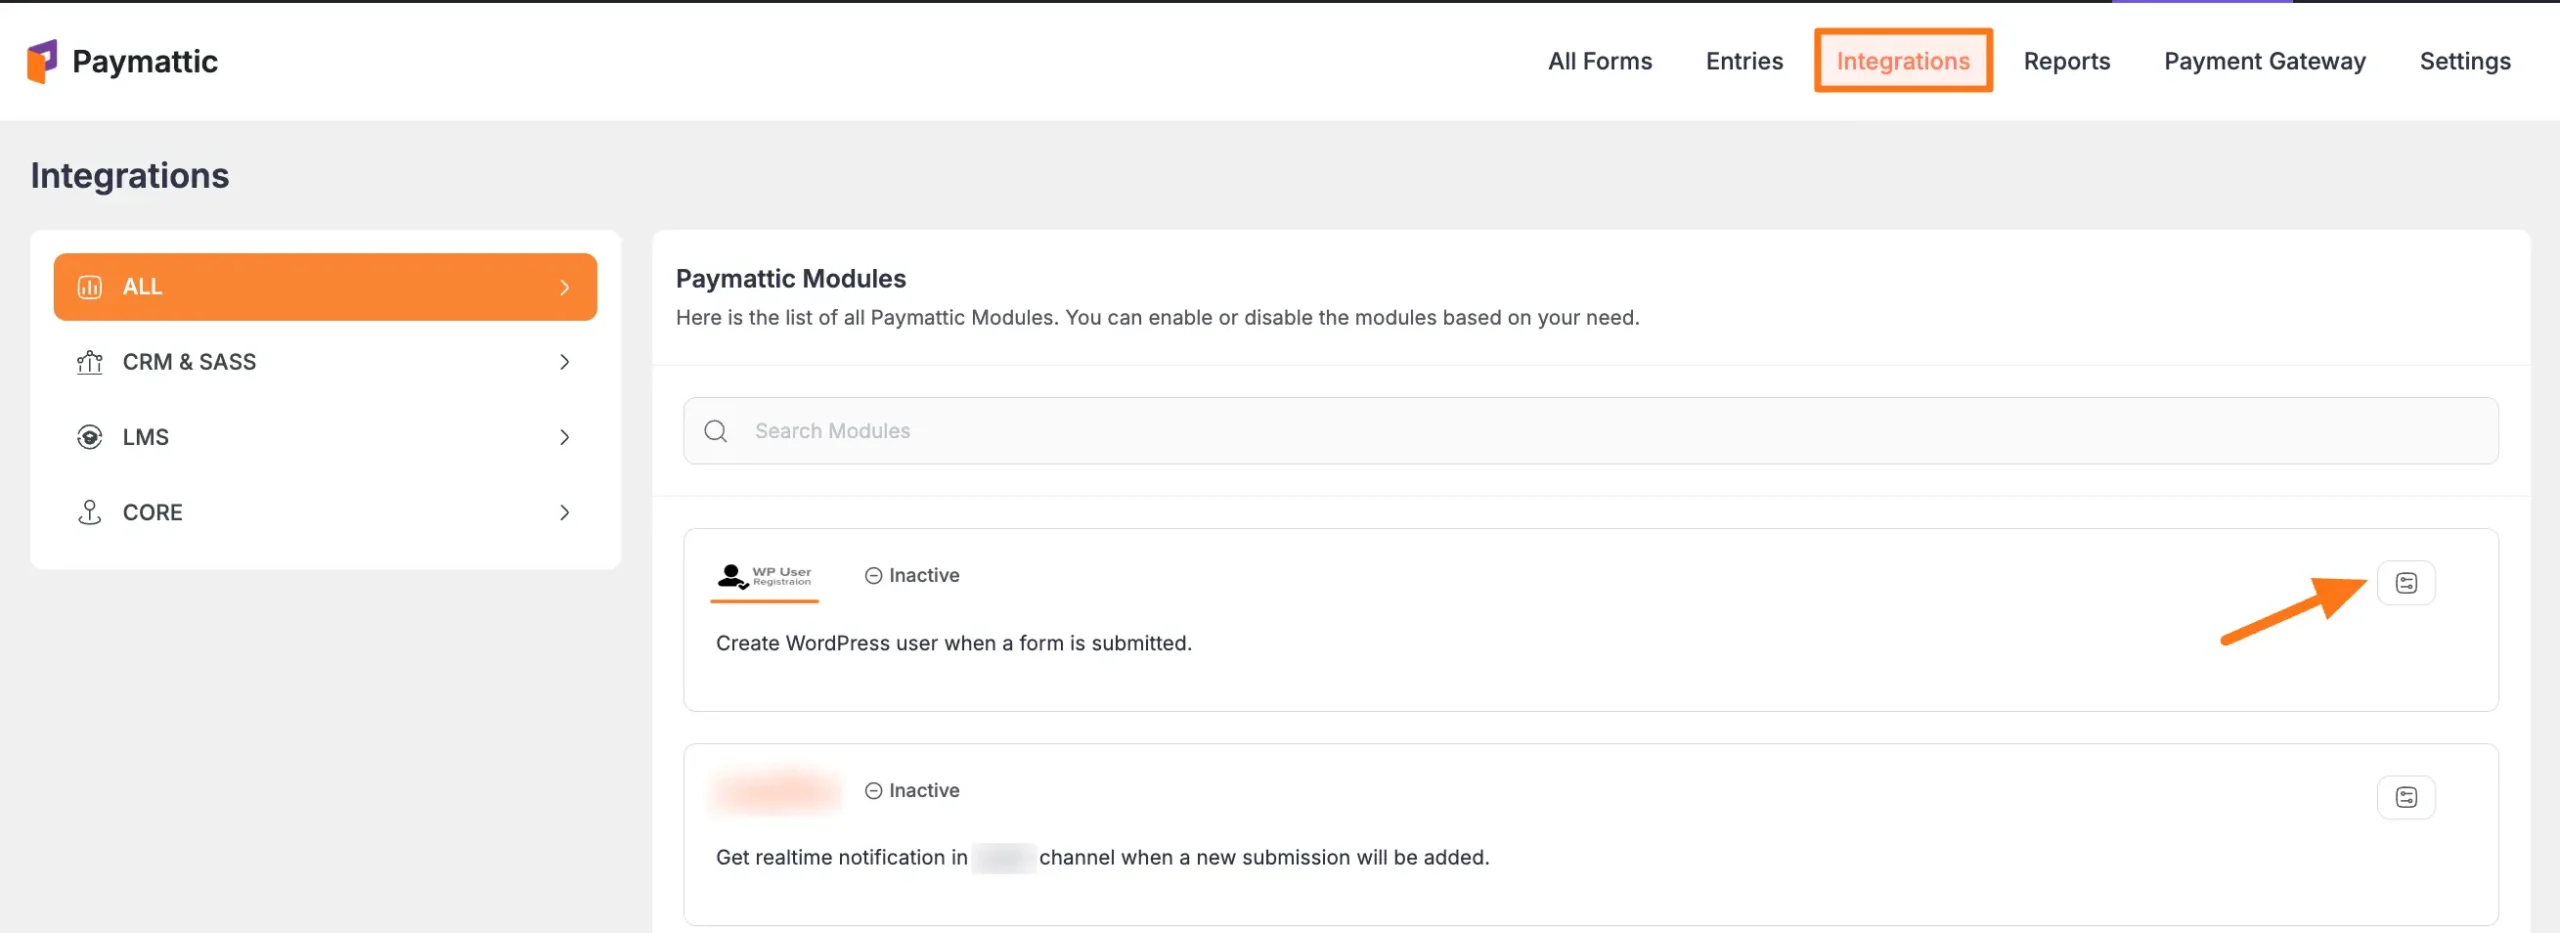
To activate the User Registration module, click the Settings Icon.
WARNING
Remember, to integrate the User Registration feed, you need to enable the integration of the User Registration module.
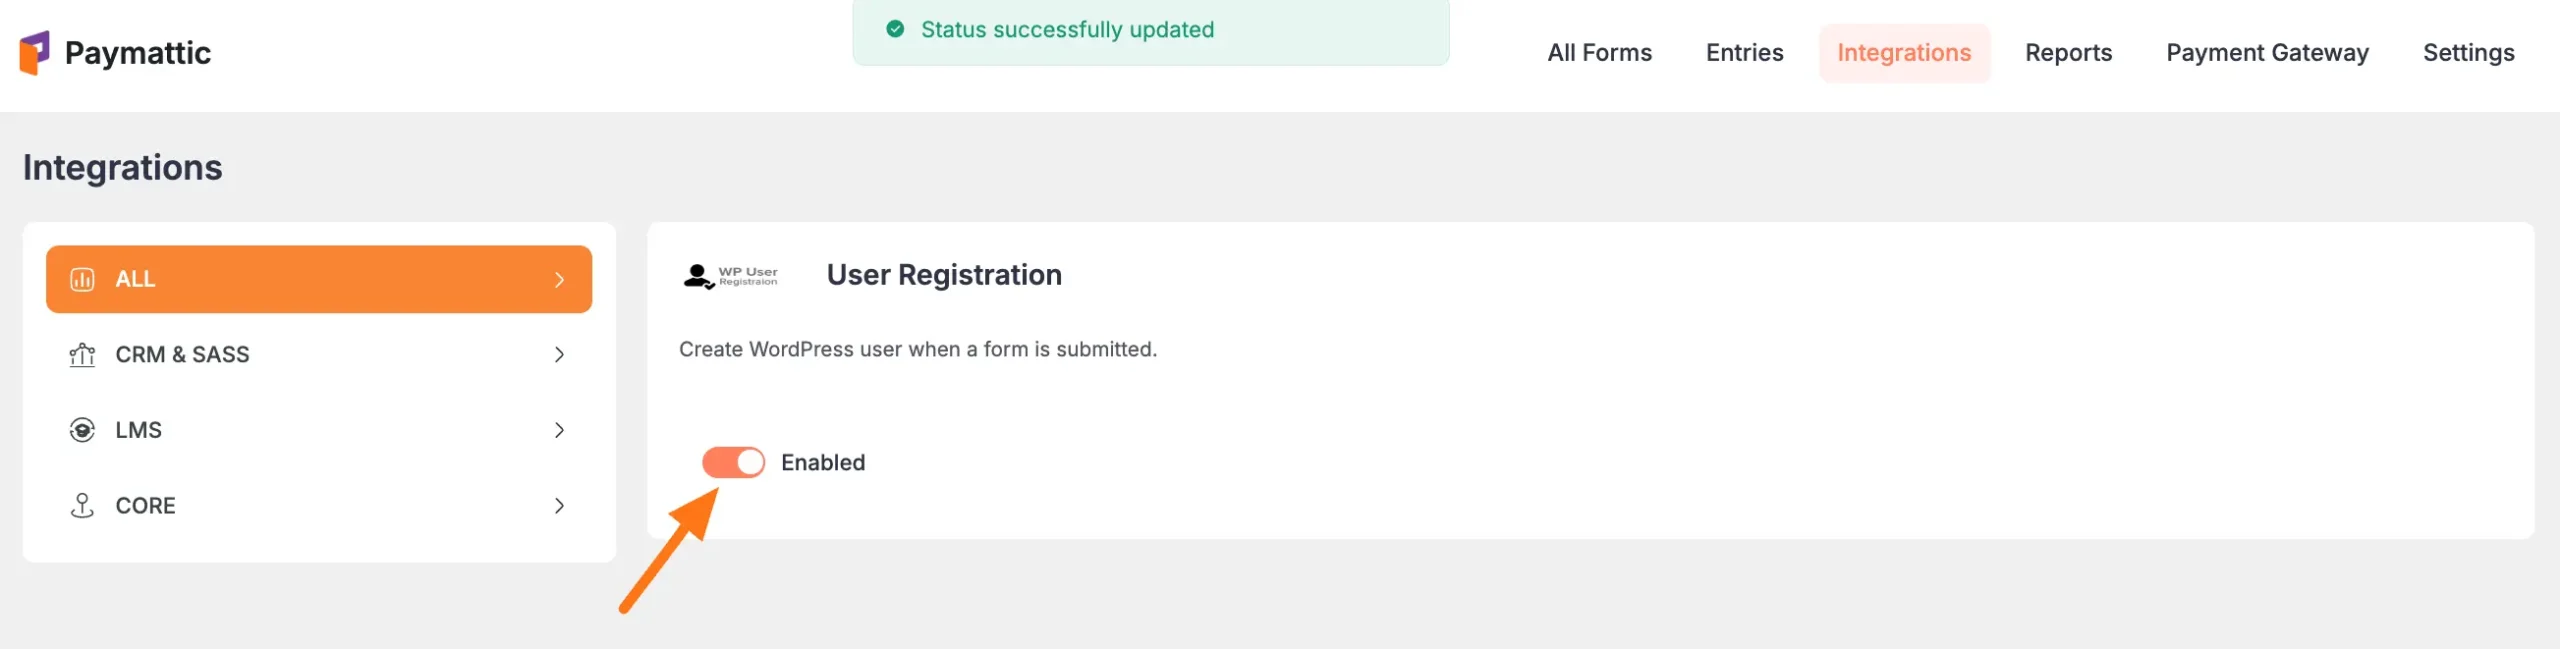
Click the Toggle button and the User Registration module will be enabled.
Add Registration to Form
Now, return to your chosen form’s Editor page, go to Integrations, expand the Add New Integration dropdown, and select the User Registration Integration feed.

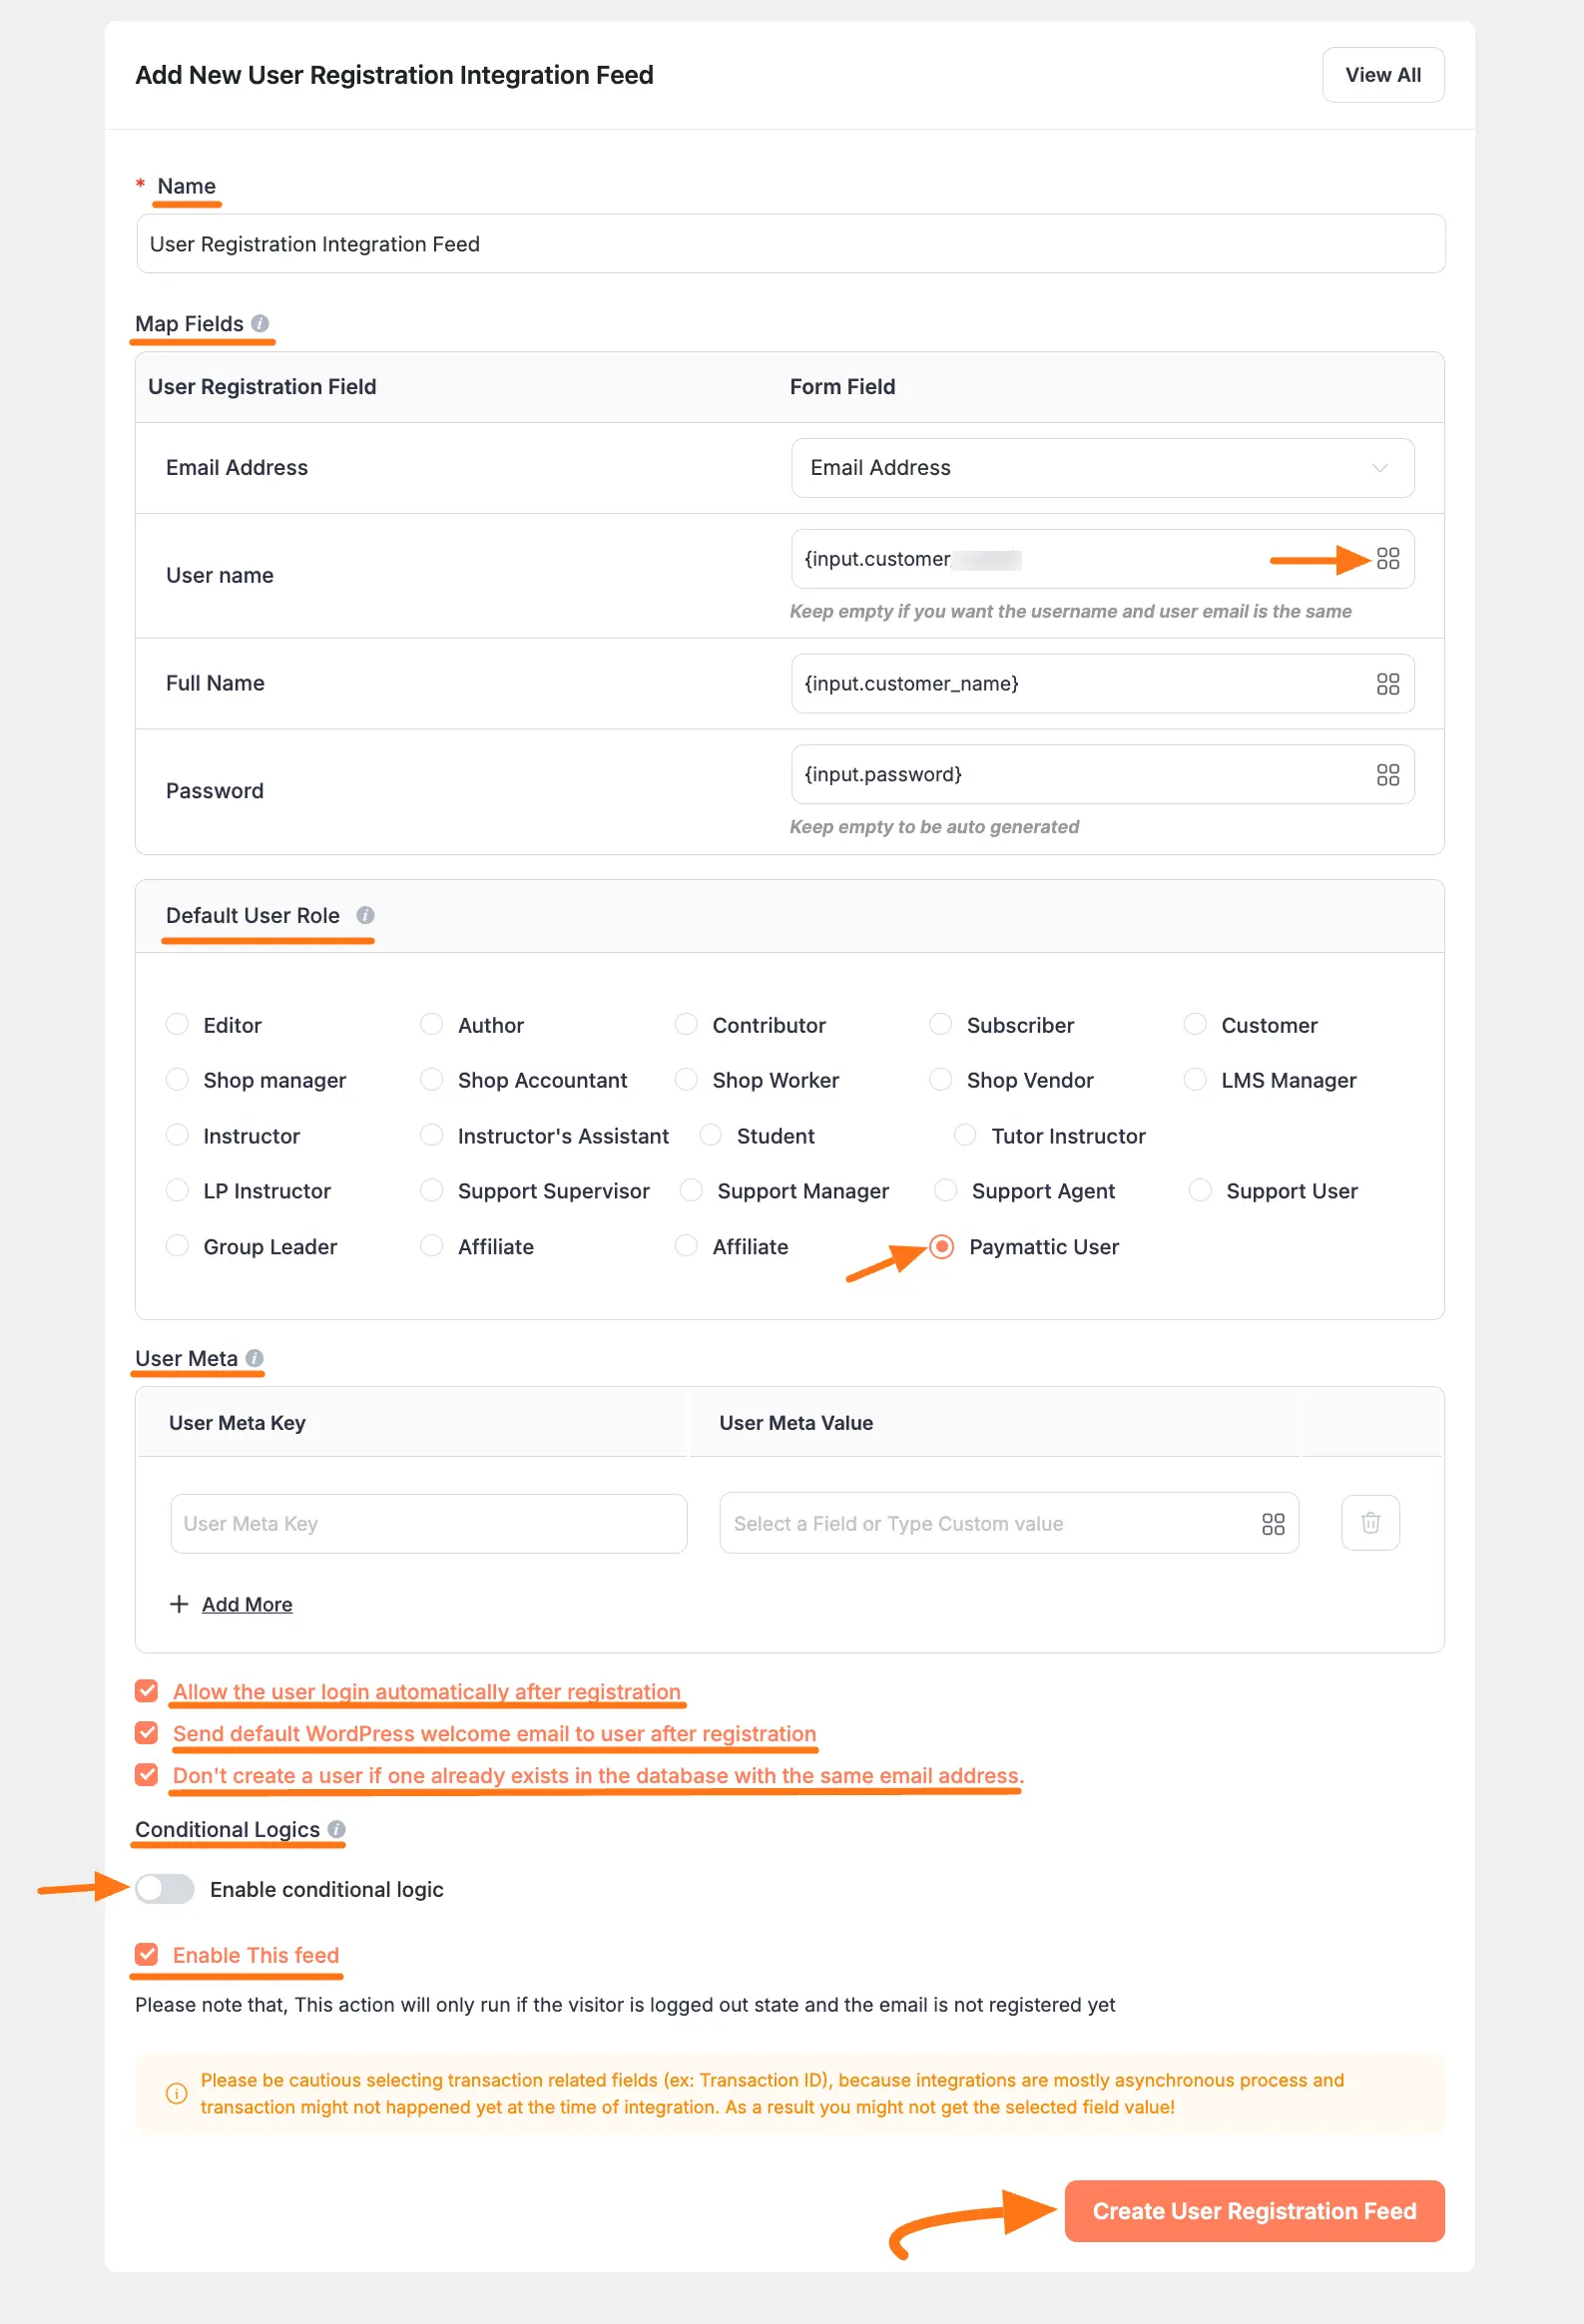
Now, a pop-up page will appear with various settings options for configuring User Registration.
All the settings options mentioned in the screenshot below are briefly explained:
- Name: Here, you can set a name according to your preference for your feed.
- Email Address: In this field, you have to select the Email Address.
- User Name: Here, use the {input.customer_email} shortcode because your customer email will be the user name to log in to your Paymattic user dashboard field.
- Full Name: Here, use the {input.customer_name} shortcode
- Password: Here, use the {input.password} shortcode to address your password
- Default User Role: You can select a default user role for your paymattic user.
- User Meta: Here, you can add some User Meta Key and Meta Value if needed.
- Allow the user login automatically after registration: Enable this option and your user will be directly logged into your Paymattic User Dashboard after registration.
- Send default WordPress welcome email to user after registration: Here you will also get the checkbox option to give a Welcome Email Notification to your user. Don’t create a user if one already exists in the database with the same email address: If you want to disable the form submission of already existing users then just simply check this box.
- Conditional logics: If you have any conditions about this submission just set the conditions from the Conditional Logic option.
- Enable this field: If you check this option, all the actions of this feed will only run for the visitors who are in logged out state and the email that is not registered yet.
Once you set up the page, click the Create User Registration Feed button and the feed will be added.
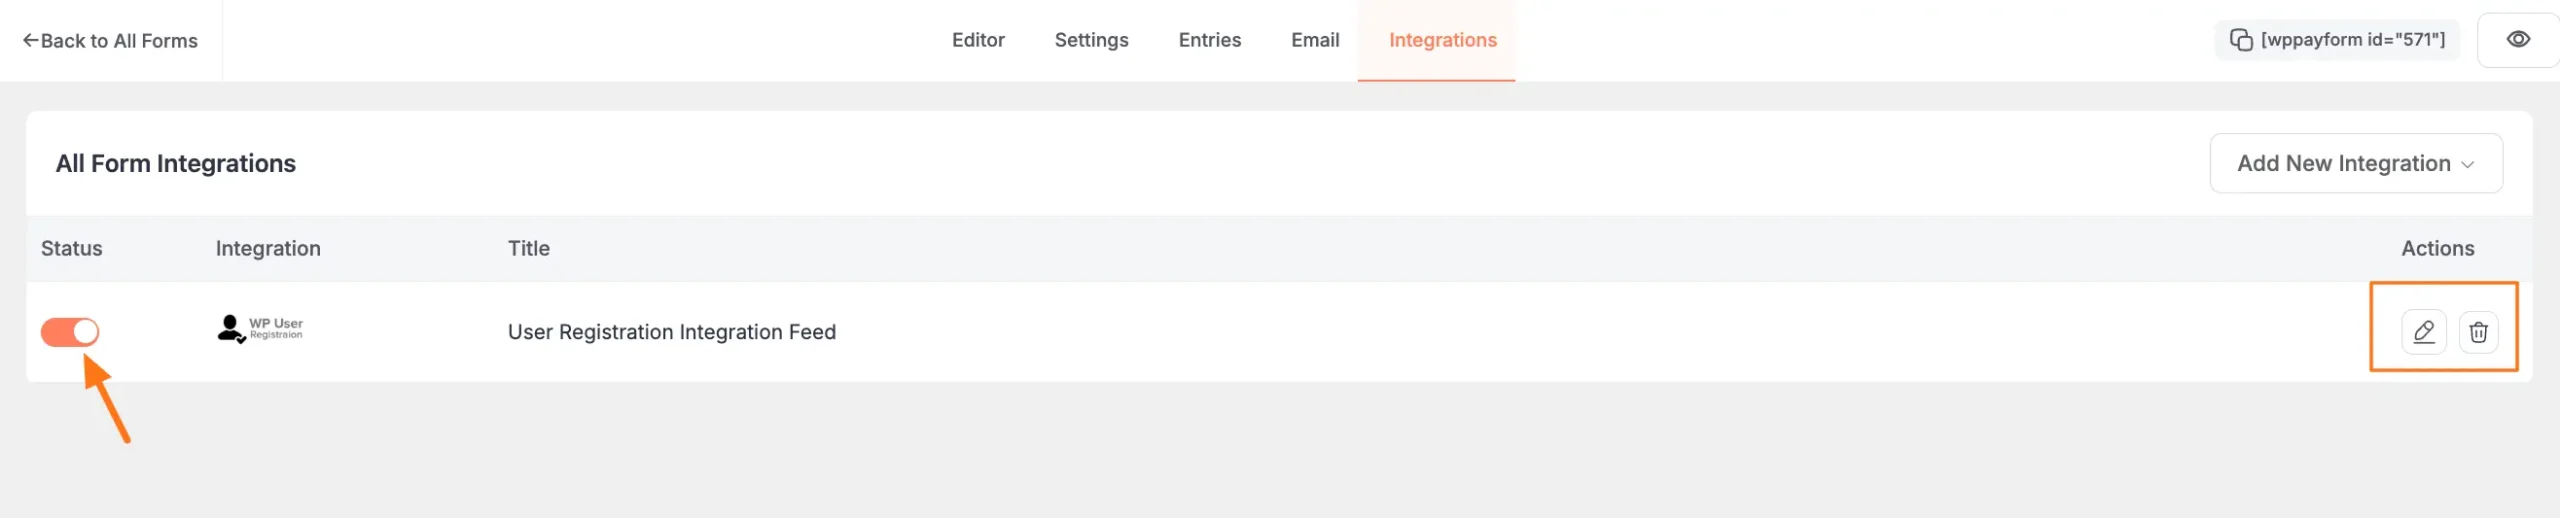
Now you will see that your User Registration Integration Feed has been added here.
You can modify your user registration feed anytime by clicking the Pencil Icon and delete it from here by clicking the Trash Icon.
Also, you can disable or enable this feed anytime by clicking the Toggle button if needed.
Configure Form Submission
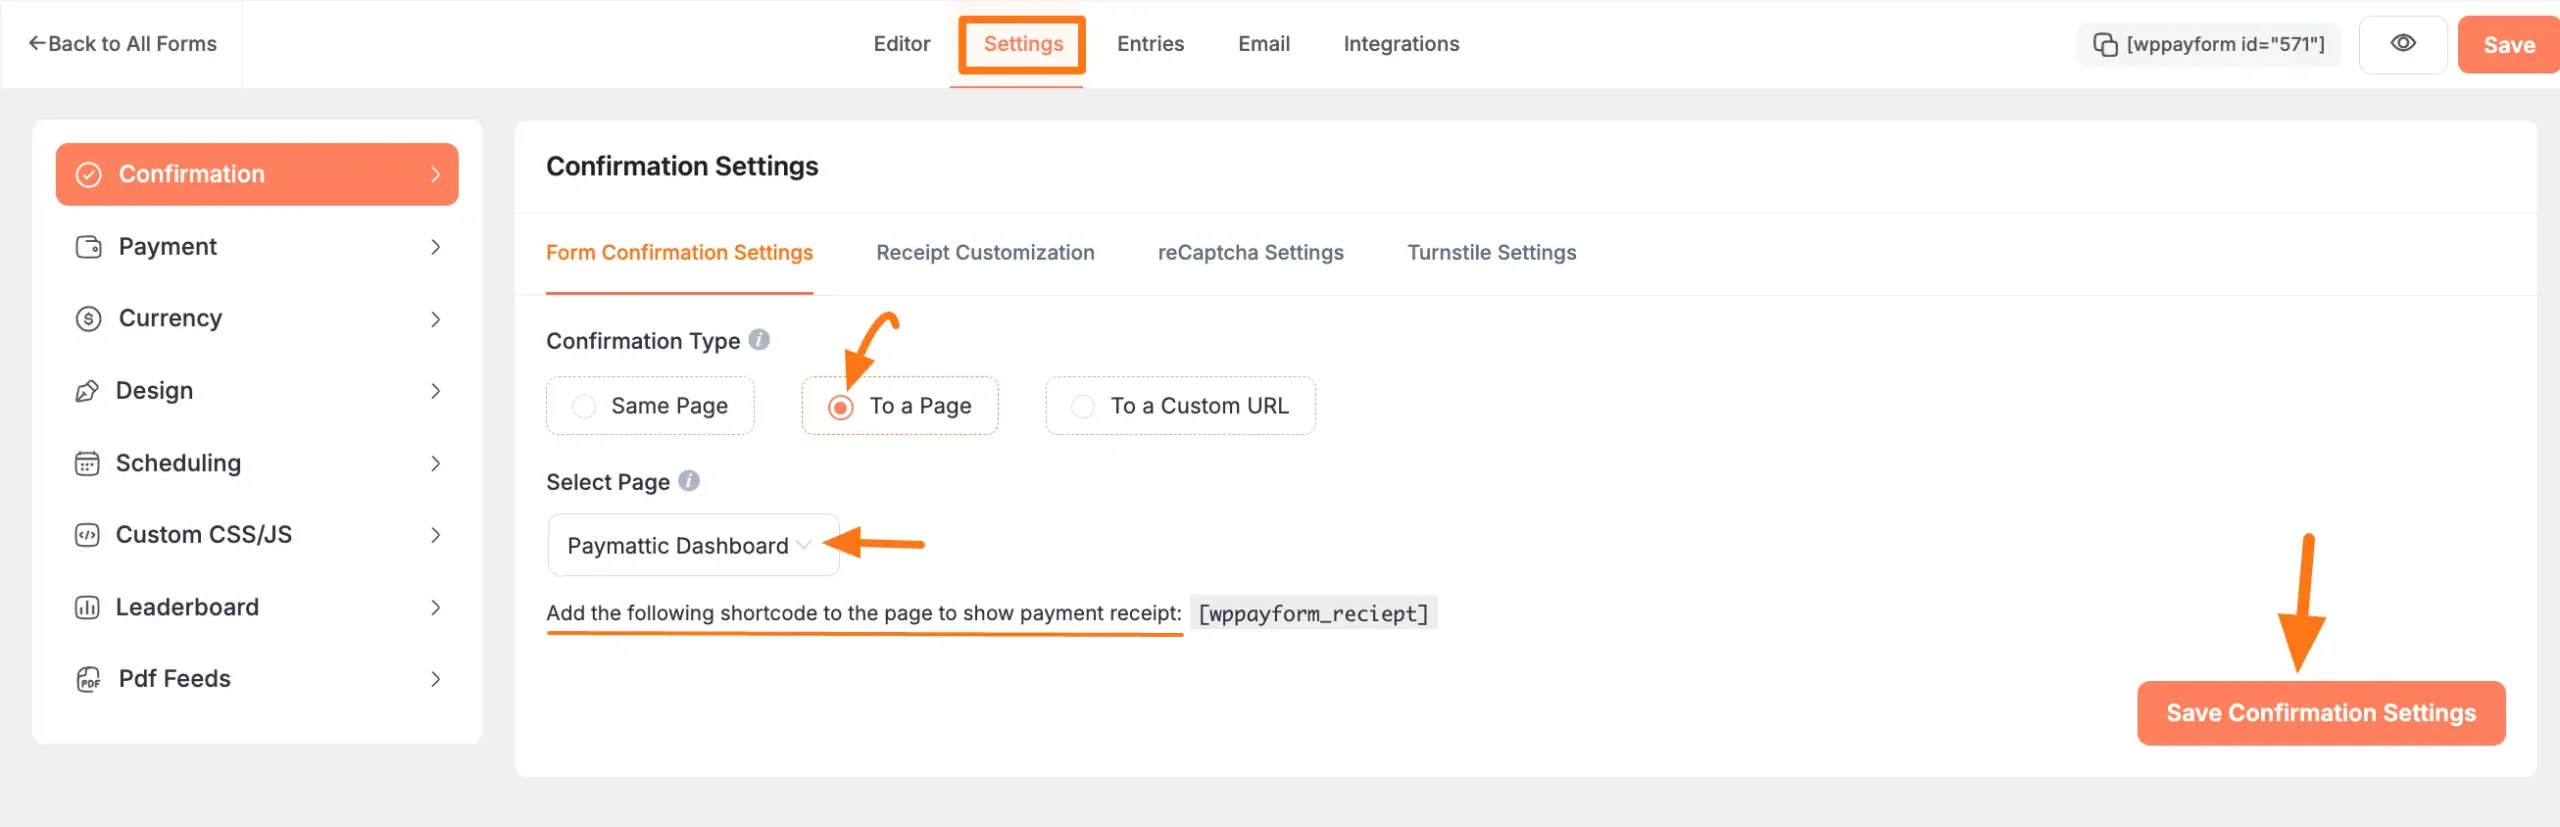
Now go to the form’s Settings, open the Confirmation tab, select the To a Page as the Confirmation Type, and select the Paymattice Dashboard page from the dropdown as a redirection page.
Also, to display the payment receipt to your user, you can use this [wppayform_receipt] shortcode to the Paymattic Dashboard page.
Finally, click on the Save Confirmations Settings to save your changes.
Display Payment Receipt
Add [wppayform_receipt] shortcode to your dashboard page to show payment receipts.
Display the Dashboard
To display your User Dashboard through the User Registration Form to the front end of your desired WordPress Site, follow the steps with the screenshots below –
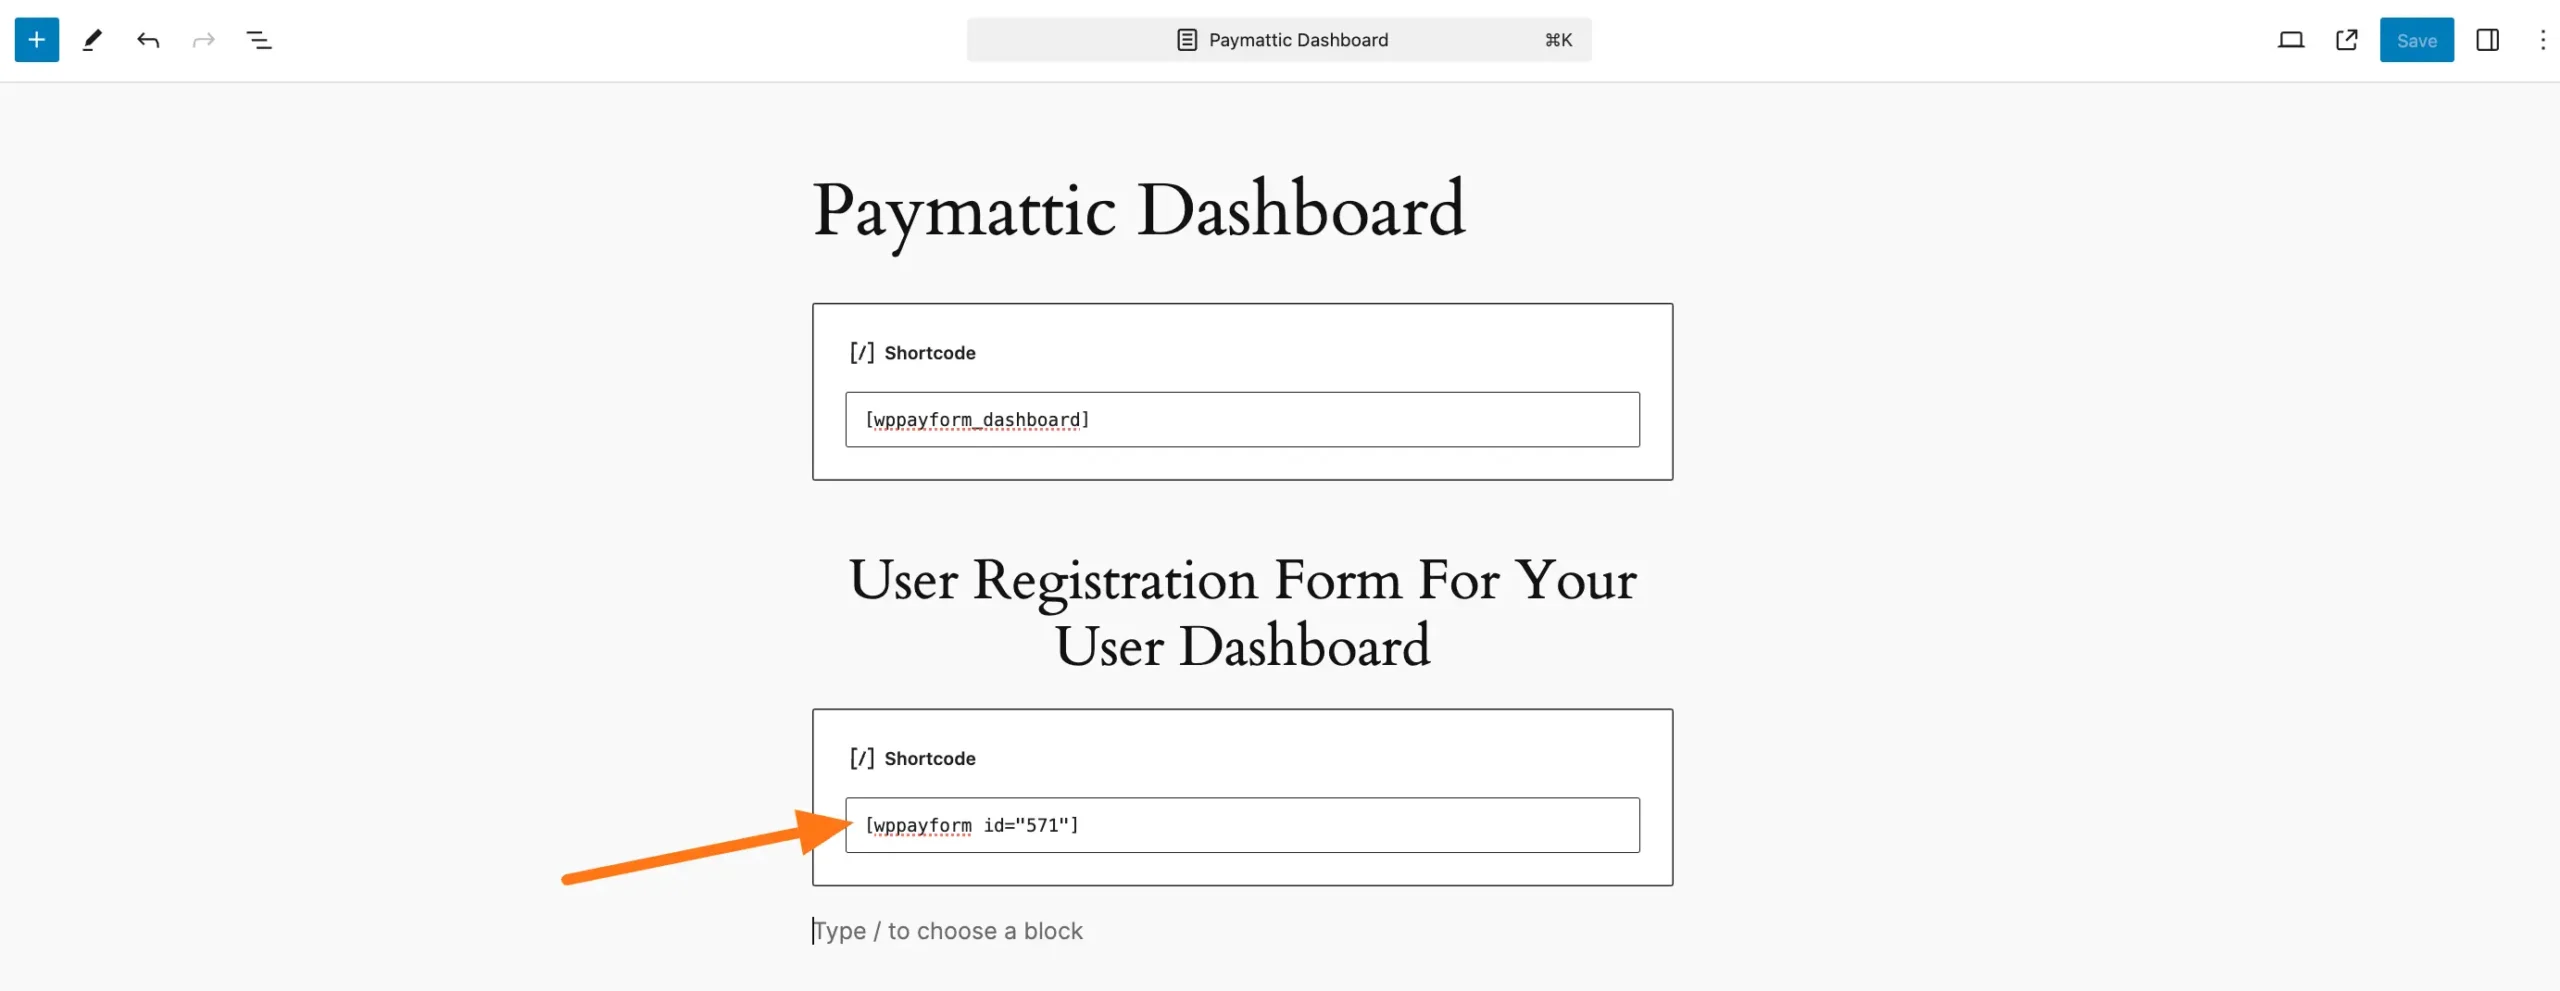
First, go to the All Forms from the Paymattic Navbar and copy the Shortcode of your User Registration Form.
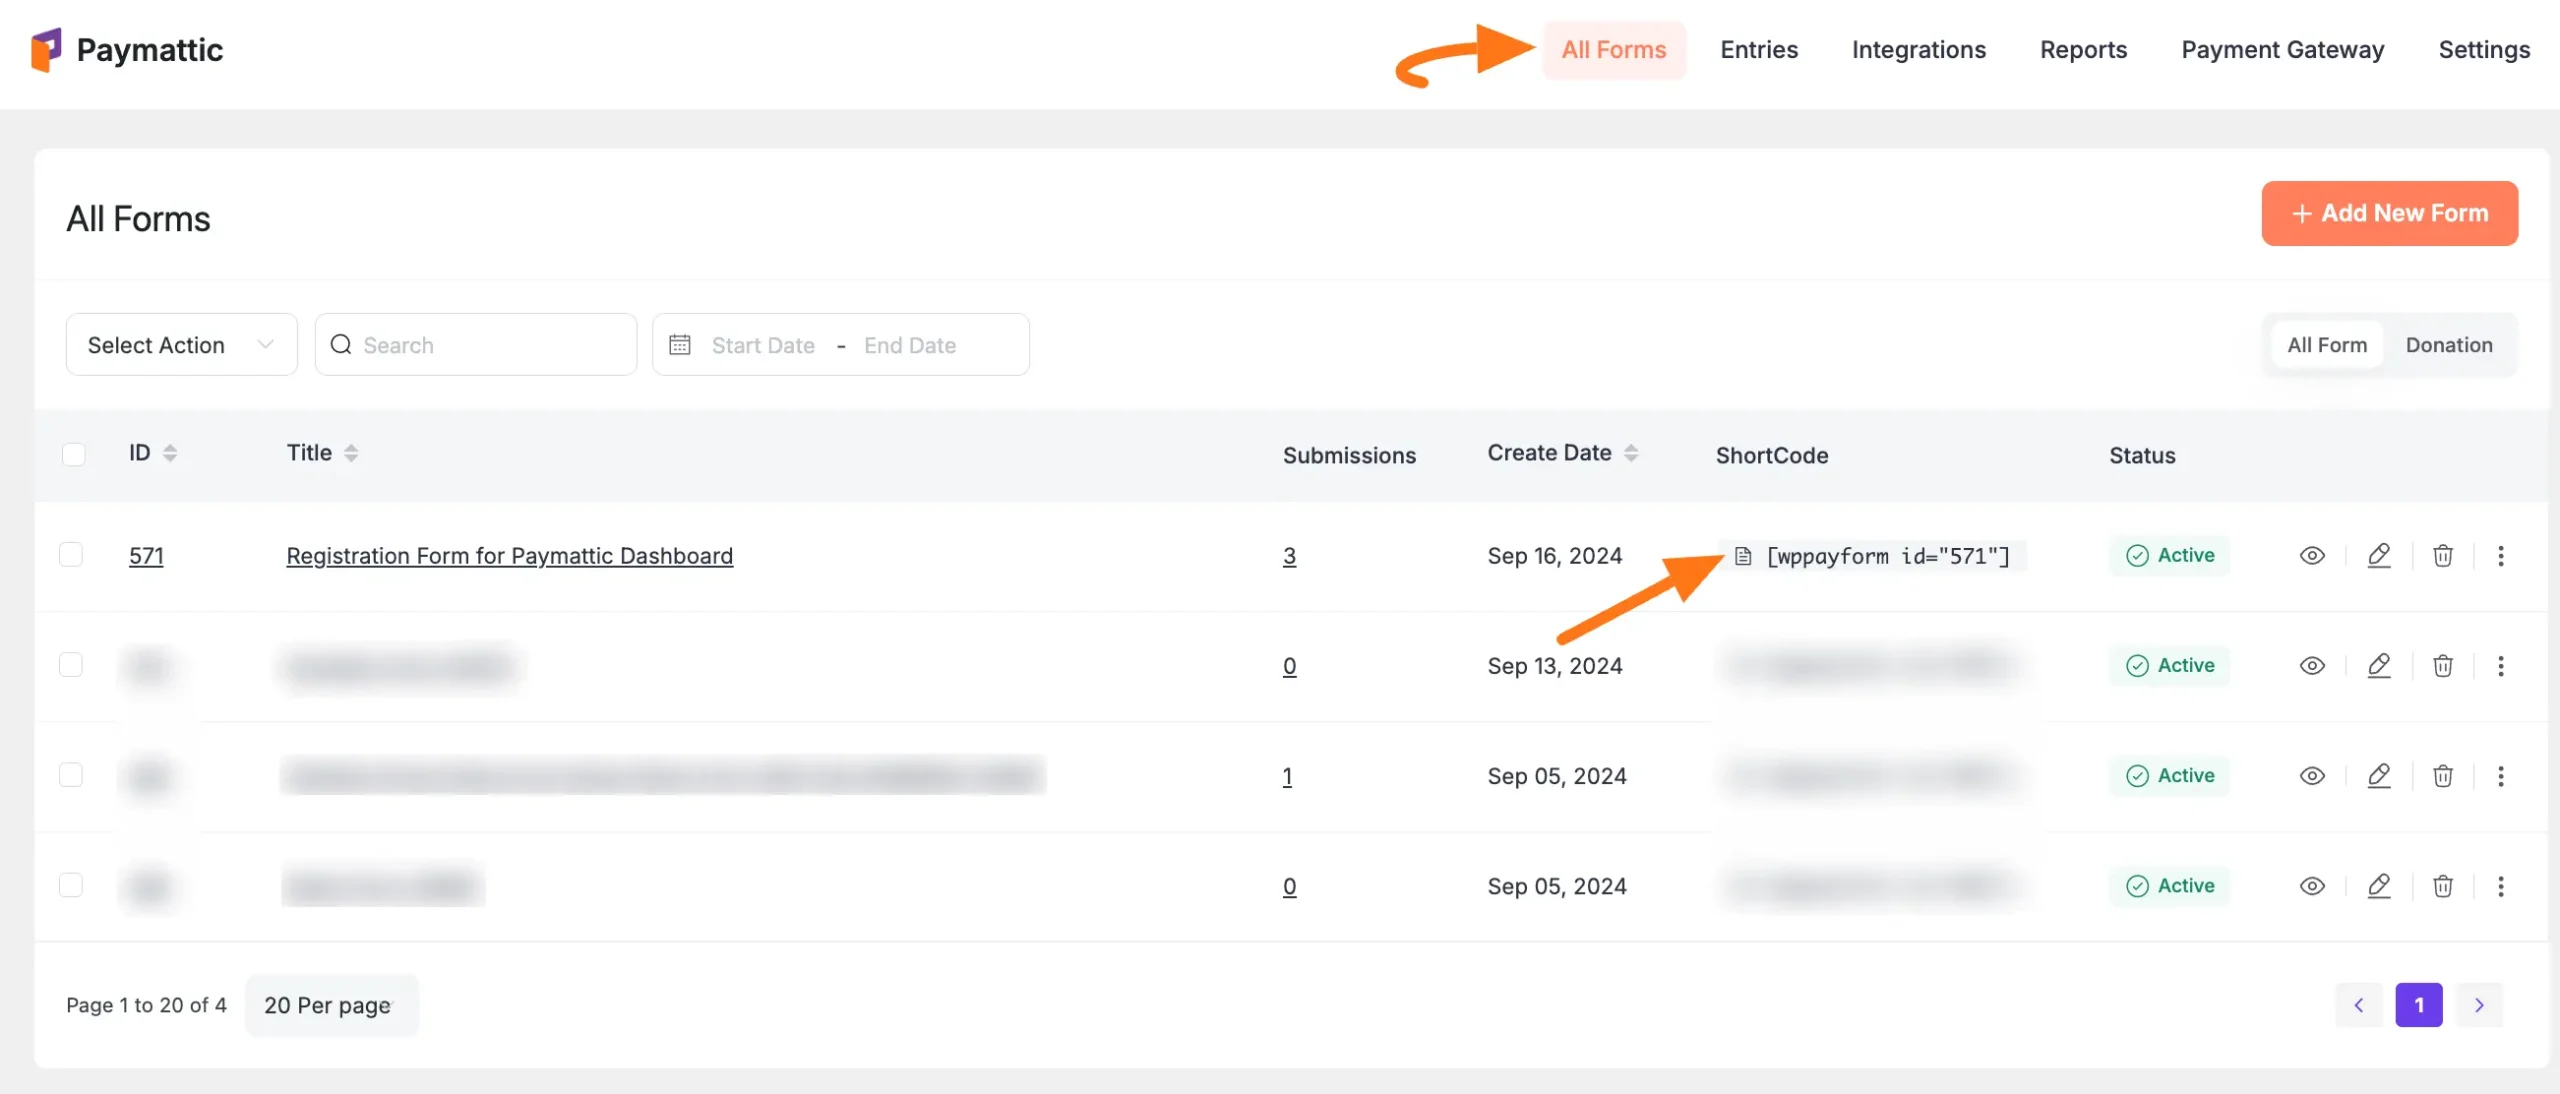
Then paste it to the page where you want to embed your User Registration Form and display the User Dashboard.
For example, I pasted the ShortCode to the default Paymattic Dashboard page to add the User Registration Form to display the User Dashboard on the front end.s
Final Result
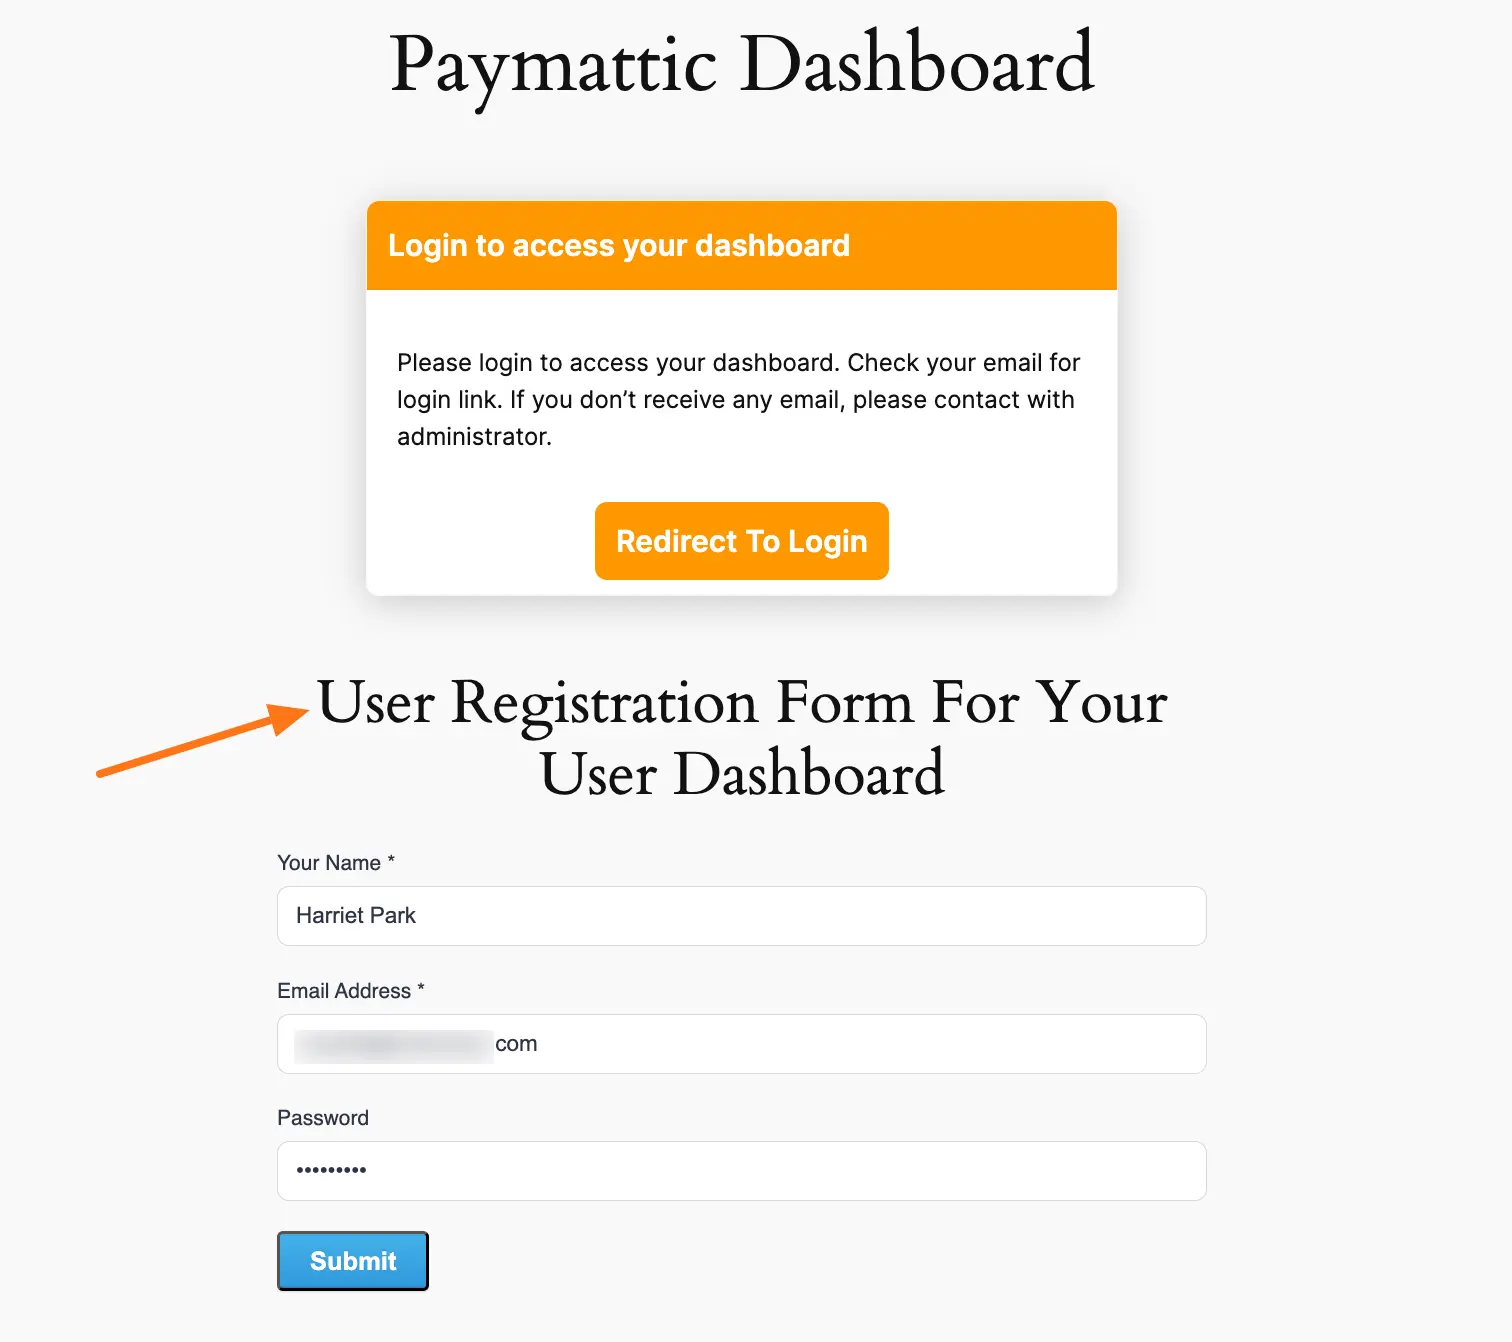
Now in your front end, you will see your User Registration Form like the below screenshot. Here your user needs to fill up the form to make complete the registration.
Your user dashboard will look like the screenshot below.
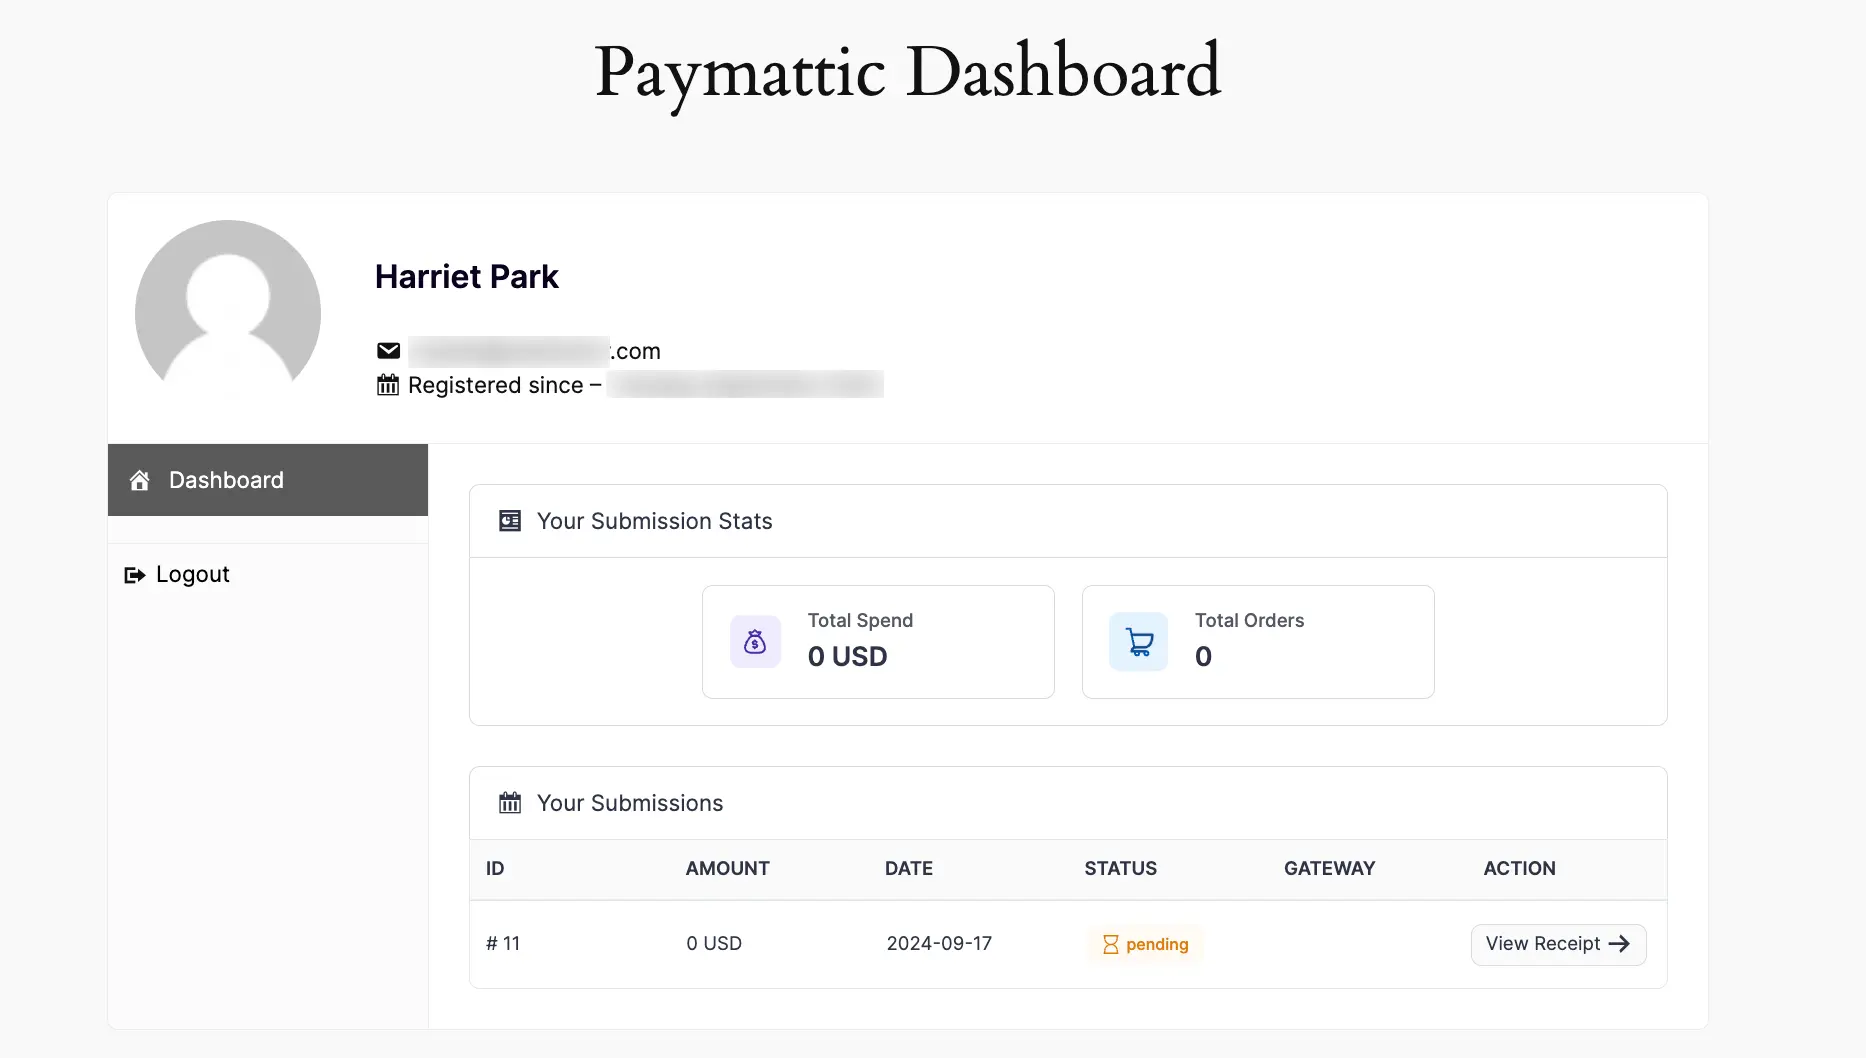
Congrats! Your User Dashboard is ready to use now.
If you have any questions, concerns, or suggestions, please contact our support team.