How to Add a Donation Progress Item in WordPress with Paymattic
Paymattic offers a powerful Donation Progress Item feature that helps you create engaging donation forms with progress tracking. This feature allows you to add donation items with fixed prices and display a progress bar to track fundraising goals.
Feature Availability
The Donation Progress Item is available in both free and pro versions:
- Free Features: Basic progress bar and fixed amounts
- Pro Features:
- Recurring donations
- Custom amount option
Upgrade to Paymattic Pro to access all features.
Adding the Donation Progress Item
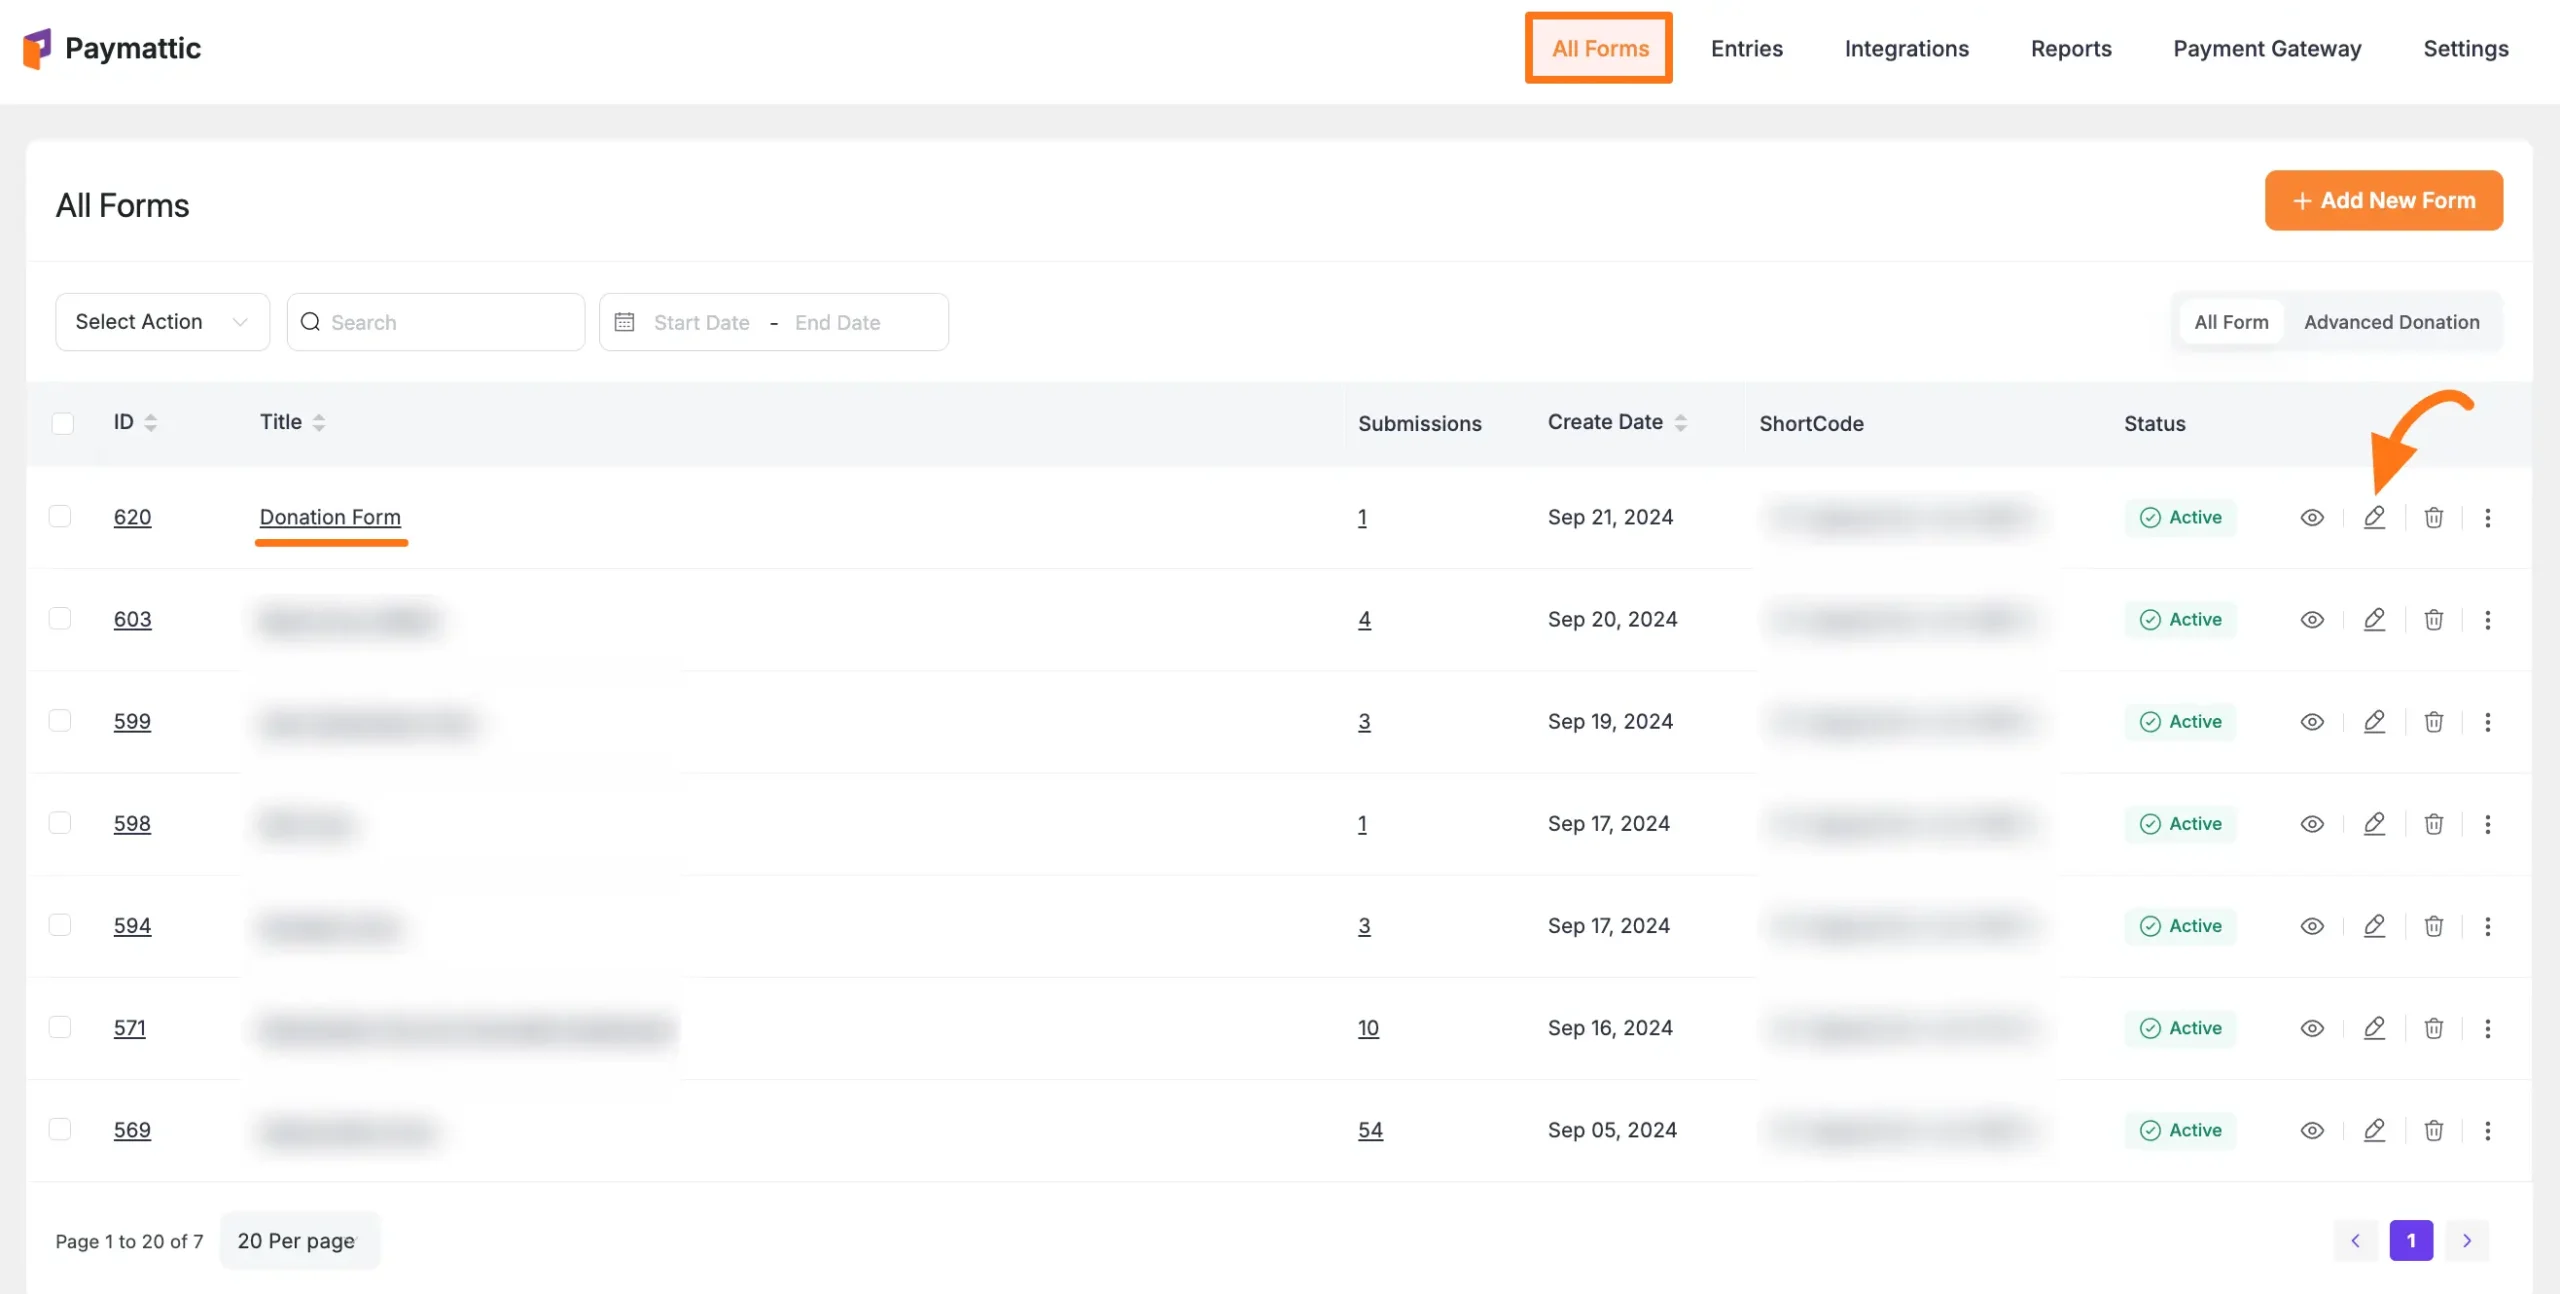
Step 1: Access Form Editor
- Go to All Forms from the Paymattic Navbar
- Select your target form
- Click the Pencil/Edit icon to open the editor
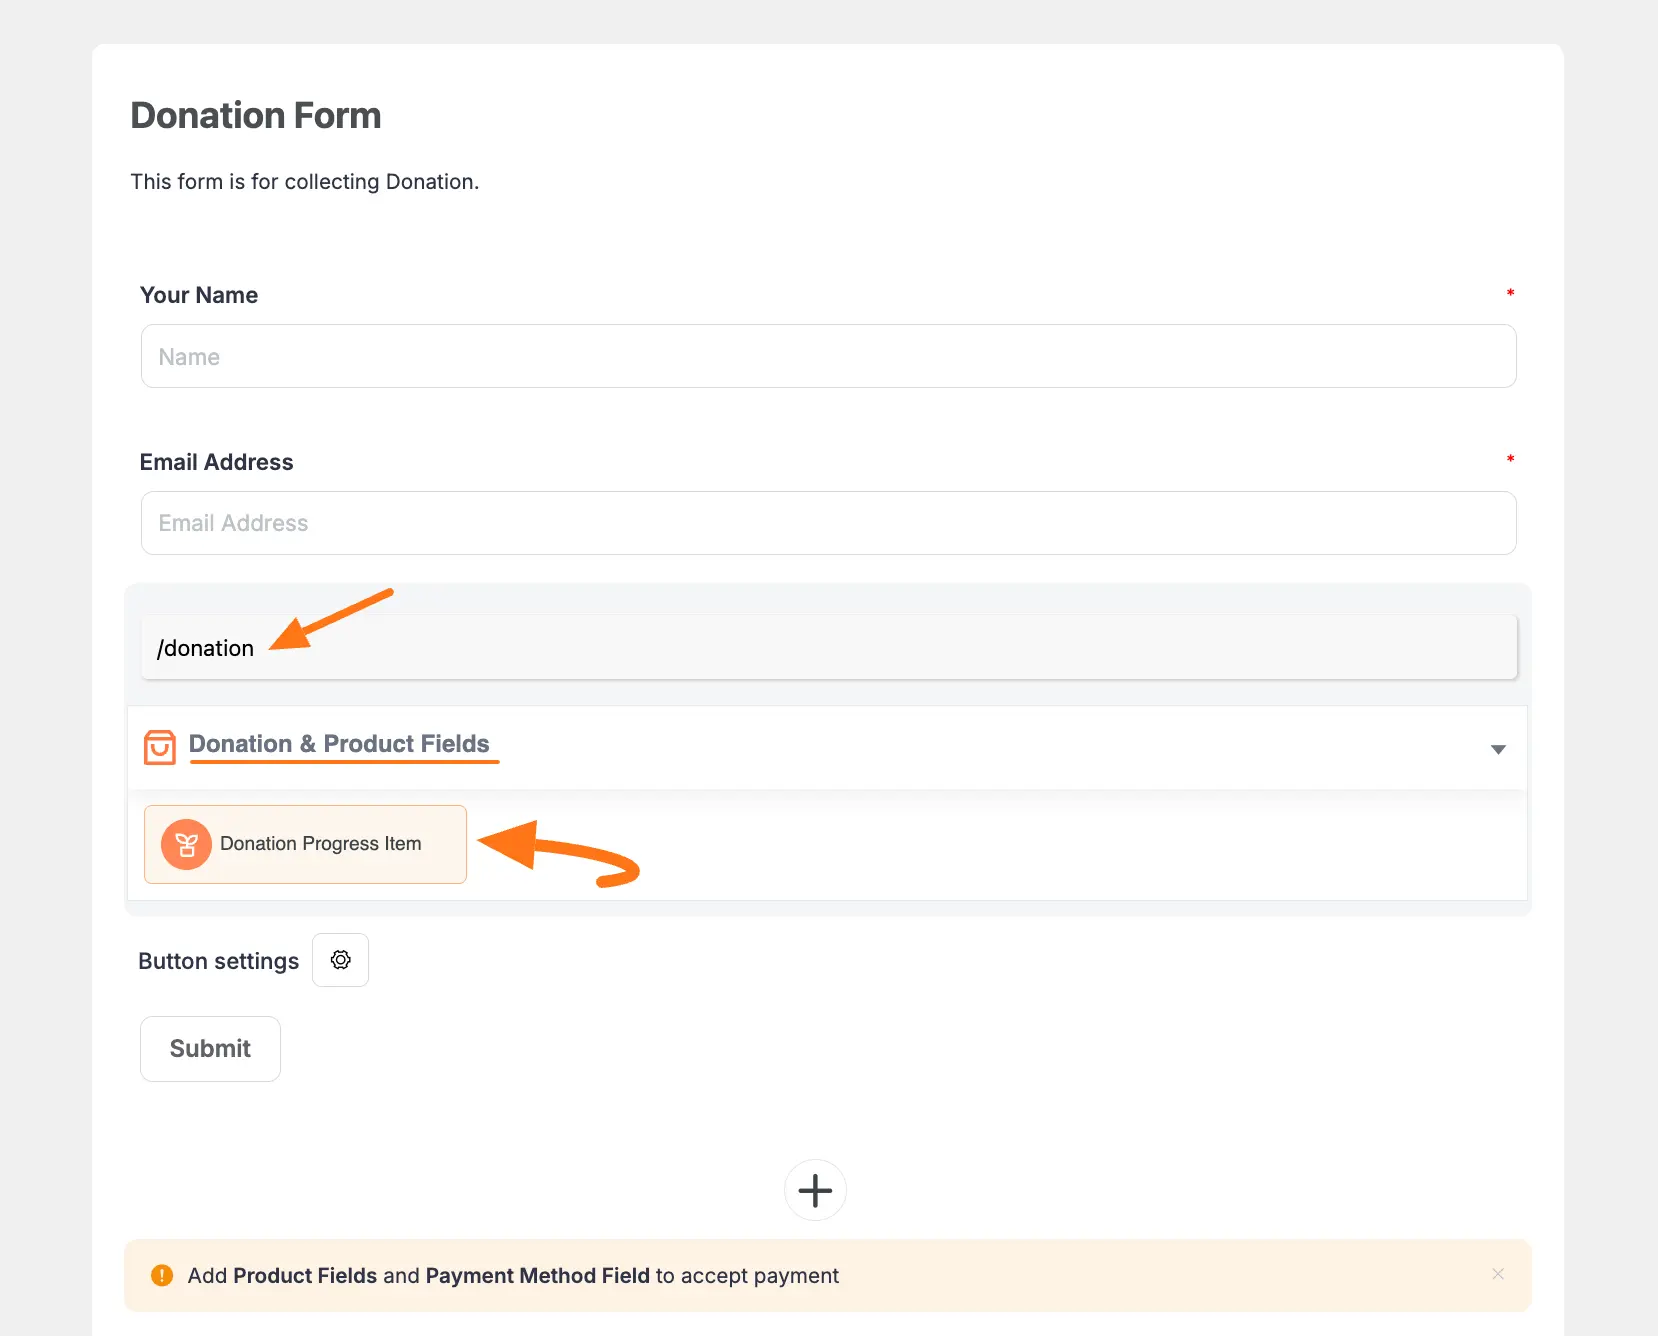
Step 2: Add the Field
You can add the Donation Progress Item field in two ways:
- Type "/" in the editor
- Click the Plus Icon at the bottom
![]()
Select "Donation Progress Item" from the field options:
Configuring the Donation Progress Item
To customize the field, click the Settings Icon in the right corner:
![]()
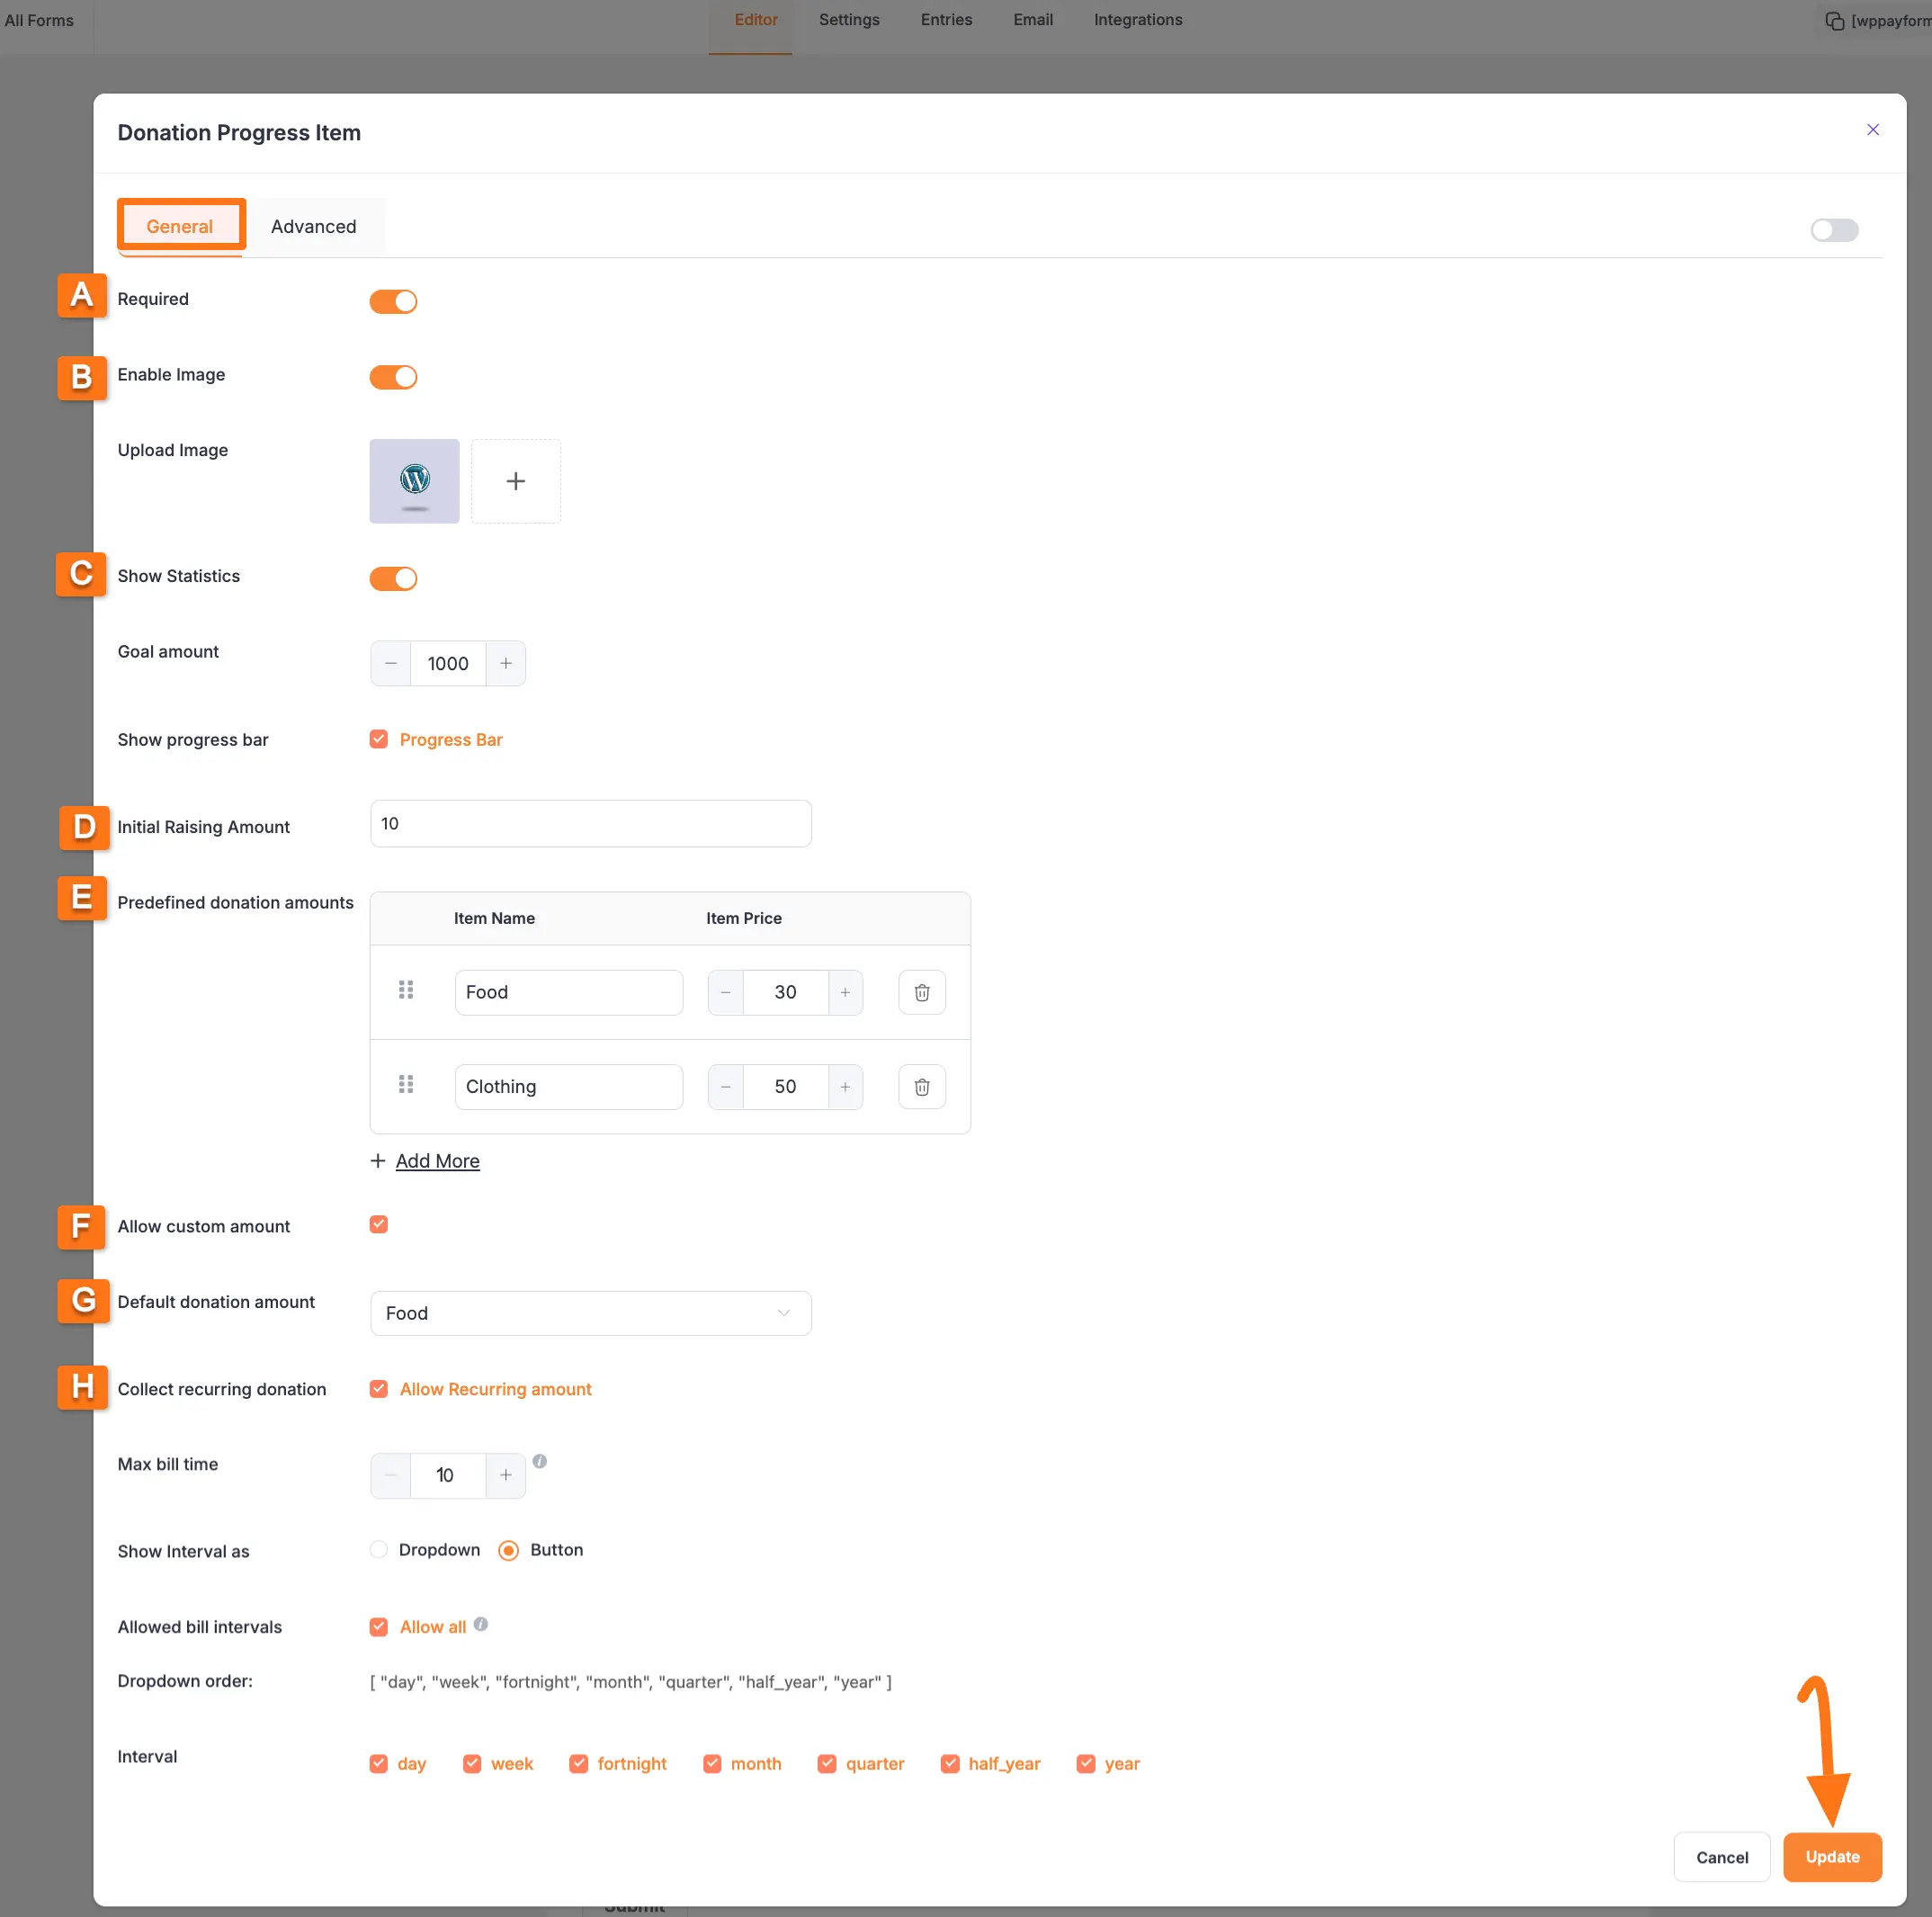
General Settings
This guide explains the options available in the General tab for the Donation field, which allows you to configure a flexible and powerful fundraising form.
[Screenshot of the General tab settings for the Donation field.]
Required
Enable this toggle to make the donation field mandatory. Users will be required to select or enter a donation amount to submit the form.
Enable Image
Toggle this option on to display an image within the donation field, such as a campaign photo.
- To add your image, click the Plus Icon under the Upload Image section.
Statistics
Enable this to display fundraising goals and progress on your form.
- Goal amount: Set the total monetary goal for your campaign.
- Show a progress bar: Check this box to display a visual progress bar tracking donations. You can uncheck the Progress Bar box if you prefer not to display it.
Initial Raising Amount
Enter a starting value for your campaign here. This amount will be counted toward your goal from the beginning (e.g., for funds raised offline).
Predefined donation amounts
Here, you can create a list of suggested, fixed-price donation amounts (e.g., $10, $25, $50). This provides donors with quick and easy options.
Allow custom amount
Note: This is a Paymattic Pro feature.
Check this option to allow donors to enter a custom amount they wish to contribute, in addition to or instead of the predefined amounts.
Default donation amount
From your list of Predefined donation amounts, you can select one to be highlighted as the default or recommended option when the form first loads.
Collect Recurring Donations
Note: This is a Paymattic Pro feature.
Check the Allow Recurring Amount option to give donors the choice to make their contribution a recurring subscription. The following settings are available:
- Maximum billing time: Limit the total number of times a donor will be billed.
- Billing intervals: Set the recurring frequency, such as daily, weekly, fortnightly, monthly, quarterly, half-yearly, or yearly.
- Display Options: Customize how the recurring choices are presented to the donor.
Once you have set up all the settings, click the Update button to save all your customizations.
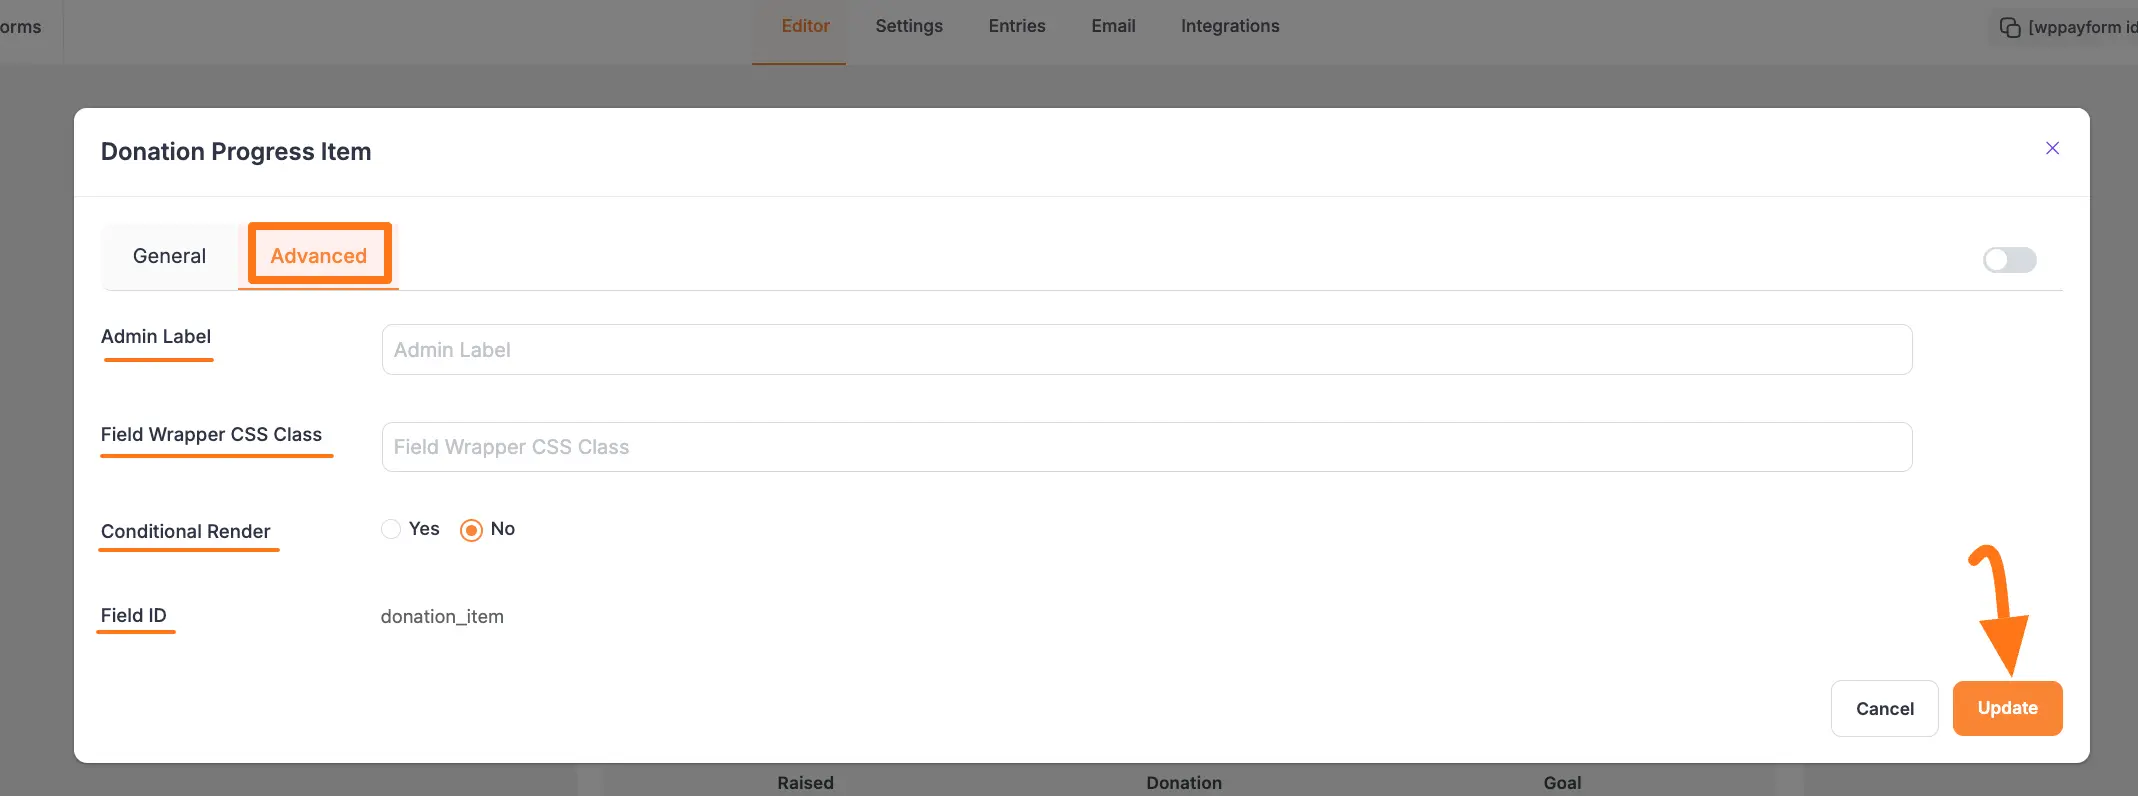
Advanced Settings
Once you complete the General settings, go to the Advanced tab to find more technical options for your Donation Progress Item field.
Admin Label
This label is for internal use only. The text you enter here will be used as the field’s label in the admin backend (for example, on the Entries page). It will not be visible to the public, making it useful for clarifying a field's purpose for your team.
Field Wrapper CSS Class
This is used for adding a custom CSS class to the entire field container (the wrapper). This allows you to apply unique styling like borders, margins, or background colors to the whole progress bar element.
- Note: To learn more, see our guide on applying Custom CSS to forms.
Conditional Render
You can set conditional logic to show or hide the donation progress display. This feature can be triggered by specific actions a user takes in a previous input field.
- Note: For a detailed guide on this feature, please read our documentation on Conditional Logic.
Field ID
This option displays the unique ID assigned to the form field. It is primarily used for custom development, such as targeting the field with custom JavaScript or for integration purposes.
Once you finish, click the Update button to save all your configurations.
Adding Payment Methods
Required Step
Don't forget to add a Payment Method field to process donations.
Embedding the Form
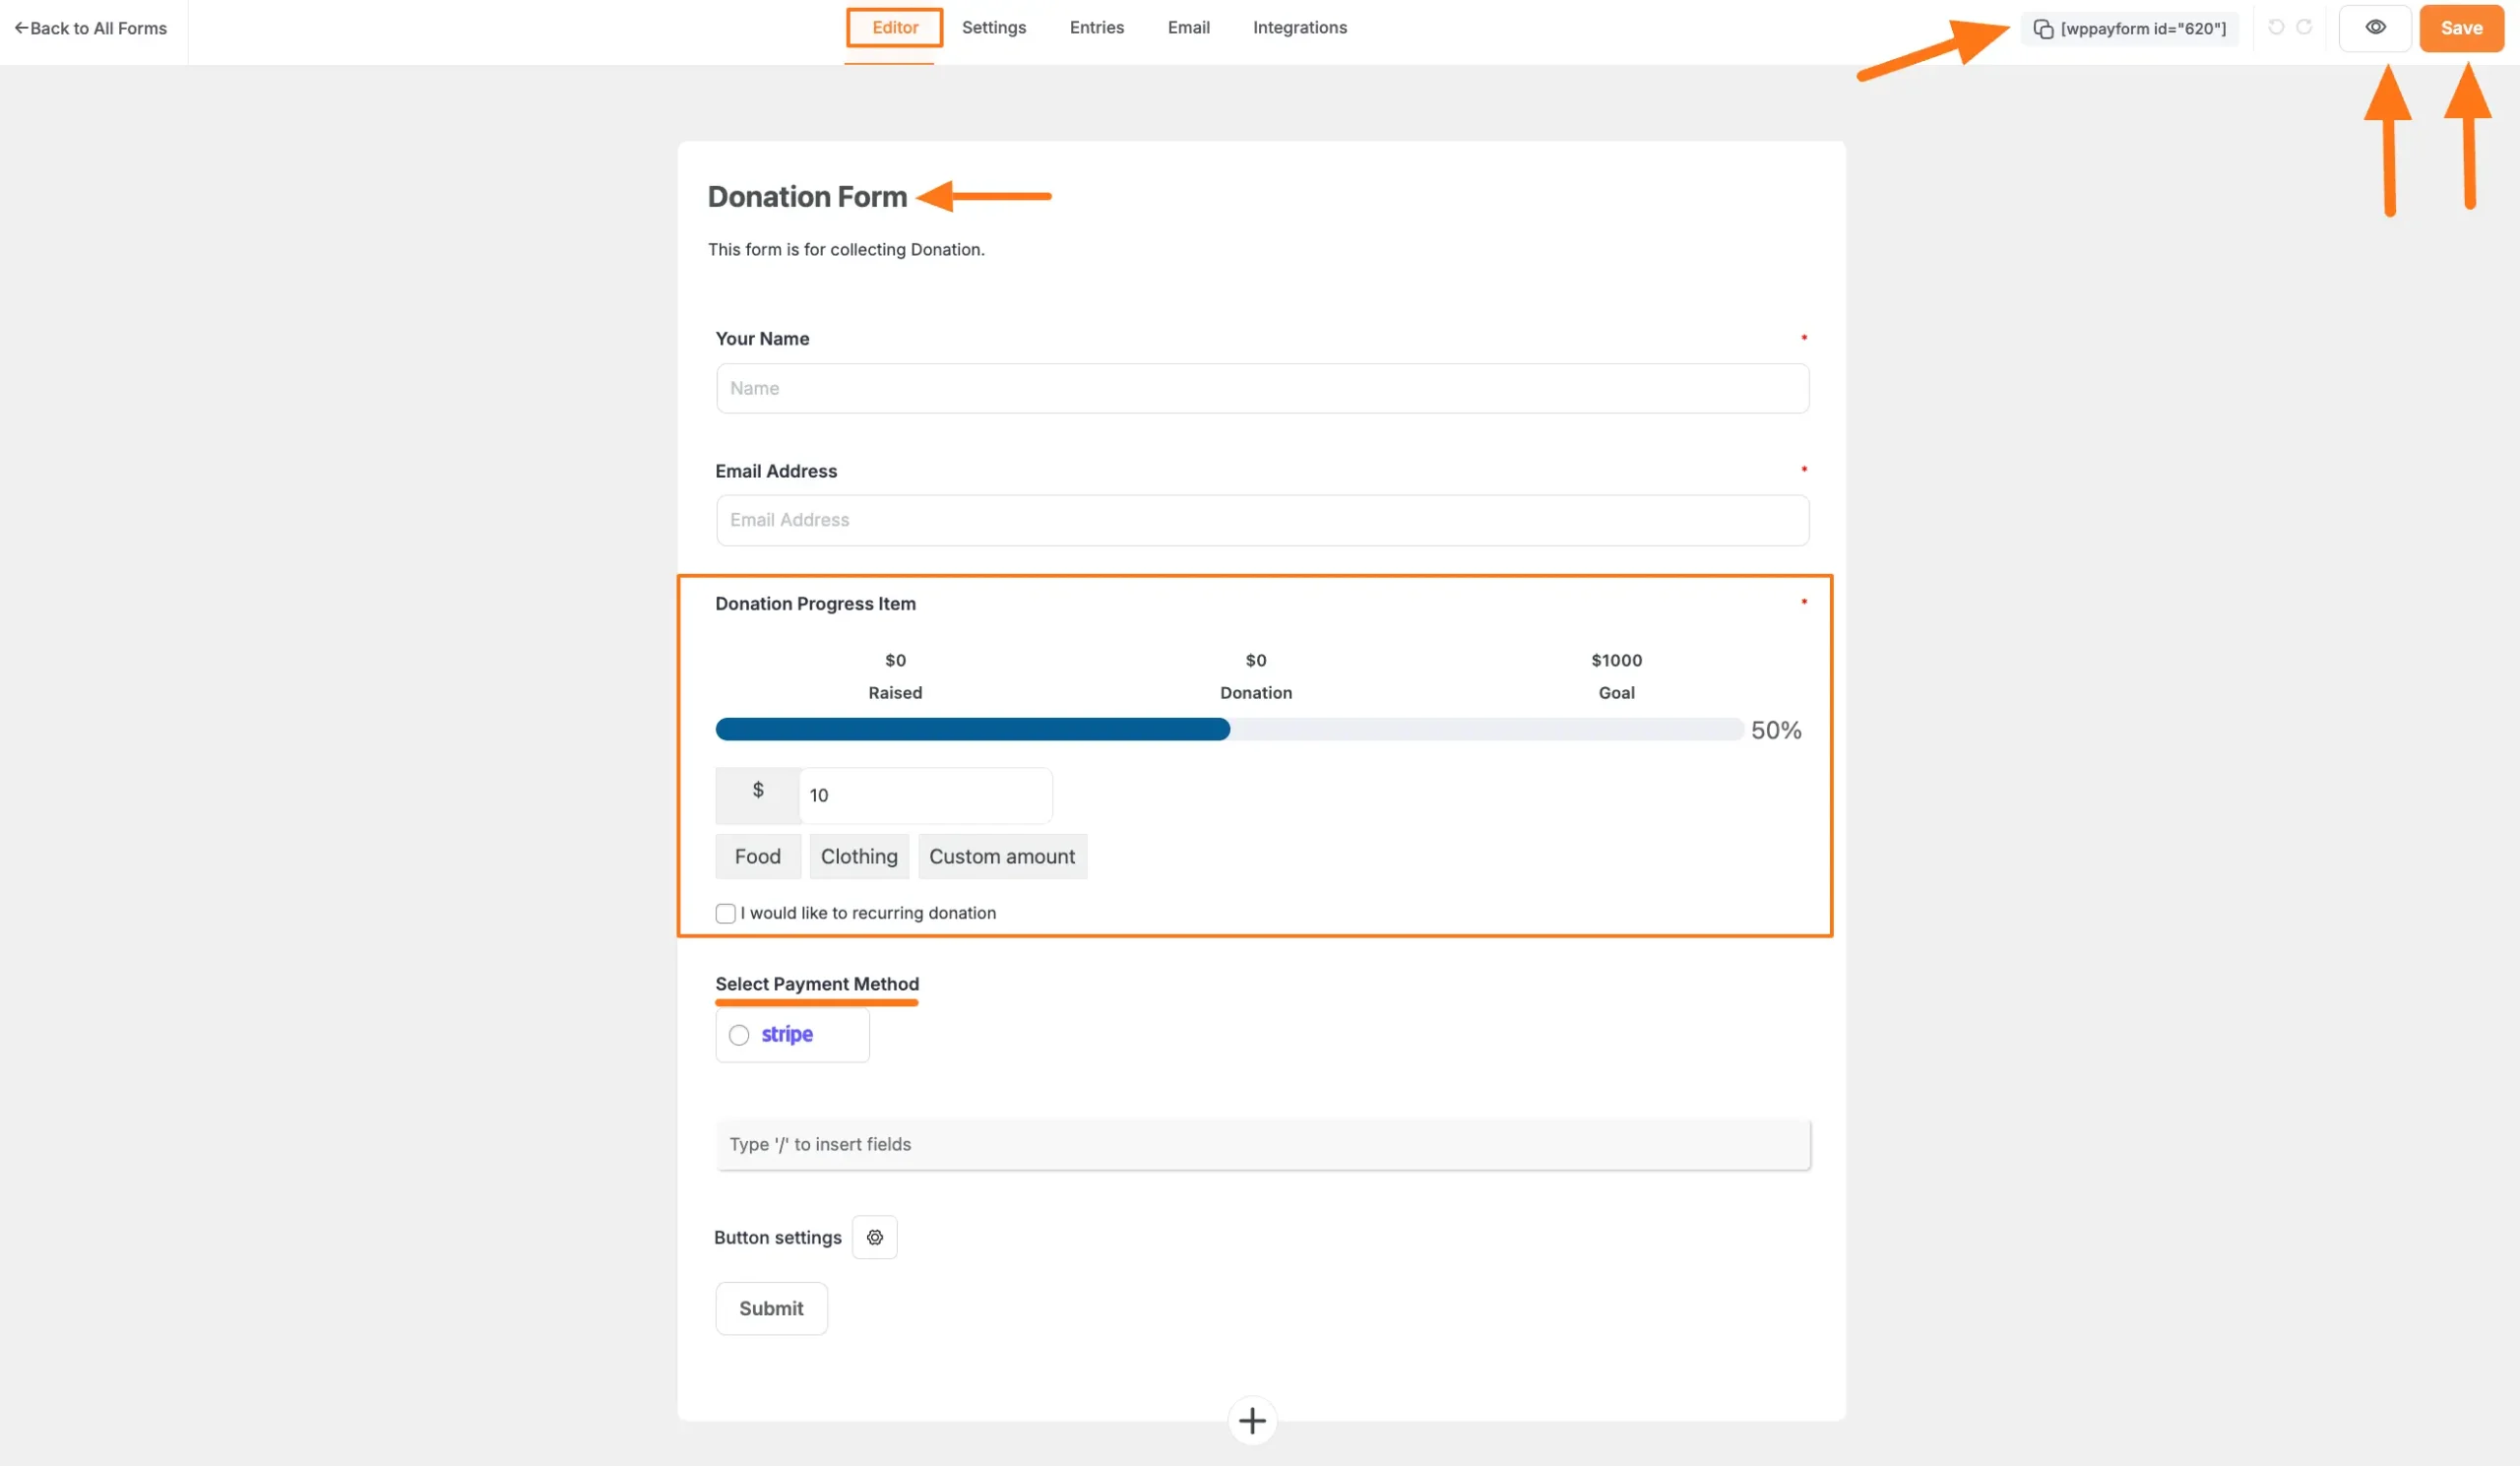
Once your fields are configured, you will see the Donation Progress Item with its Progress Bar in the form editor. Before you publish, here are the final steps to get your form ready.
Important Reminders
- Edit Title & Description: You can change the form’s Title and Description at any time by simply clicking on the text in the editor.
- Add a Payment Method: A form cannot collect payments without a Payment Method field. Make sure you have added and configured at least one.
Saving and Displaying the Form
Save Your Form After you finish editing, press the Save button at the top-right corner to save all the changes you made.
Preview the Form To see what your form will look like to visitors, click the Preview button (the Eye icon).
Copy the Shortcode To display the form on your website, copy the Shortcode from the top of the editor. It will look like this:
[paymattic_form id="123"].Embed in a Page/Post Paste the copied Shortcode into the content area of your desired WordPress page or post.
Once you publish the page, your donation form will be live and ready to help you achieve your fundraising goals.
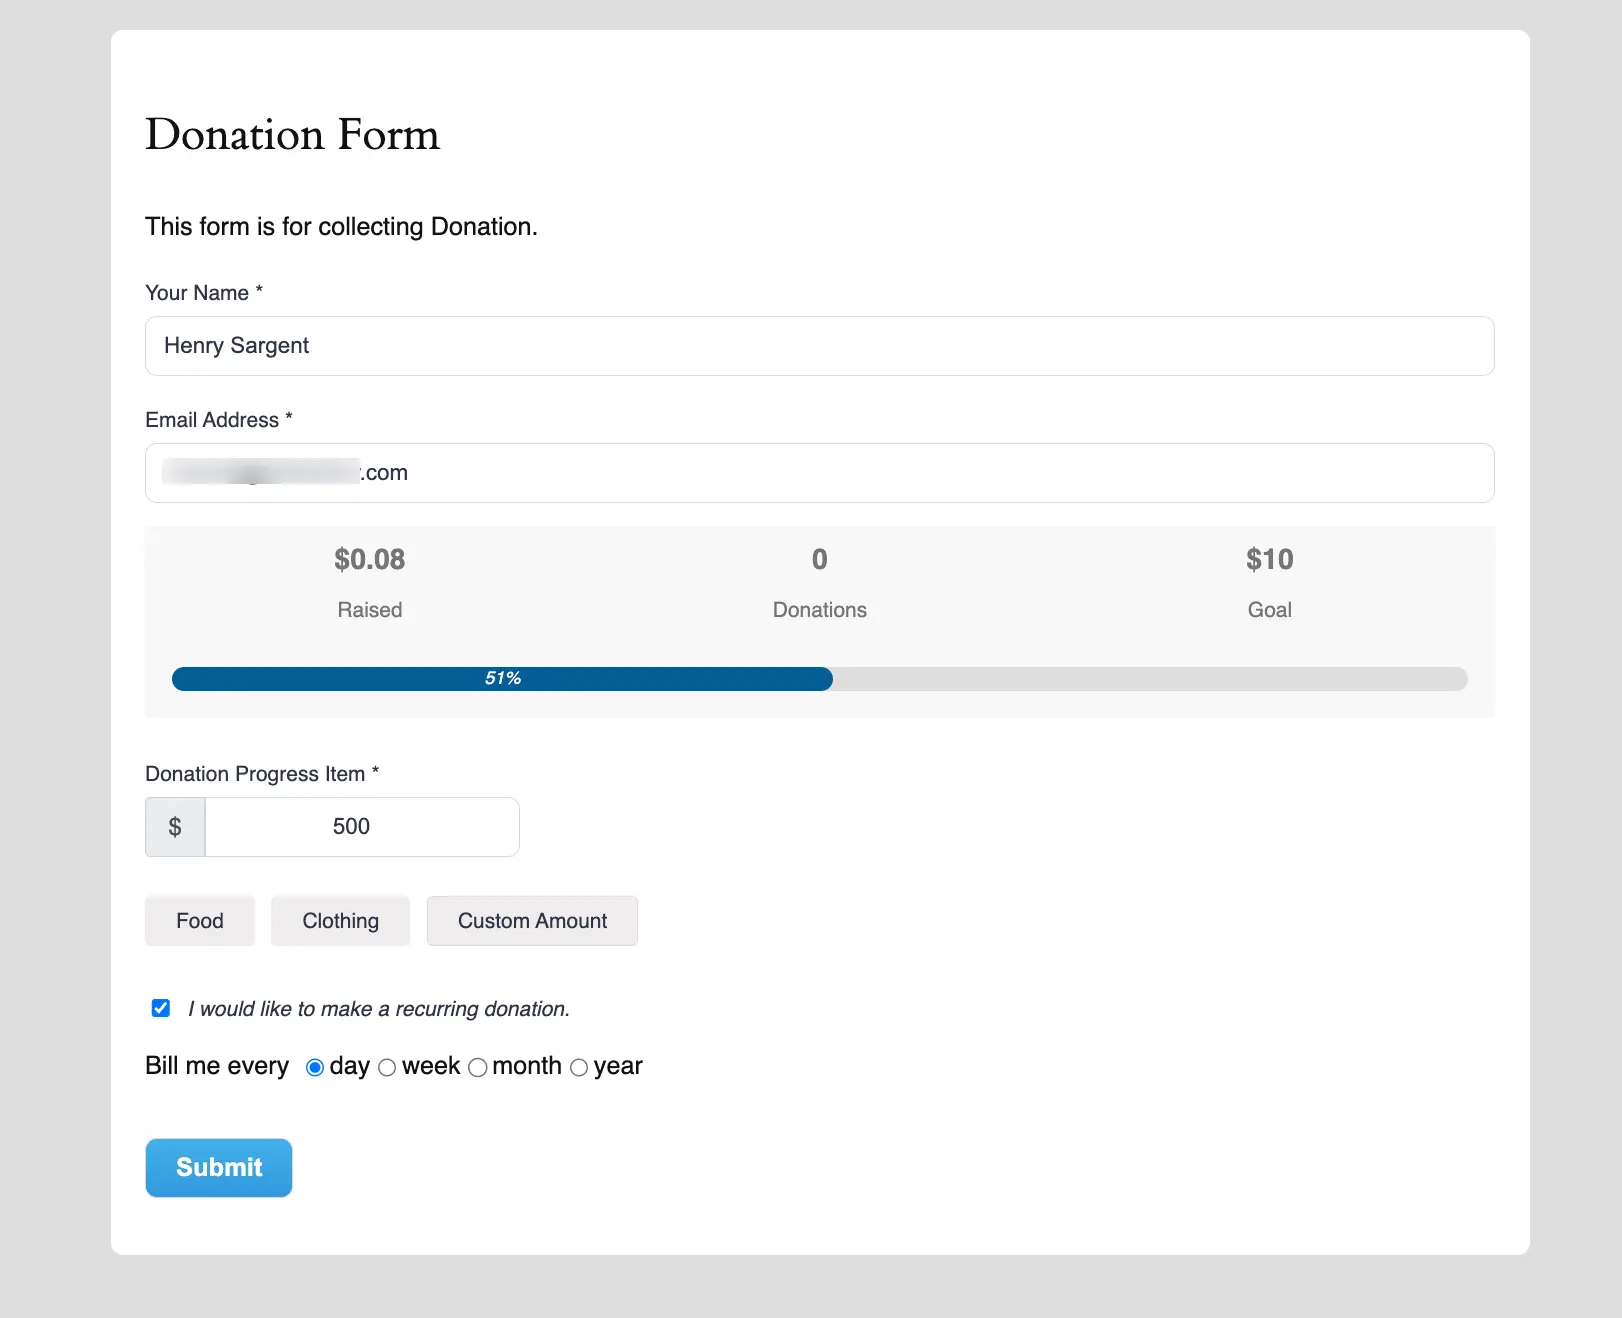
Preview
Here's how your donation form will appear to donors:
Best Practices
Optimization Tips
Goal Setting:
- Set realistic fundraising goals
- Update goals based on performance
Amount Options:
- Offer a range of donation amounts
- Include suggested amounts
- Consider your audience when setting defaults
Progress Display:
- Keep progress bar visible
- Update in real-time if possible
- Consider showing donor count
Images and Content:
- Use high-quality, relevant images
- Write clear, compelling descriptions
- Highlight the impact of donations
Need Help?
Our support team is ready to assist with any questions or concerns!