How to Configure Cloudflare Turnstile Security with Paymattic?
Integrating Cloudflare Turnstile with Paymattic helps protect your WordPress forms from spam and automated abuse and provides a frustration-free, CAPTCHA-free browsing experience.
This article will guide you through the configuration of Cloudflare Turnstile in your WordPress Site through Paymattic.
Get the Turnstile Site & Secret Key
Before configuring Cloudflare Trunstile in Paymattic, you must get the Site and Secret keys from the Cloudflare Turnstile websites.
First, go to Cloudflare Turnstile, and log in to your account.
If you don’t have a Cloudflare Turnstile account, you can sign up here.
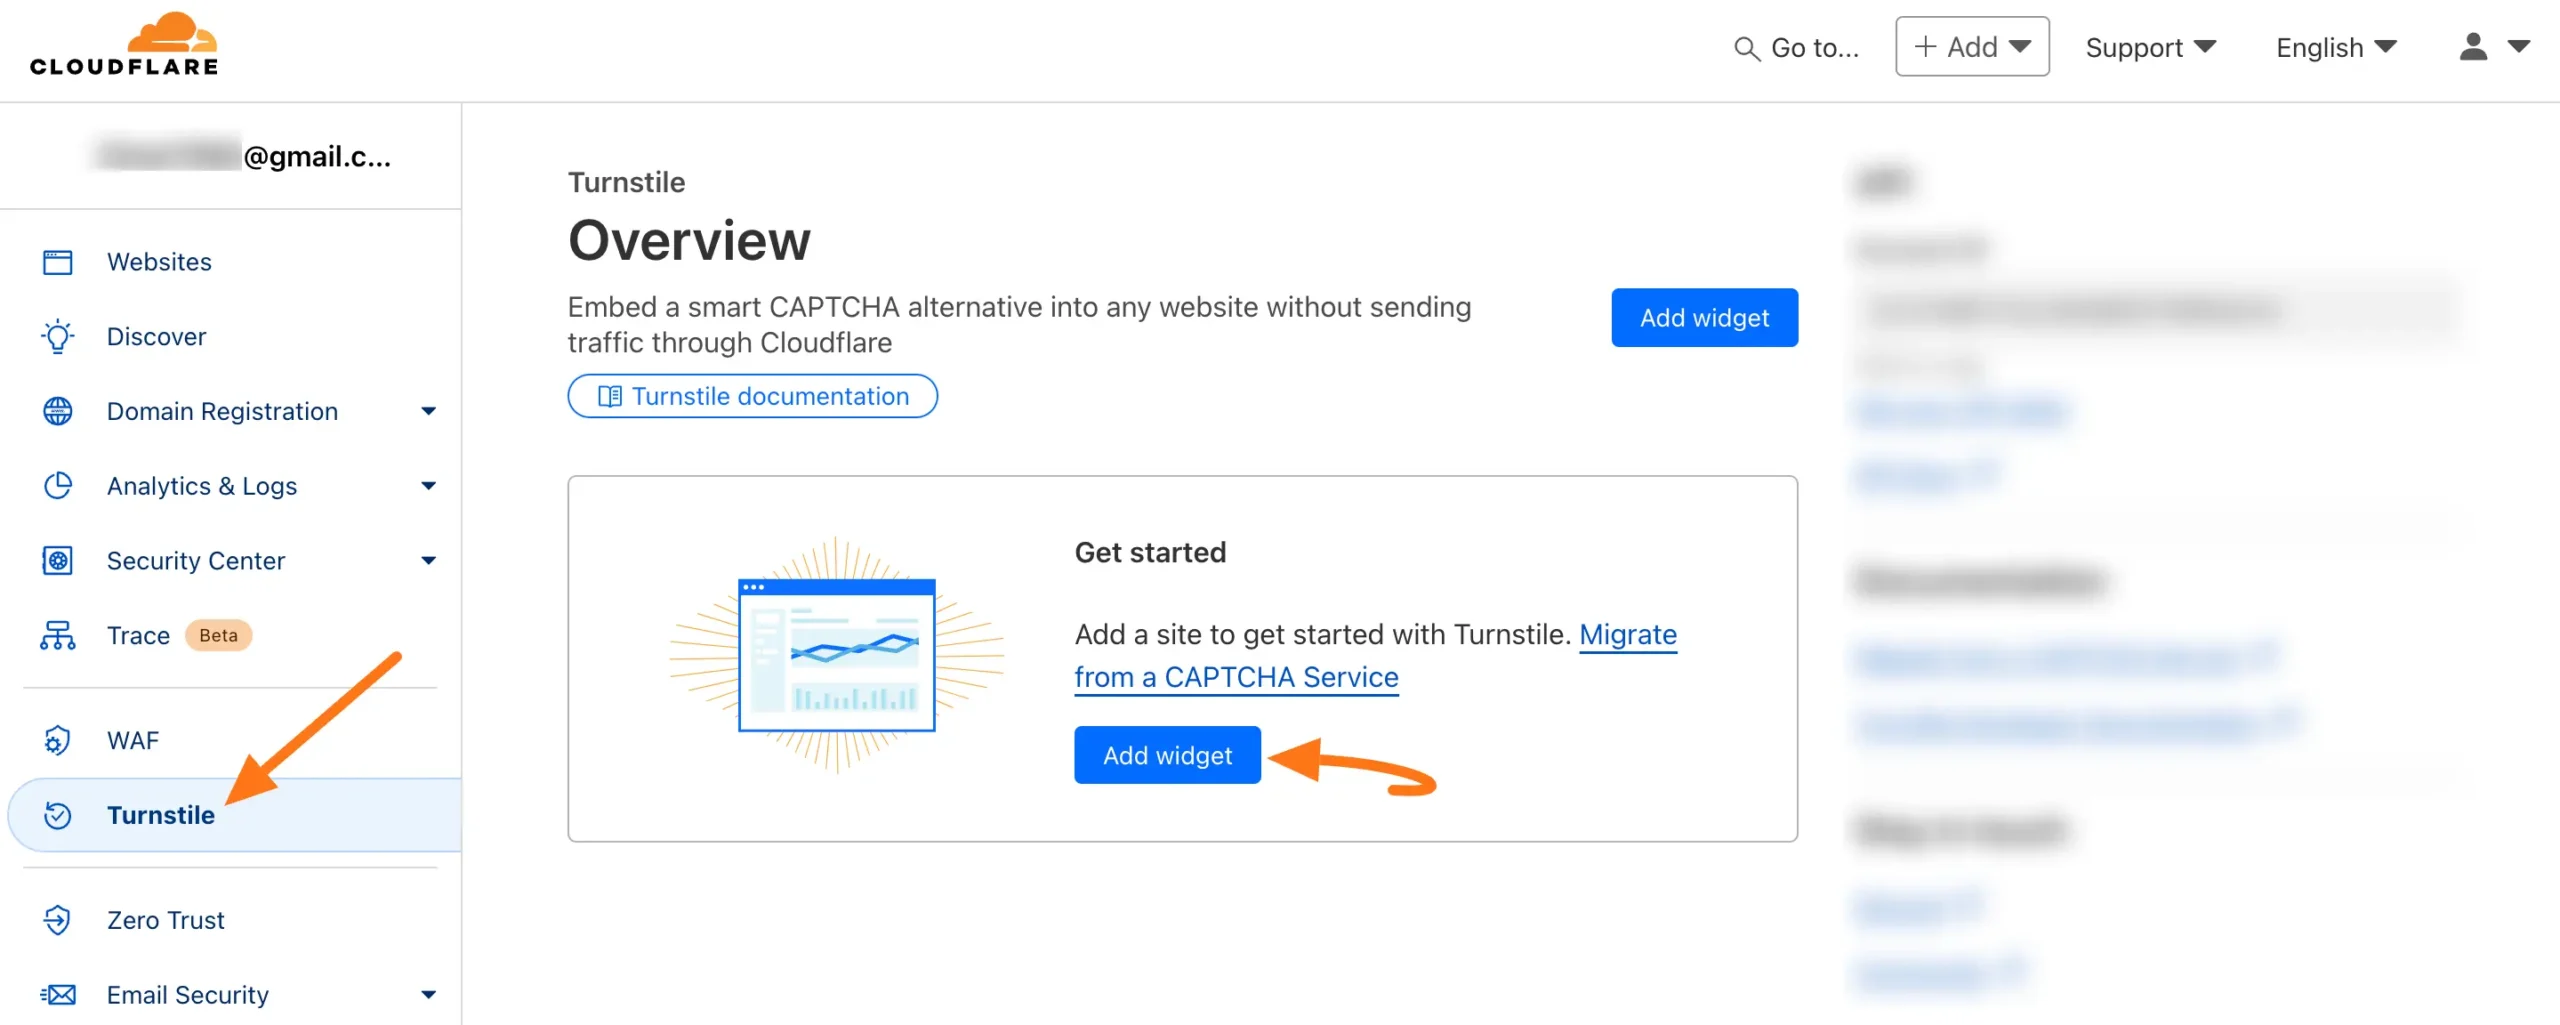
Now, open the Turnstile tab from the left sidebar and click the Add widget button.
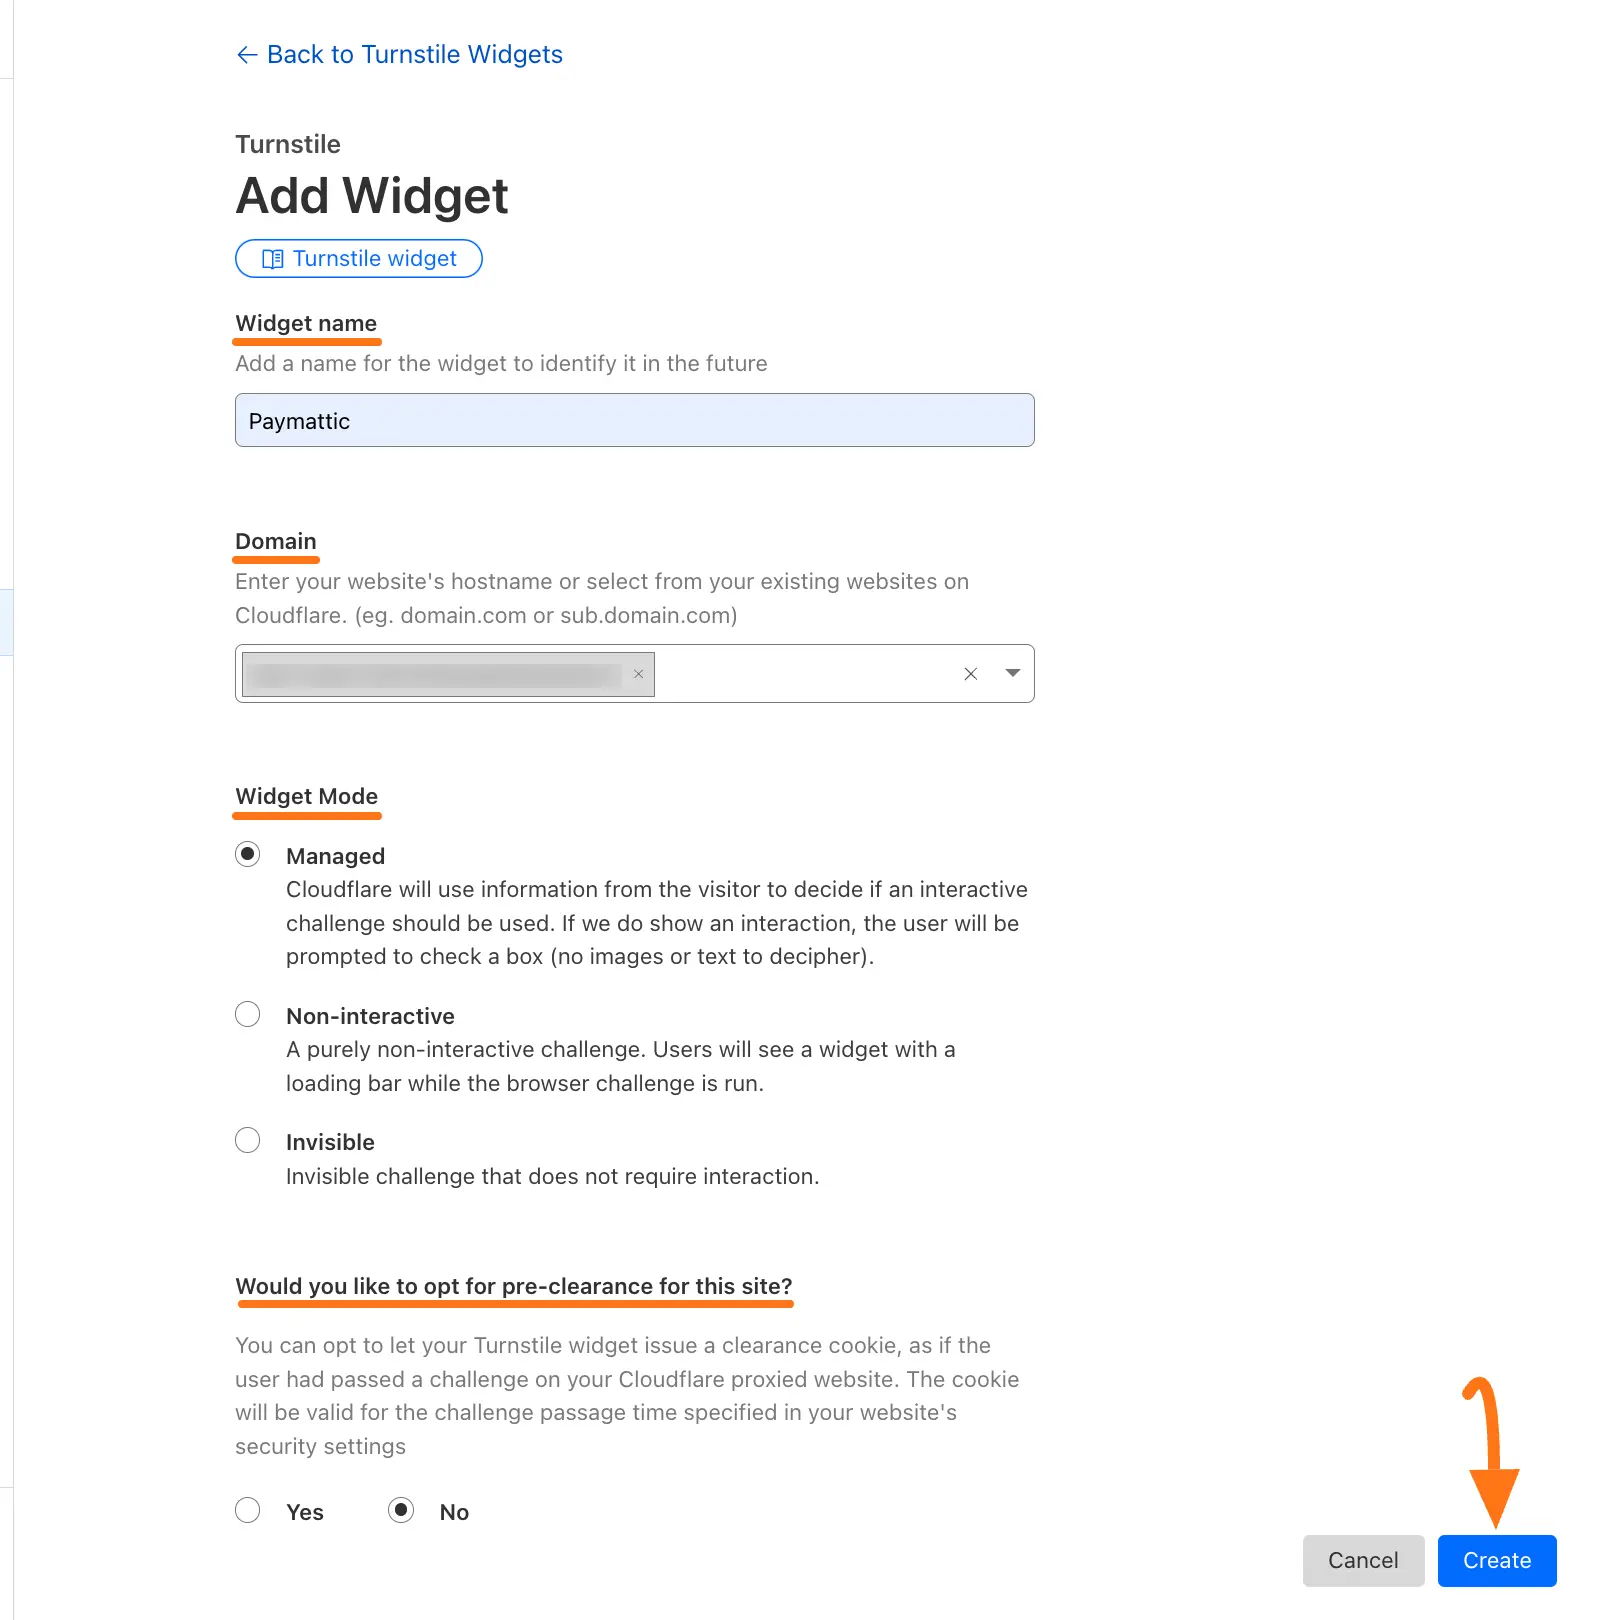
Now, put a Name into the Widget name field to identify your website in the future and enter your website/s address in the Domain field.
Also, you can choose your Widget Mode and Pre-clearance according to your preference. Once you are done, click the Create button, and the Site and Secret keys will be shown.
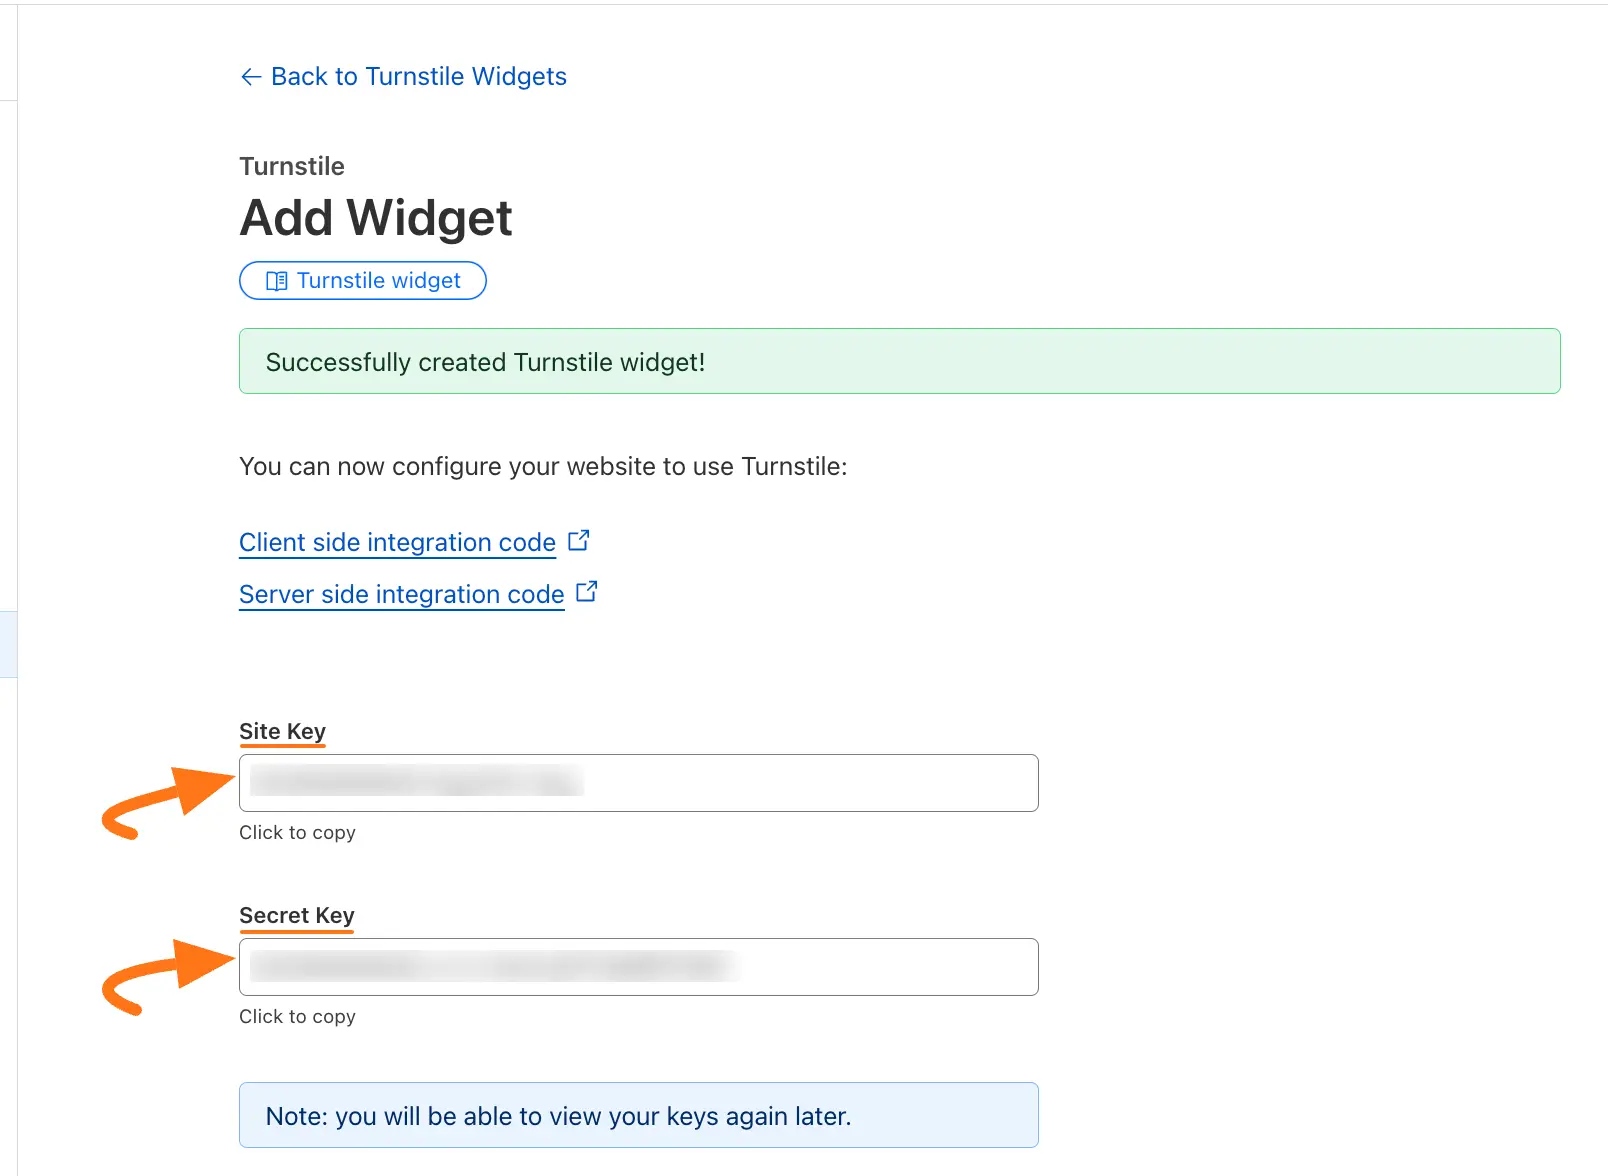
Here, you will get your desired Site key and Secret key. Simply, copy them by clicking the Copy Site Key and Copy Secret Key buttons.
Configuring Cloudflare Turnstile
First, go to Settings from the Paymattic Navbar and click the Turnstile (beta) tab from the left sidebar.
Now, paste the Site Key and Secret Key into the respective fields you copied from the Cloudflare Turnstile Site.
Finally, press the Save Settings button and your Cloudflare Turnstile will be configured.
If you want to clear the settings, simply click the Clear Settings button.
TIP
Use the Clear Settings button to remove configuration if needed.

Adding Cloudflare Turnstile in Forms
Once you have successfully configured the Cloudflare Turnstile with Paymattic, it’s time to integrate this with your payment form.
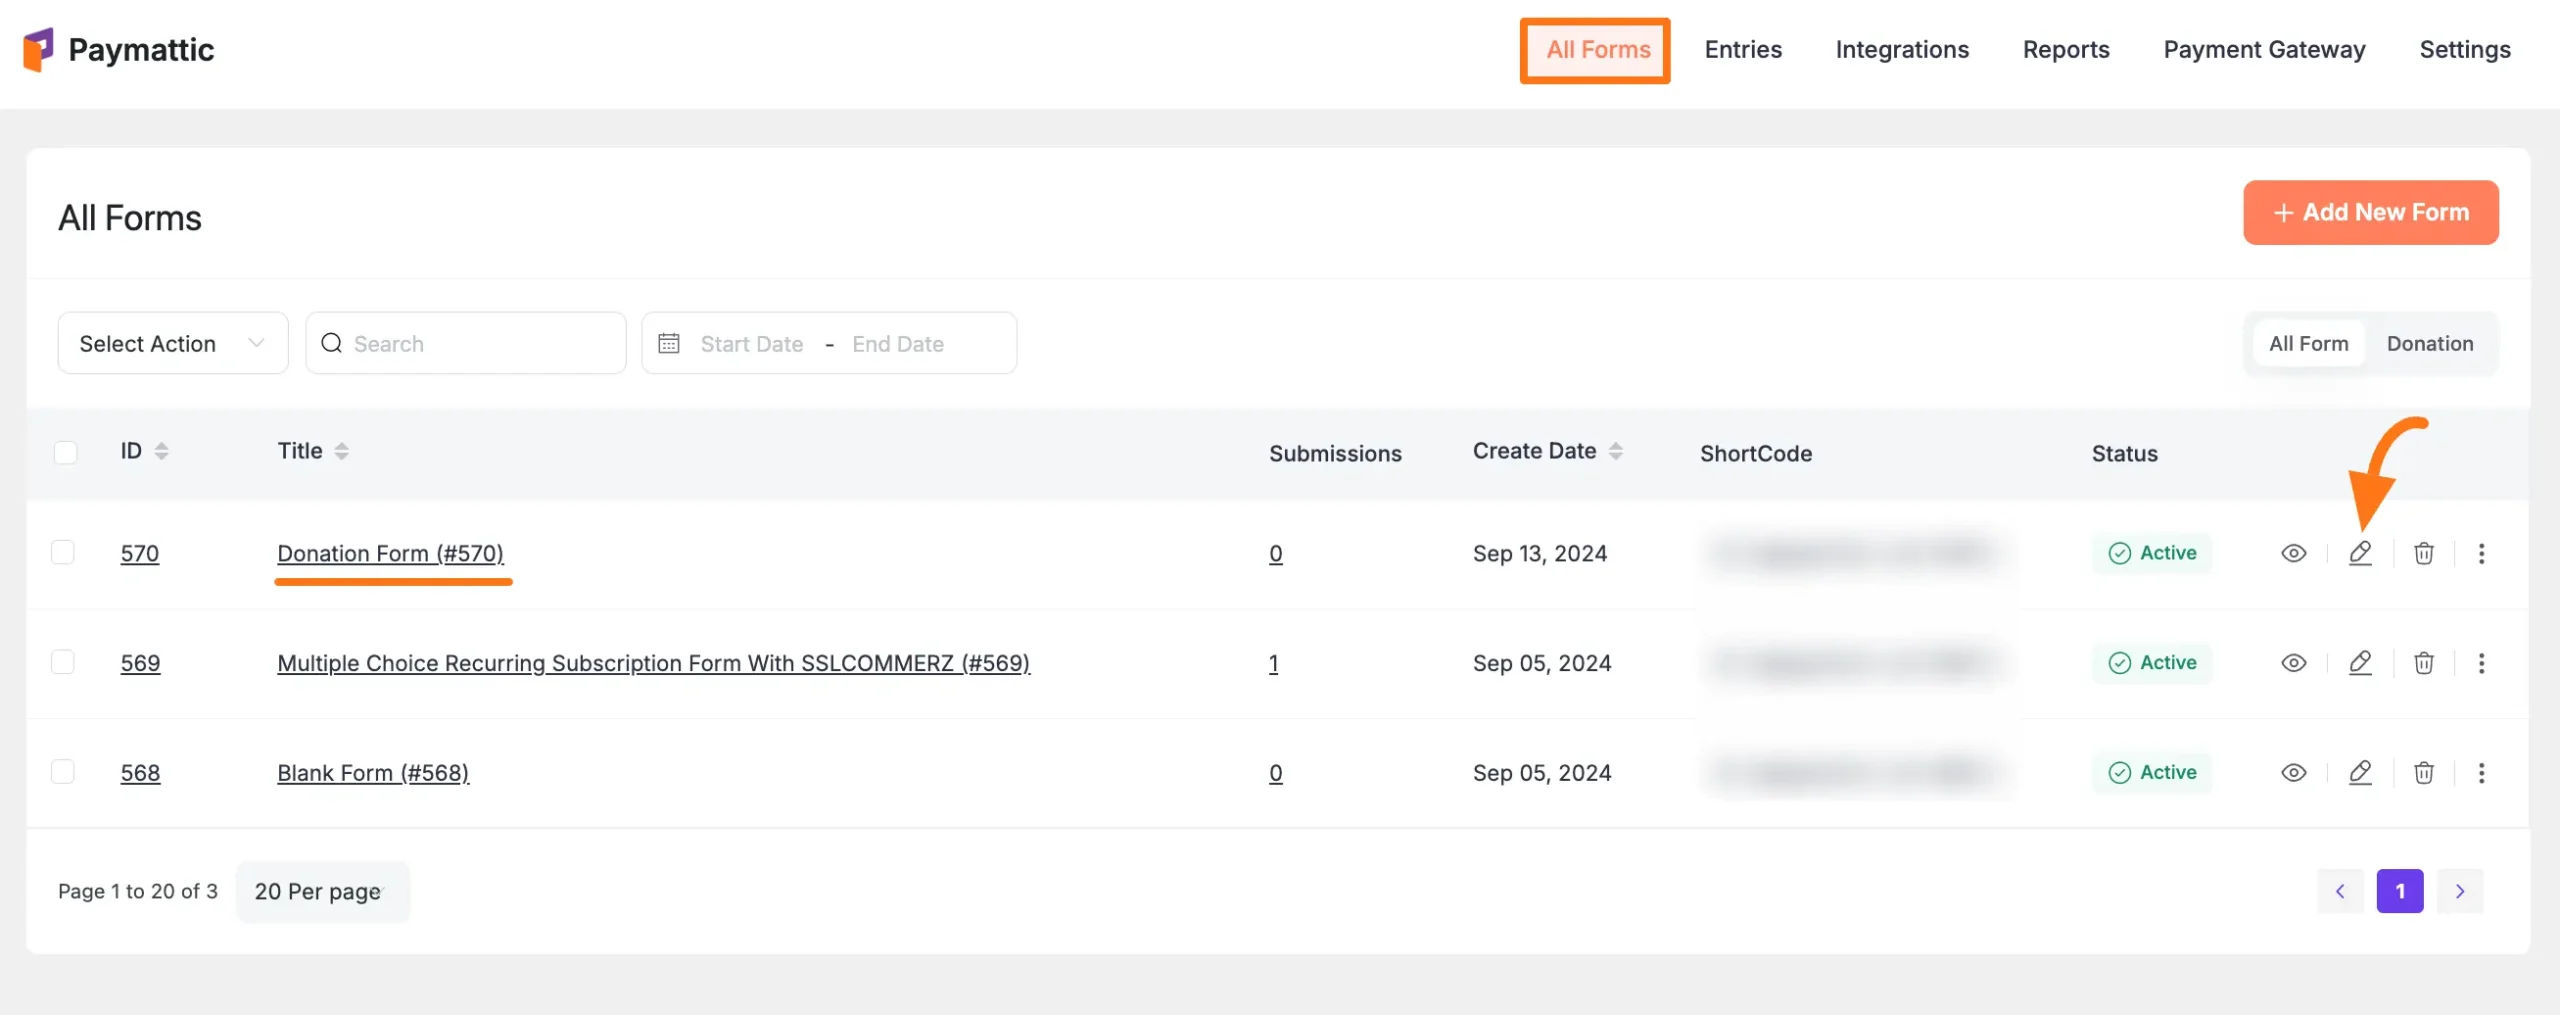
First, go to All Forms from the Paymattic Navbar, choose the form you wish to work on, and click the Pencil/Editor icon, e.g., I choose the Donation form to show the process.
New Forms
Need to create a form? See our guides for creating from scratch or using templates.
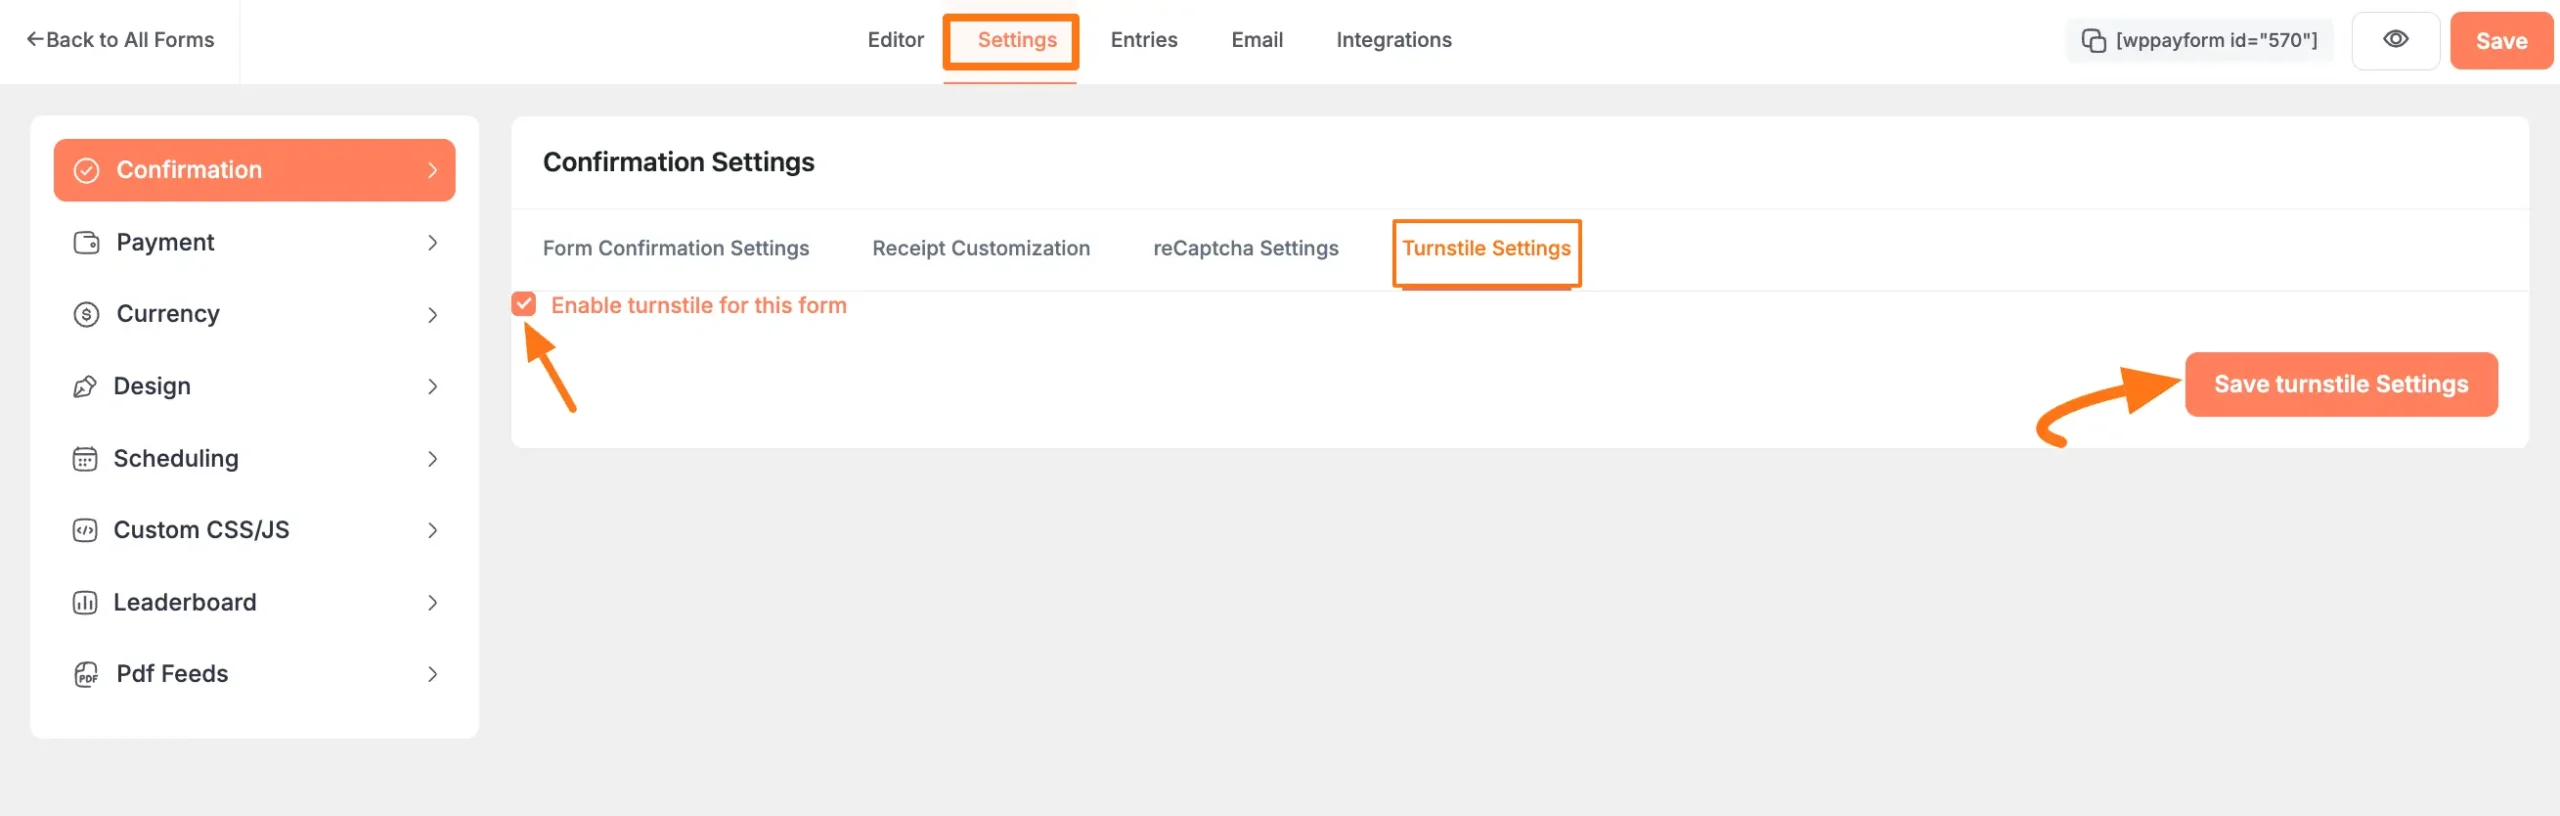
Go to Settings, open the Confirmation tab from the left sidebar, go to Turnstile Settings, and check the Enable turnstile for this form option.
Finally, click the Save Turnstile Settings button to integrate the Turnstile with your Paymattic form.
Need Help?
If you have any questions, concerns, or suggestions, please contact our support team.