How to Manage Subscriptions in WordPress with Paymattic
With Paymattic you can easily manage your subscription with offline payments i.e., those form entries where users want to make payments Offline through direct bank transfer. This article will guide you through the process of managing subscriptions with offline payment in Paymattic.
Pro Feature
Remember, as the Subscription Payment field is a Pro Feature, you need the Paymattic Pro to manage anything related to Subscriptions.
Managing Offline Payment Subscriptions
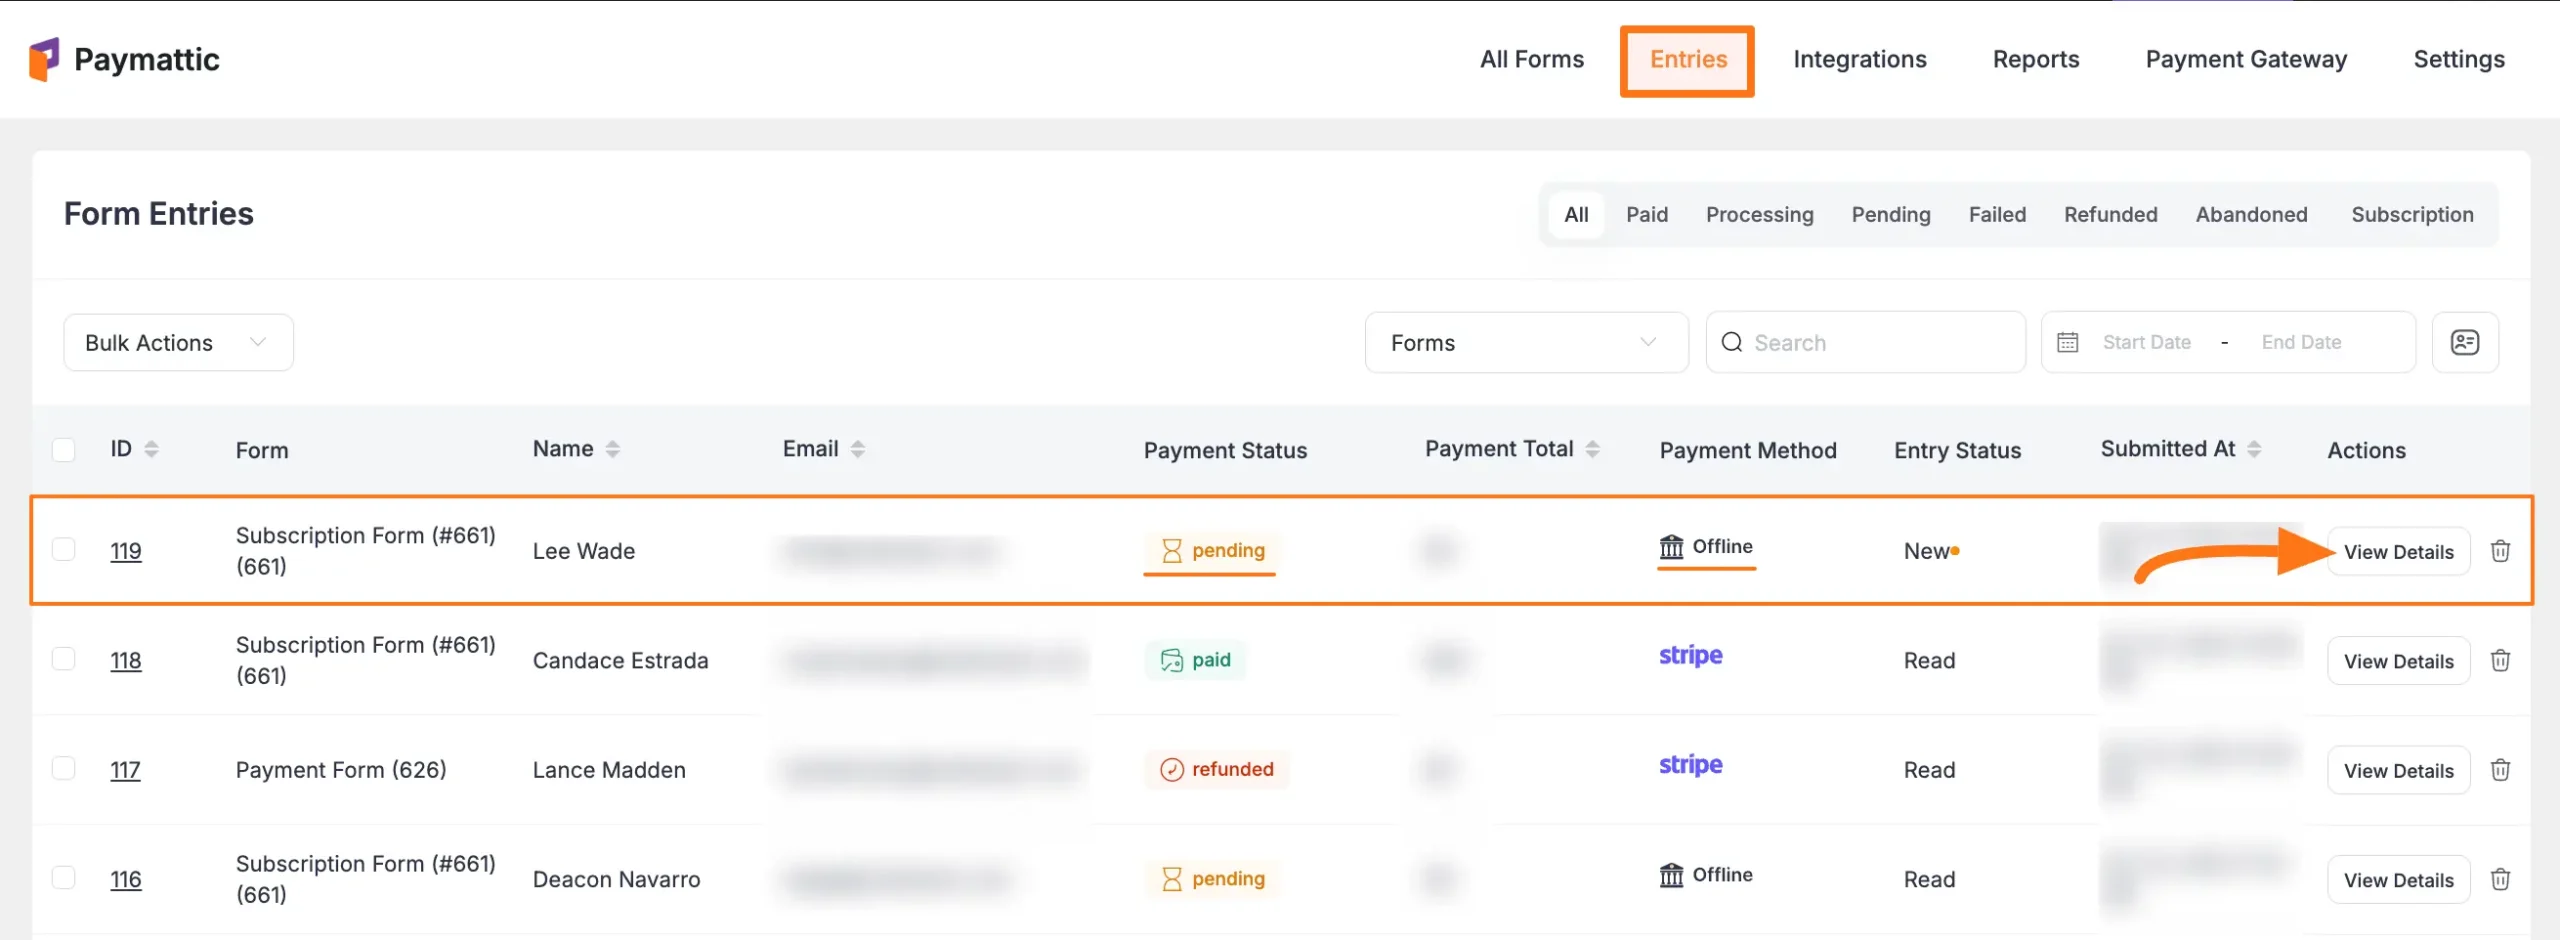
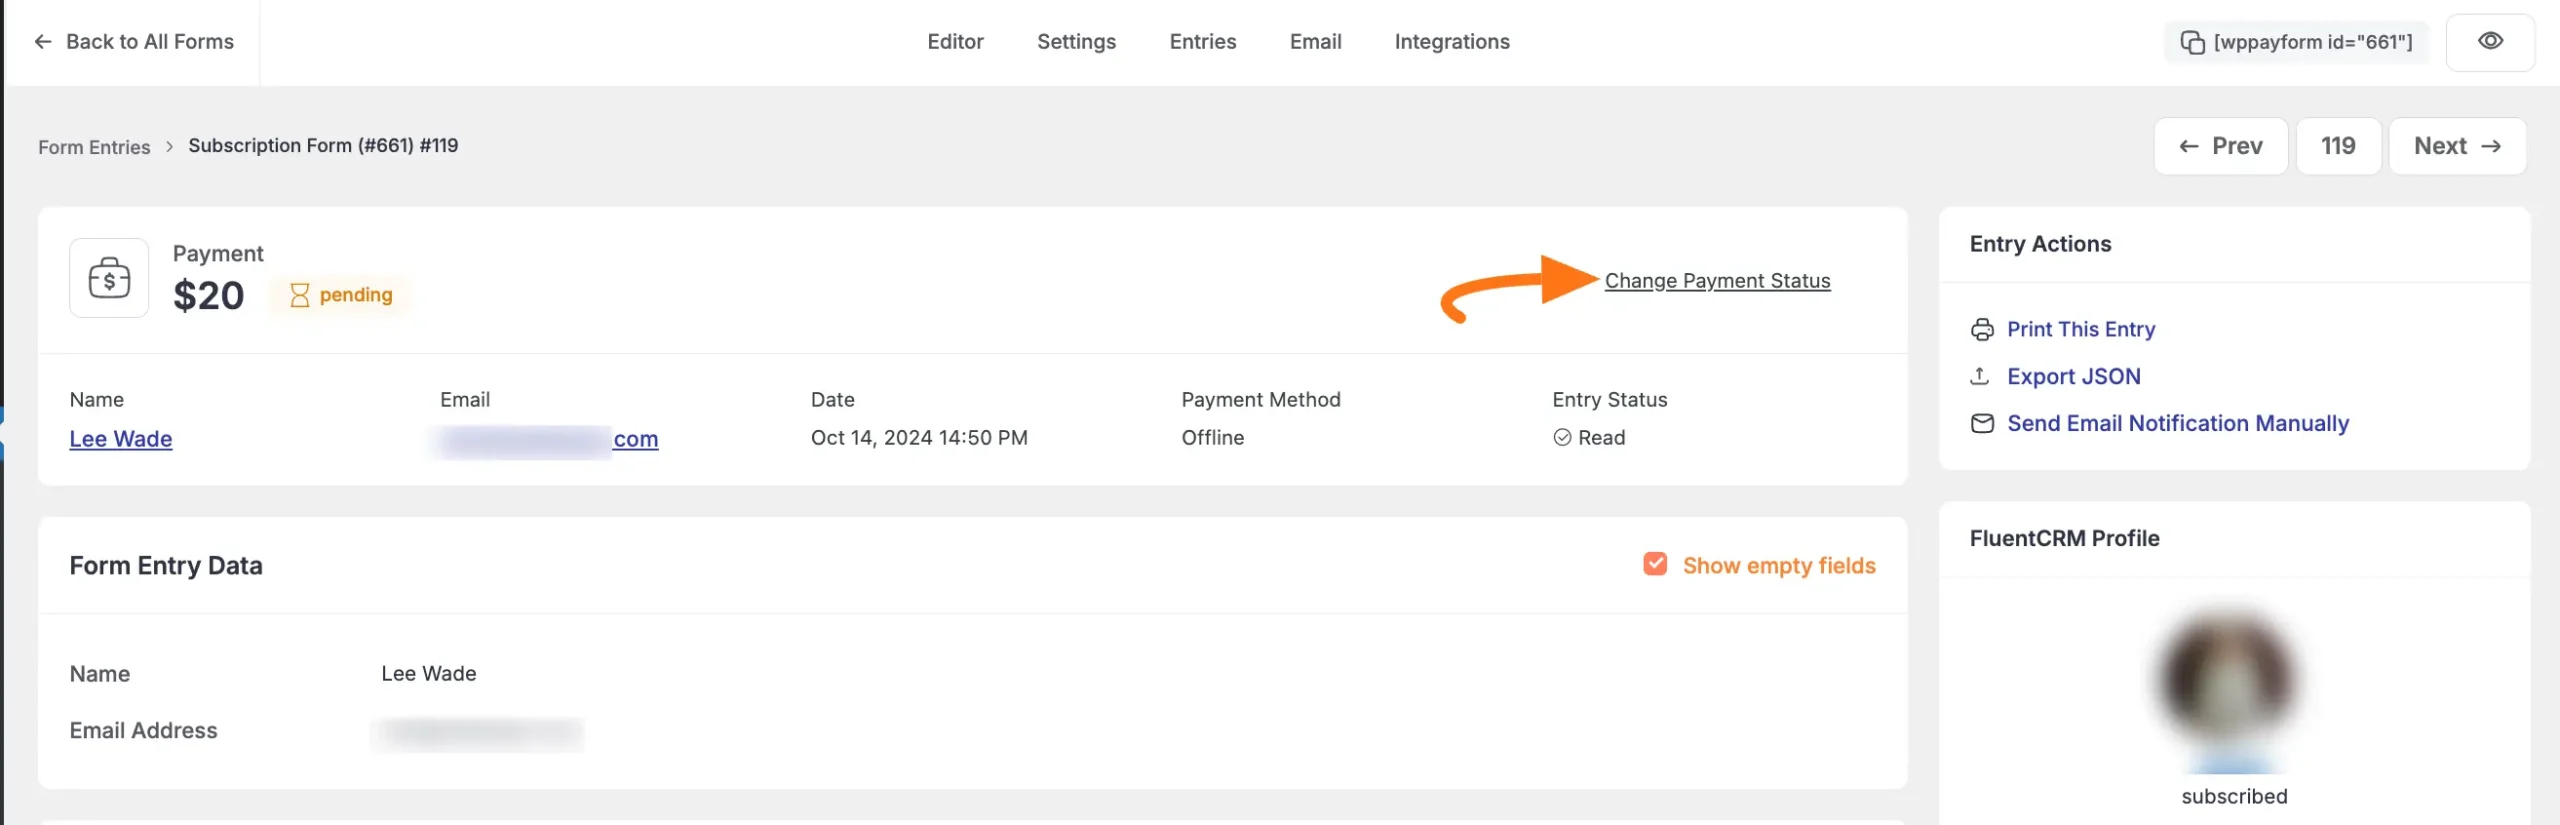
First, go to Entries from the Paymattic Navbar, and open the desired entry by clicking the View Details button that has Offline payment transaction.
TIP
For offline payments, you can manually update the payment status from Pending to Paid once you receive payment.
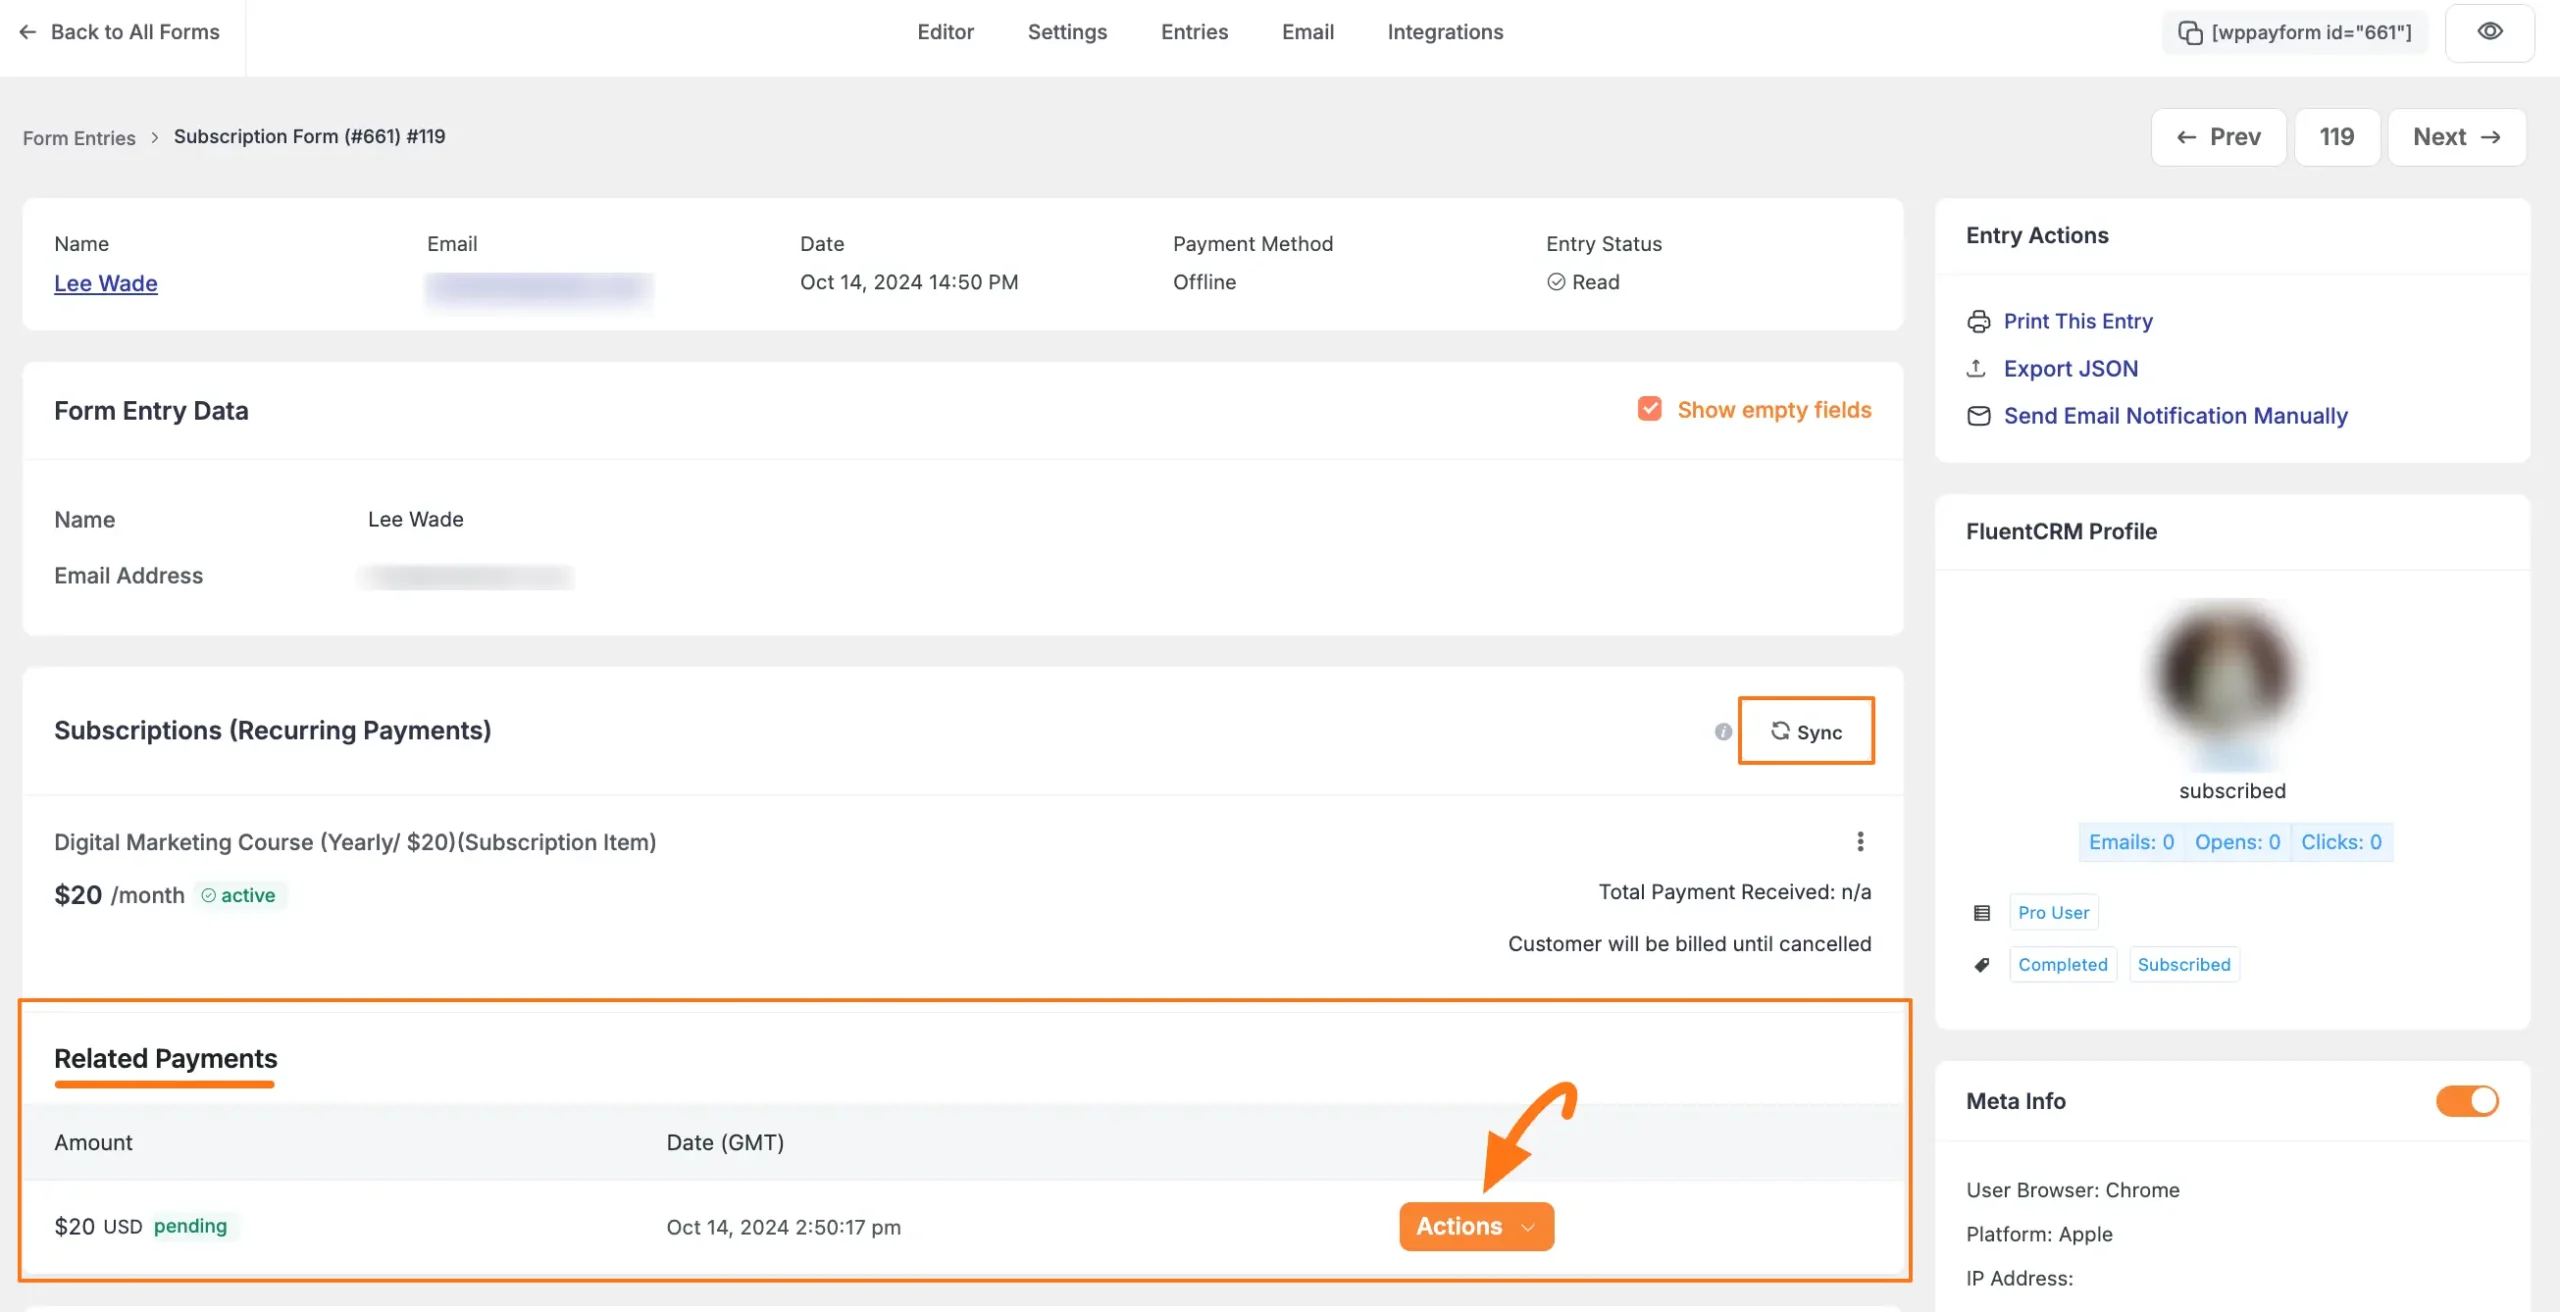
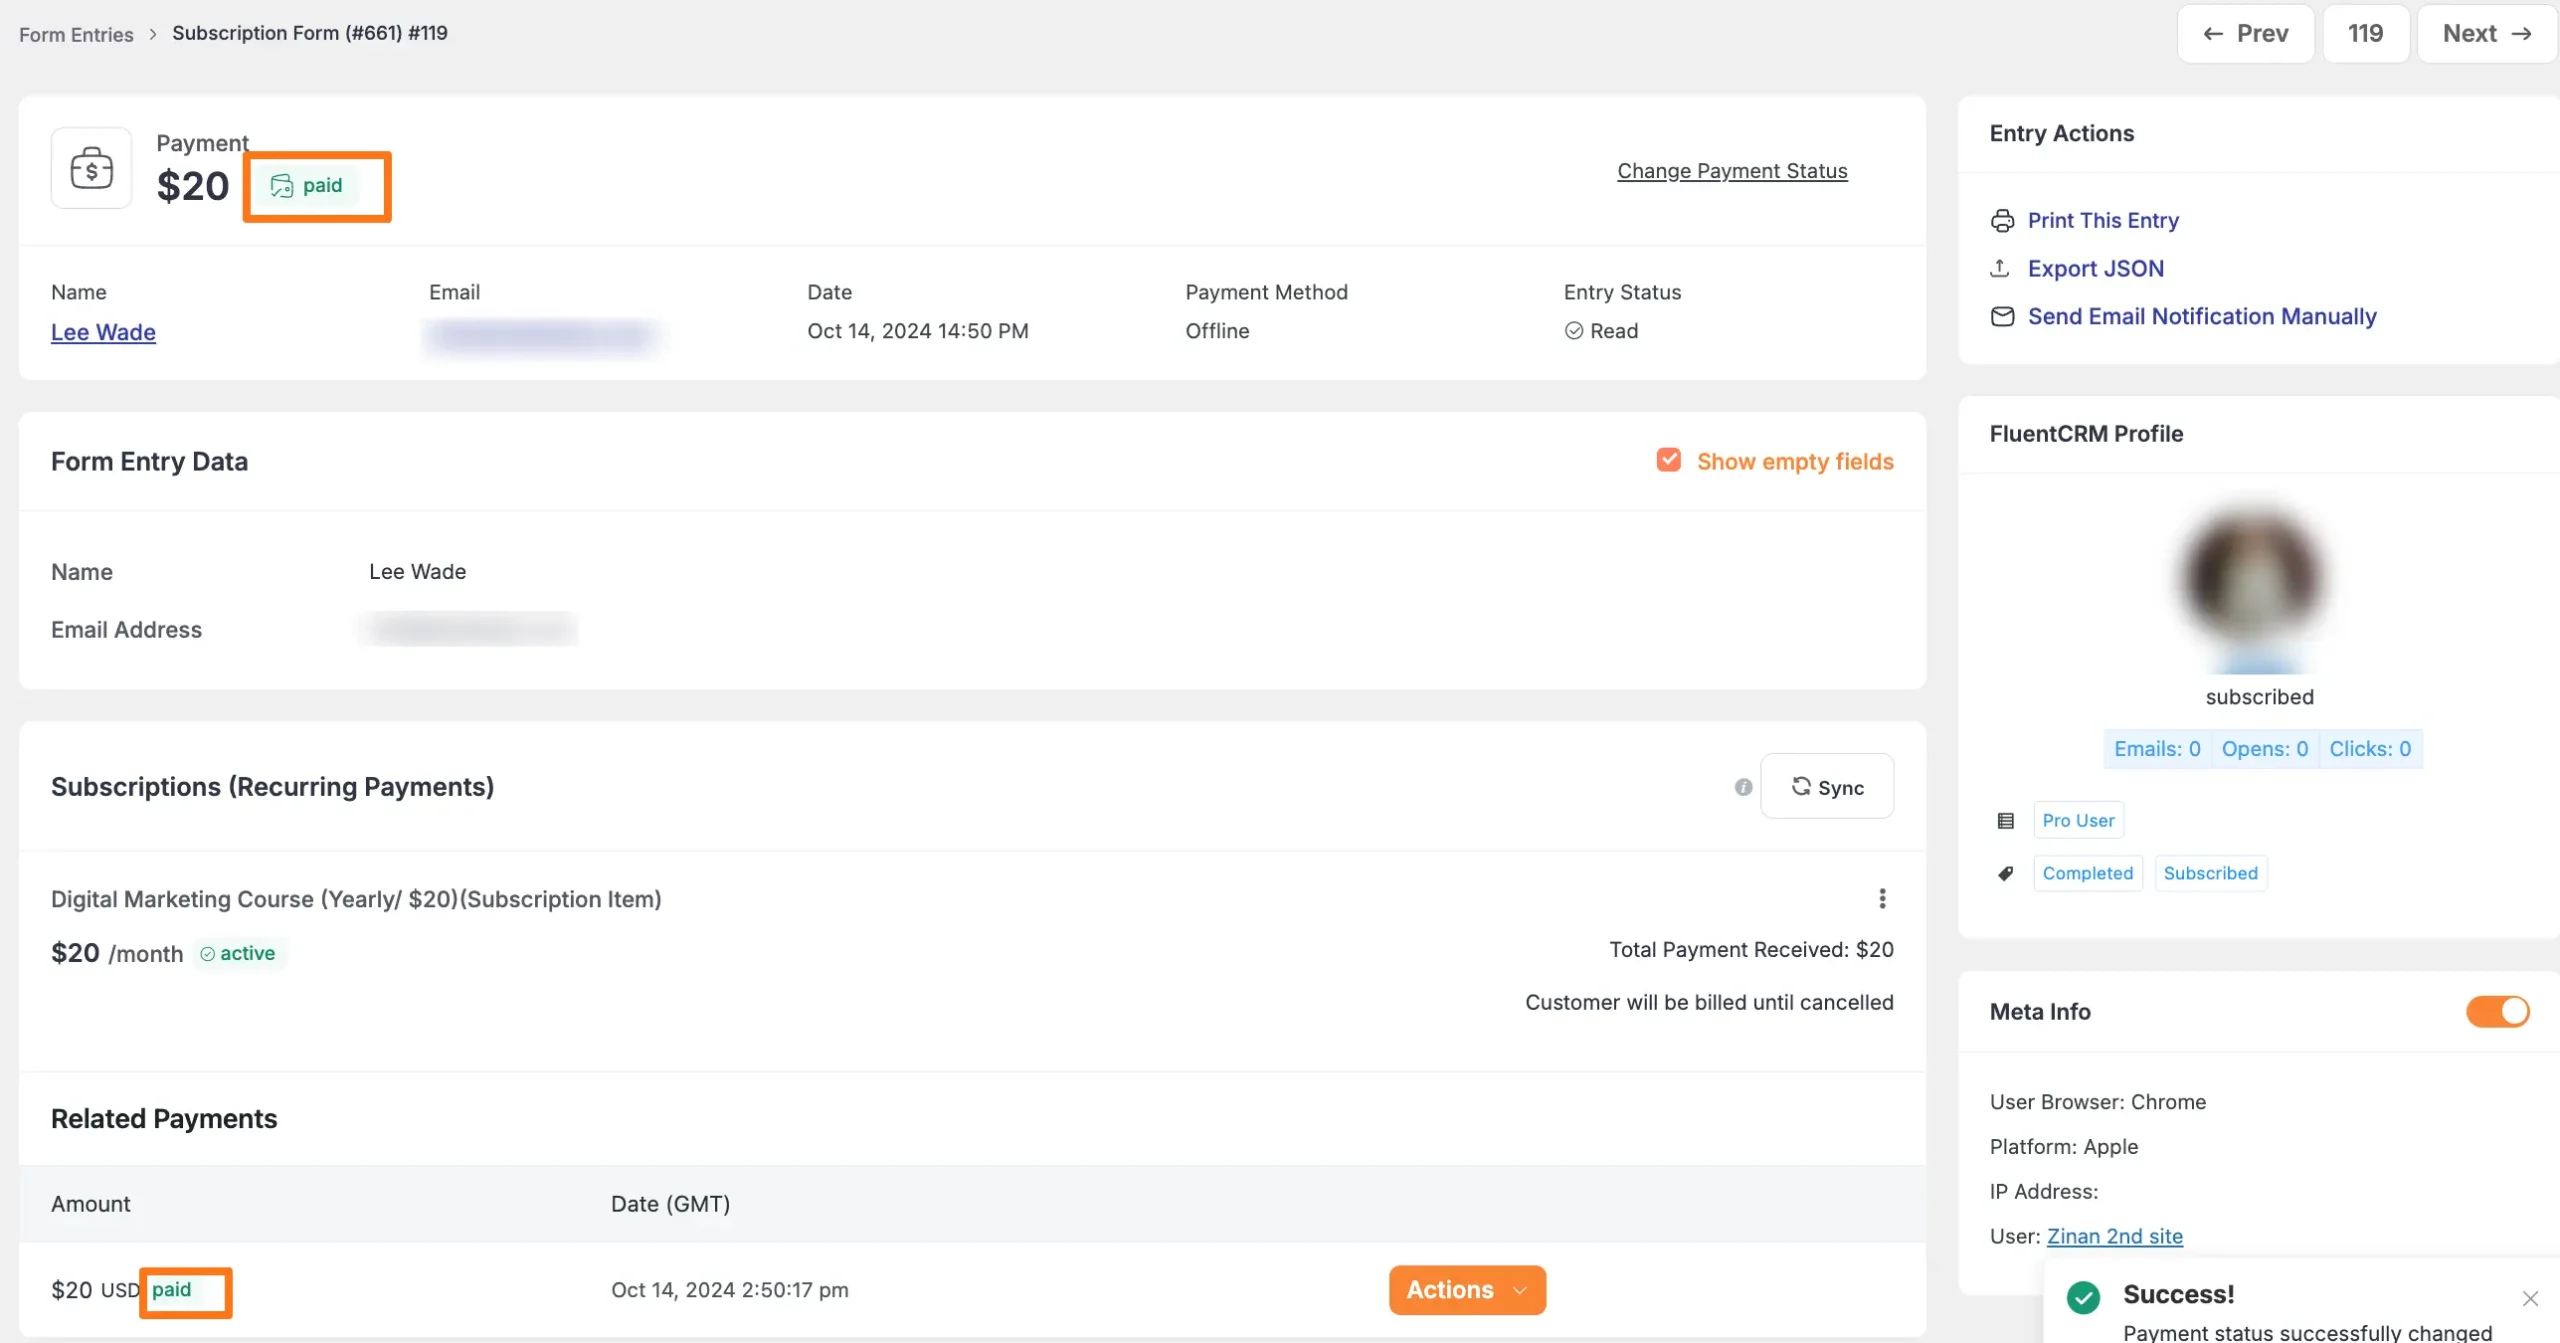
Once you open the detailed entry page, scroll down to the Related Payments section where you can see the latest billing information.
For example, if a user subscribed 3 months earlier and chooses a monthly billing plan, his billing details will appear here for every single month individually.
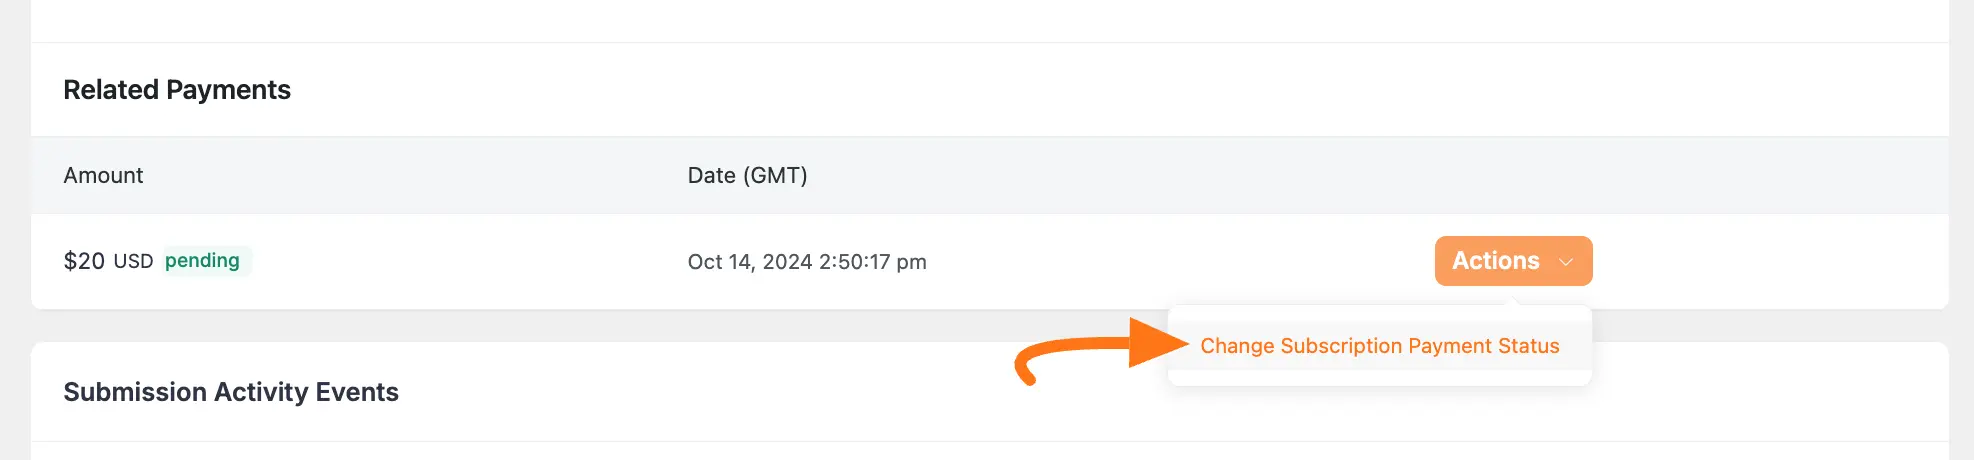
To change the Subscription Status for individual bills, click the Actions button.
TIP
Always press the Sync button to refresh all subscription details for this specific customer.
Click the Change Subscription Payment Status button and a pop-up will appear.
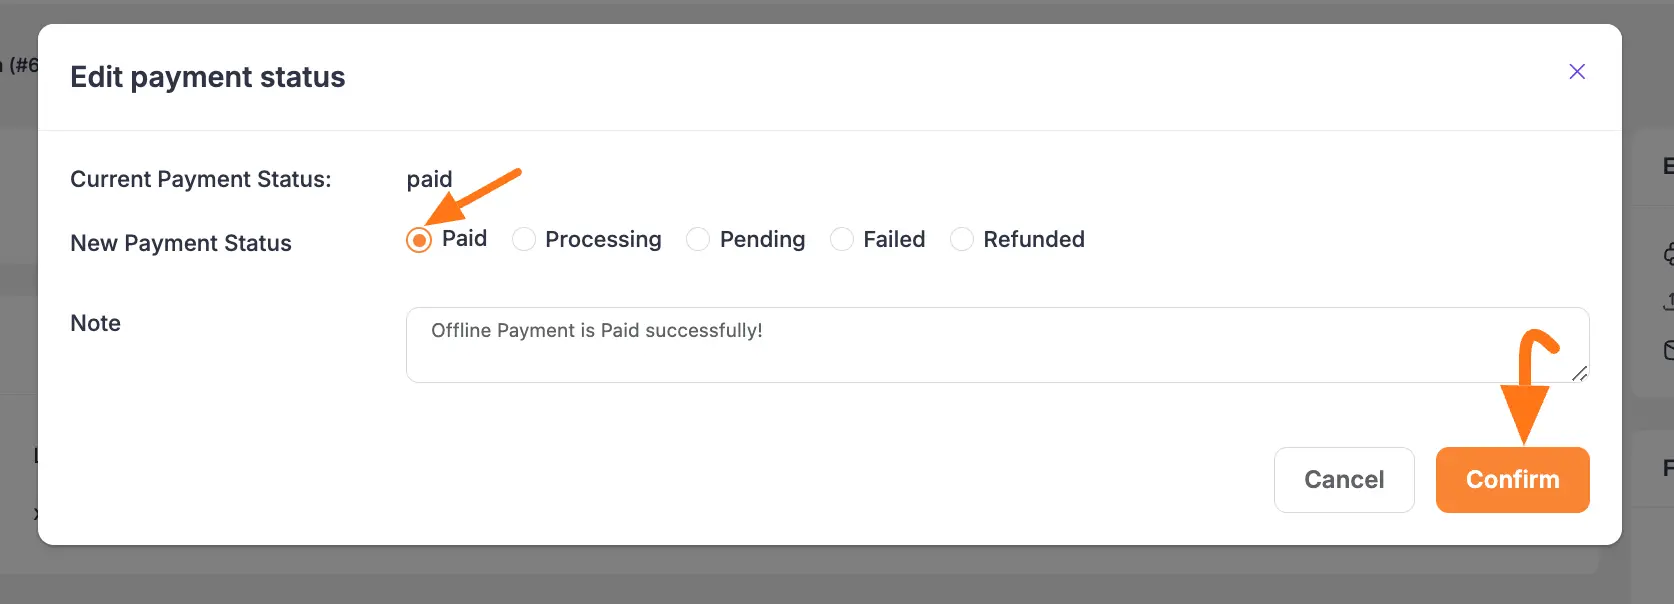
Now, select a new payment status that fits your needs and click the Confirm button. And, your Subscriptions Status will be changed!
Also, if you want, you can add a Note for this specific bill during the status change.
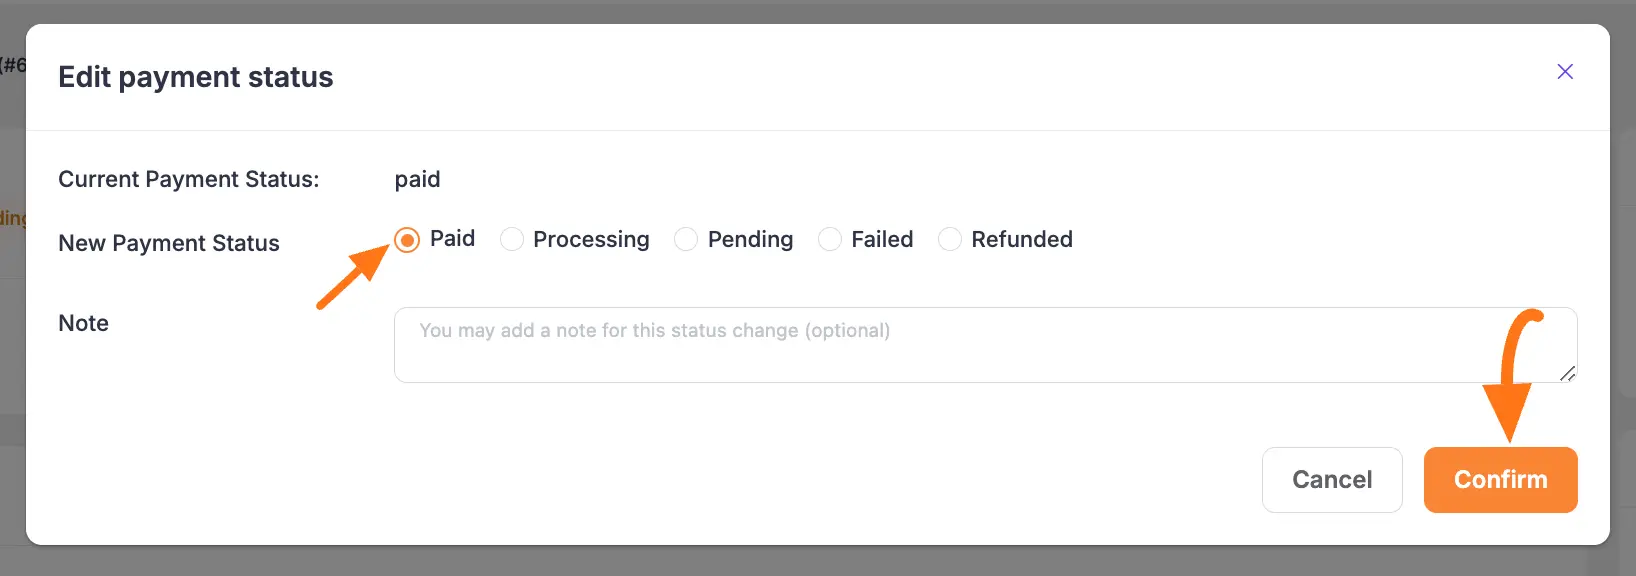
To change the Payment Status for the whole Entry, click the Change Payment Status button on the top right corner.
Now, select a new payment status that fits your needs and click the Confirm button. And, your Payment Status will be changed!
Also, if you want, you can add a Note for this entry during the status change.
The system will update both the payment and subscription status:
Need Help?
If you have any questions, concerns, or suggestions, please contact our support team.